Challenge COMPLETE: Pokemon Adventures Platinum: Battle Frontier Challenge

QuentinQuonce

formerly green_typhlosion
This one's been a long time coming...

1638095778504.png


Pokemon Adventures Platinum: Battle Frontier Challenge

Can I Conquer the Sinnoh Battle Frontier?


Pokemon_Special_v38_c417_104-105_neuquant-me.png

Introduction

Some time ago, in the Gen III Battle Frontier thread, I embarked upon a Pokemon Adventures Emerald: Battle Frontier Challenge, based on the Pokemon Adventures manga series. The objective was to play through the Frontier as the character Emerald from the Pokemon Adventures manga, using the Pokemon he did to win all seven Gold Symbols from each of the facilities. The challenge was a lot of fun, and a few people asked if I would do a corresponding Platinum challenge. Finally, I'm ready to do so.

In case you've never heard of Pokemon Adventures (also often referred to as Pokemon Special by some fans) it's perhaps the most prominent Pokemon manga, closely following the story of the games but frequently incorporating original elements and characters. It's known for being a somewhat more mature and occasionally somewhat dark take on the Pokemon world, but a thoroughly detailed and high-quality one, and has been praised by Satoshi Tajiri as the adaptation that most closely resembles the fictional world he envisaged.

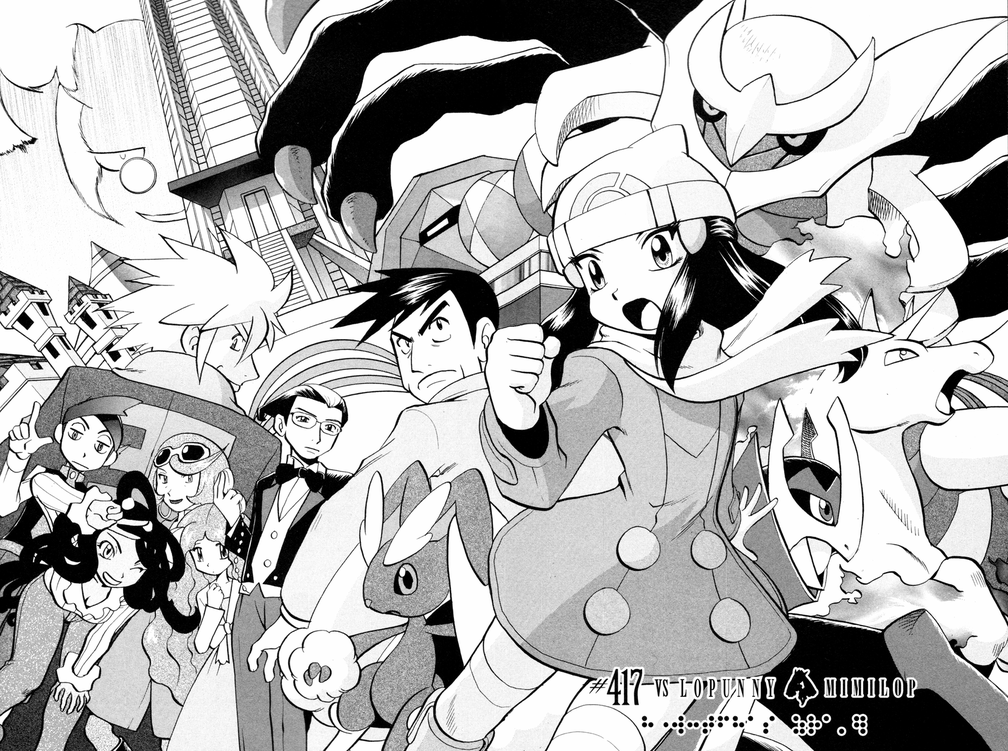
Every chapter of the saga corresponds to one of the main series games, and the Platinum chapter is no exception. The eponymous protagonist is a highly capable battler who, in the course of an investigation into the legendary Pokemon of Sinnoh, decides to conquer Sinnoh's Battle Frontier. With her trusty team of six and her indepth knowledge of Pokemon moves and abilities, she handily takes down each of the facilities. But as much fun as the saga is to read, part of me wonders how feasible Platinum's feat would be for a player of the main series games to accomplish. Those of you familiar with the manga will probably remember that Platinum uses a much smaller pool of Pokemon (even though she, like Emerald, used several rental Pokemon) and, unlike Emerald, most of hers are far from top-tier picks.

So this is my challenge - to play as Platinum and to complete the Frontier using the team she used. Can I emerge as the champion of Sinnoh's Battle Frontier?


1638096174983.png
1638096132946.png
1638096188676.png


Rules
  • Each facility must be completed using the Pokemon used by Platinum in the manga (a full list can be found on Bulbapedia's character page for her, which I have used as a general reference for the whole challenge. These are the only Pokemon eligible for the challenge, and must adhere to the facilities they were used in - for example, Empoleon may be used in the Arcade and Castle but not the Hall. The obvious exception is the Factory, since it's not directly possible to control which Pokemon I'm given. However, if a Pokemon appears which was used by Platinum in the Factory, it must be chosen or swapped for. These species are:
    -Qwilfish
    -Grimer
    -Loudred
    -Kadabra
Note that this means doing the Factory challenge at level 50. All the other facilities are level 50 by default except the Hall, which allows any level above 30.
  • Different individuals of the same species are permitted, as are different EV spreads and movesets. However, if the Nature or Ability of a particular Pokemon was specified in the manga, this must be respected: so Empoleon can only be Serious, Froslass can only be Quiet, Lopunny can only be Naive and have Cute Charm as an ability, etc. Exact movesets or items do not have to be adhered to since Pokemon in the manga often use far more than four moves. Tradeback moves (meaning those moves exclusive to HGSS) are permitted.

  • Each facility must be completed in the order taken in the manga (Castle-Arcade-Factory-Hall-Tower). Multiple attempts in any given facility are permitted in order to reach the target streak.

  • Note that Platinum does not actually challenge the Tower on-page, and does not specify which Pokemon she will use. Because of this, I am permitted to choose any three of her six Pokemon to challenge the tower with.

  • In the Emerald chapter of the manga, Emerald conquers the Frontier in seven days. Platinum has no such time restriction - however, because giving myself infinite time would be too easy, I'm imposing a limit of two days on each facility. This means that the challenge must be completed in ten days or less. Much as I'd like them to be, those ten days will not be consecutive - real life having, as it does, that annoying tendency to get in the way (the two-day periods, however, will be).

1638096364175.png
1638096796505.png


Facility-specific rules
  • If an opponent in the Factory is carrying one or more species used by Platinum, I can freely choose which one to swap for. If all three of my Pokemon are species which were used by Platinum, and the opponent also has a Pokemon used by Platinum, I must swap one of them regardless.

  • I am permitted to complete the Hall in any order I choose, with any moves and items I choose.
Reflecting on my Emerald challenge, I may have been unduly harsh on myself. I deemed the Arena and Tower portions of challenges failures due to the fact that I failed to get the Gold Symbol from the Arena and Tower (though managed to win the Silver Symbol from each). Given that I did partially succeed (I mean, Greta's team in the Adventures manga is her Silver one anyway - Heracross, Umbreon, Shedinja) I probably shouldn't have written it off as a failure, though Emerald does explicitly go for the Gold Symbols in his chapter.

However, I was surprised to learn that in the Platinum manga the benchmarks vary - Platinum explicitly only makes it to 20 battles to fight Thorton, Darach, and Dahlia, despite the fact that she makes it to the 169th battle in order to face Argenta. With this in mind, I wondered about potentially modifying my goal, but ultimately decided against it. It's underwhelming to only try for the Silver, and 21 wins isn't that much of a reach even with a weak team - particularly in the Castle where difficulty can be easily negated. So the objective will be to win the Gold Print from all five facilities, but getting the Silver Print won't count as an outright failure. I've decided to grade myself with points - obtaining a Gold Print from a facility will be worth 2 points, while obtaining a Silver Print will be worth 1 point. The objective therefore is to get as close to 10 as possible.


1638096269472.png


The challenge commences on Friday 11th February 9am GMT - see you there!
 

QuentinQuonce

formerly green_typhlosion
castleplat4.png


Day 1
Battle Castle

Battle_Castle_Exterior.png


It's time to begin.

As Platinum enters the Frontier, she and Looker fall afoul of a mysterious girl accompanied by an overprotective Gallade. After seeing the girl bypass the line in front of the Battle Castle, Looker rationalises that she must be the facility's Frontier Brain. Informed by the valet that a trainer wishing to challenge the Castle must defeat a fixed number of trainers and manage their supply of Castle Points to make it through intact to the end, Platinum resolves to make this her first challenge...

castleplat7.png
castleplat6.png

Ouch. This was not fun to start with. The Castle is probably my favourite facility of Gen IV, and yet... and yet. After 22 fruitless attempts to reach 49 battles, I'm calling time.

In fact, I've been through this place so many times that a Black Belt in the second round eventually sent out a shiny Hitmonlee...

hitmonlee.jpg

To my great surprise, I made it to 25 battles on my second try, after having only gotten to 5 on my first. This was largely due to me thinking that Rapidash, with its high speed, might be a better lead than Empoleon. It isn't and it wasn't. Largely because its primary attack involves wounding itself, which is hardly optimal for the Castle. Empoleon proved to be a far superior lead and really pulled its weight in the early rounds.

But this team was so un-optimal (especially without items) that it just didn't work in the later rounds. Due to its lack of defensive synergy, switching was rarely safe. But hey, at least I got the Silver Print. So that's one point to me so far.

A notable change from Gen III is that in Emerald you only do the Silver fight once until you reach the Gold fight - no do-overs until you fully complete the facility. In Gen IV, you fight the Silver fight every time on your way up which is... interesting. Means lots of BP, I guess.

castleplat10.png
castleplat9.png

empo.png

Empoleon (Torrent)
Surf
Ice Beam
Signal Beam
Flash Cannon
76 HP, 20 Def, 252 Sp.Atk, 4 Sp.Def, 156 Speed (Serious)

As I said, really pulled its weight as a lead. Can sweep all 21 Pokemon in the first round even if they're at level 55 without needing to heal. Flash Cannon came in useful against the numerous Rock- and Ice-types that proliferate the early rounds. Drill Peck would have been nice, but probably not that effective.

rap.jpeg

Rapidash (Flash Fire)
Flare Blitz
Megahorn
Double Kick
Bounce
252 Att/Speed, 6 HP (Adamant)

Rapidash. Ah, Rapidash. The only Pokemon used both by Emerald and Platinum. And sadly still not that good. Bounce OHKOed a surprising amount of stuff though. Can't take a hit and Double Kick is just so miserably weak - but it's the only weapon I've got against Darach's Empoleon.


loppy.png

Lopunny (Cute Charm)
Fake Out
Toxic
Endeavour
Healing Wish
252 HP/Speed, 6 Def (Naive)

Mmyeah I was sort of trying something here. Can give either of the others a second chance with Healing Wish even though that costs me CP. Can't kill anything Poison-immune but Endeavour works a treat at bringing stuff down to KO range for its teammates. Maybe this would have been better as a sweeper but I can't see it. We'll find out in the next facility...

castleplat5.png

At the start of every round except the first, I rented Empoleon a Sitrus Berry. The most useful item for the cheapest cost. Status is healed between fights, and Empoleon doesn't care much about burns or paralysis so Lum Berry was no good to me. The most rage-inducing moment of the run by far was having an Ariados steal it with Bug Bite.

Everyone who's played Castle knows that a good route to go is to accrue as much CP as possible early on. After 21 battles, of course, you unlock the option to skip battles for 50 CP a go. This is steep but obviously worth it if the next fight looks threatening. If I could manage to gather 700 CP by the time I got to battle 35 (not impossible), I could then conceivably pass on every single battle until Darach gold. But that also wouldn't leave me much CV to cripple him.

Round 1 is the one where you level up everything without checking. Get the level boosts and earn that CP. You should always aim for around 300 CP by the end of round 1, if you level up everything without checking and sweep without hassle you'll be earning 40 CP minimum per fight.

Round 2 is where you check before you level. Things like Electabuzz will destroy you, stuff like Omastar and Torkoal can be levelled up without consequence. Some of the foes here start to get problematic, but due to the the randomness of the AI at this stage threats like Hitmontop can be beaten relatively easily with luck.

Round 3 is the time to play it safe. Heal frequently where needed, check every foe and only overlevel if they're absolutely no threat at all. And when you get to Darach, nerf him hard.

Darach Silver
General strategy with Darach is to reduce Empoleon and Staraptor's levels. At a five level disadvantage Staraptor is an easy kill with Ice Beam;
Empoleon can deal with Houndoom by chipping with Flash Cannon and then blasting with Surf. If it's the A variation then it's no threat, but the B variant has Reversal. The B team is much more threatening in general - Empoleon has Aqua Jet and Rock Slide and Staraptor has Endeavour. Empoleon is then dealt with by doing as much damage as possible with my own Empoleon (and Lopunny's Endeavour if Empoleon doesn't get the job done) to bring it in range of a Double Kick KO from Rapidash. If Darach leads with Empoleon it is extremely difficult to win, and I lost to him twice. Staraptor doesn't threaten Empoleon at all but can beat Rapidash in a pinch.

Round 4 is where you still have some breathing room. No need to level up, but check every foe, and pass if needed. There's just so much bullshit in general with battles post-21 that even safe matchups look terrible. I chose to battle a team of Rhydon, Rhyperior, and Kingdra, delevelling Kingdra but leaving the others intact. Rhyperior's Focus Band activated twice and it shredded Empoleon with Earthquake. Luckily I was able to clinch the win, stalling Kingdra out with Lopunny, but it shows how even simple battles can catch you out. I passed several times on Grass-, Ground-, and Electric-type leads and teams with serious bulk (Ludicolo, Porygon2, Togekiss as an example).

Round 5 is much of the same, except things are starting to get tougher. Level down things like Alakazam or Ambipom that often aren't fun to face. But still pass when you need to. I made into round 5 four times, but 32, unfortunately, was the furthest I ever managed. If I'd used up all my CP by passing I probably could have stretched this to 40, but that's an artificial victory.

castlerecord.jpg


Electabuzz. This thing was always a nightmare to see in the early rounds. Even at level 45 it seriously fucks with Empoleon. Only option is to switch to Rapidash, eat a Shock Wave, Thunderbolt, or Thunder Wave, and Flare Blitz it to death.

Fighting leads. More of a problem in the early rounds - Hariyama was the only Fighting lead I encountered post-21. Always unpleasant for Empoleon to deal with.

Bulky teams, particularly in later rounds. Porygon2, Dusclops, Meganium, Blissey, Kangaskhan, Granbull, Wailord. Empoleon can't always muscle through them, and Rapidash has no hope. Lopunny can deal with one Pokemon, but it's usually wiped out after that.

Electric leads in the later rounds. Electivire, Raichu, Ampharos, Luxray. I hate you all.


Final thoughts

It's disappointing not to get Gold on the first facility. Maybe, with a bit more time, I could have managed it, but I'm honestly not convinced. I think it takes a really exceptional team to excel in the Castle and this... isn't. Still, I at least got the Silver Print, and that earns me one point out of a possible two.

I'll have to use this exact same team in the next facility, though... let's try and mix things up a little. We're off to the Arcade next, which I'll be starting on Monday - so expect an update before the end of Tuesday. Till then.


arcadeplat2.png


______________________________


castleprintsilver.jpg

Current score - 1/10
 
Last edited:

QuentinQuonce

formerly green_typhlosion

arcadeplat1.png


Day 2
Battle Arcade

Battle_Arcade_exterior_PtHGSS.png

And we're on to facility number two. Having beaten the Castle and obtained her first commemorative print, Platinum is lured by the sound of a catchy jingle to a curious-looking facility some distance away that happens to be strangely empty. After learning that this is the Battle Arcade, a famously difficult facility where battles are decided by the motion of a roulette wheel, Platinum - no stranger to arcade games after having spent many hours in Veilstone's Game Corner - decides that this will be her next challenge.


arcadeplat.png
Sigh.

Well, I guess this is another facility in which I shall only be coming away with the silver print. I did a lot better here than in the Castle - getting to a princely 30 on my first attempt - but I just wasn't quite good enough to make it to 49 and grab the coloured print from Dahlia.

The Arcade is fun but given that my own best personal record is 58, I wasn't expecting brilliance. It's generally easier to hobble foes here than in the previous facility but so much more dependent on RNG. At higher levels, any sort of disadvantage - be it paralysis, bad weather or a crap held item - generally spells doom. Again, had I eternity to devote to this place, I feel like I probably could eventually make it to 49. But, as per my rules, I only have two days, so...

arcadeplat7.png
arcadeplat6.png


arcadeempoleon.JPG

Empoleon @ Shuca Berry (Torrent)
Surf
Ice Beam
Grass Knot
Flash Cannon
100 HP, 108 Def, 252 Sp.Atk, 4 Sp.Def, 44 Speed (Serious)

Same as before, still a mightily impressive lead. EVs are tweaked for a bit of extra bulk at the cost of speed. Signal Beam is dropped for Grass Knot to punish Quagsire, Whiscash, and Swampert for existing.
arcaderapidash.JPG

Rapidash @ Choice Band (Flash Fire)
Flare Blitz
Megahorn
Poison Jab
Bounce
252 Attack/Speed, 6 HP (Adamant)

Again much the same as before, but still sucks. Double Kick was just so disappointingly weak so it's gone in favour of Poison Jab, which hits Ludicolo more reliably at least.
arcadelopunny.JPG

Lopunny @ Brightpowder (Cute Charm)
Fake Out
Toxic
Charm
Healing Wish
252 HP/Speed, 6 Def (Naive)

She's still not great, either, but she's got her uses. Endeavour was swapped for Charm here because I kept losing to Earthquake users - Flygon and Swampert in particular just devastate this team. It's saved me in many instances, the most notable being one particularly ugly match in which I accidentally hit the ? button on the roulette while trying to skip a battle, resulting in me then levelling up the next opponent's team of Flygon, Altaria, and Skarmory. Lopunny is almost always able to survive a hit on the switch and get in a couple of Charms, but in this case she got off all three and even managed to poison Flygon for good measure. From there, Empoleon was able to sponge a much-weakened Earthquake and proceed to sweep. As in the Castle, Healing Wish is a useful option to give either of my other team members a second wind.

Psypoke's Battle Arcade page contained an interesting little nugget of information I hadn't read anywhere else: the item option can potentially give you back your original hold items instead of just giving all three Pokemon a random item. I've no idea if this is true or not because it never happened during any of my runs. However, just in case, I gave my team the items listed before going in. Came to nothing in the end which is a pity, though in general I'm inclined to say that opting to give yourself items is not a good use of the roulette. You run too great a risk of being lumped with something like the Lagging Tail which can devastate you and even if you get something good it's unlikely all of your team will benefit; I got the Wise Glasses and the Muscle Band when I tried. Better than nothing, but hardly spectacular.

arcadeplat5.png
arcadeplat3.png

Round 1 is not at all difficult. The board is littered with options to cripple your foe, but you hardly need them. I honestly sometimes opted for "no event". I had terrible luck with the Berry option; never got Sitrus or Lum. Even a couple of slips of the finger when I wasn't paying attention resulting in paralysis or burns for my whole team never caused a loss.

Round 2 shouldn't be difficult, but just takes longer. Status can often be quite useful in this round when up against a team of slightly higher-grade mons (Zangoose, Hitmonlee, et al) though obviously with those two examples you need to keep in mind their immunities. But even without them, this round never caused any problems. A lot of the beneficial effects here (like setting up rain) are overkill.

Round 3 is just more of Round 2. My personal priority in this round is to slow the speed of the roulette, even just once. This takes a lot of the tension out of fighting Dahlia, who isn't a tremendously tough fight even at full health. Otherwise, the focus is on crippling the opponents and grabbing a Berry if there's absolutely nothing better to do, which there usually is.

Dahlia Silver

This is without question the easiest Silver Brain fight as all of these Pokemon are easily countered and because Dahlia, unlike Darach, always uses the same sets. You should absolutely be able to nerf her severely - burning her is the optimal route as it takes the sting out of all her team's attacks and prevents Medicham from being able to use Endure properly. In the two instances where I fought her and no status options were on the board, I went for a) giving her entire team a Berry simply to rid her team of their items and b) activating Sandstorm.

In general I found this fight easiest if she started with Medicham or Dusknoir. Empoleon can 2HKO Dusknoir with Surf and do chip damage to Medicham before blasting it with Surf. I found that Medicham actually rarely used Endure, instead preferring to chip away with ineffective Zen Headbutts. Even if I failed to inflict a status or set up Sandstorm, Lopunny's Fake Out ensures I'll never get swept. Lopunny can stall out Dusknoir with Charm and Toxic; Rapidash beats Ludicolo in most scenarios.

Round 4 is where things start to get un-fun. For some reason I always found battle 22, the one directly after Dahlia, to be nightmarishly difficult. You're facing a mix of opponents using stuff like Persian and Primeape and those using high-grade mons like Rhyperior and Electivire. The lack of items helps in most cases, as does the AI still being somewhat random (I had a Rampardos use Screech on my ~25 HP Rapidash), but it's still extremely easy to get caught unawares. Ah, if only the level upgrade option stayed for the whole round... but that'd be broken, so they didn't do it. No fun at all.

Round 5 is absolutely brutal and proved to be the killer of every run. The speed of the roulette is now very quick and at this stage, none of the enemy teams are easy breezy. If the opponent has one problematic Pokemon (Lucario, Heracross, Electivire, etc) it's fine as long as it's not the lead, but any leads which can OHKO Empoleon pretty much mean instant death; due to my team's lack of defensive synergy switching often proves fatal. My final run was ended by a Heracross which 3-0'd me with Close Combat. Most physical threats are salved by switching to Lopunny and using Charm, but no chance of that here.


arcadeplat8.png


arcaderecord.JPG
2 prints.jpg


Final thoughts

My final thoughts are going to be much the same as the last time, really. It's disappointing not to get Gold on here either, but ultimately the combination of Empoleon, Rapidash, and Lopunny just isn't good enough to do that (for me, at any rate). At least this is the last time I have to use this team.

I'm actually really looking forward to the next facility, weirdly. And hopefully it's one I actually will get the Gold print on... that's right, next time it's the Factory. Sometime later this week, not sure when yet.


factoryplat7.png
Current score - 2/10
 

QuentinQuonce

formerly green_typhlosion

factoryplat9.png


Day 3
Battle Factory

Battle_Factory_exterior_PtHGSS.png

Time for facility number three. With the situation at Stark Mountain worsening, Platinum decides to send her team away with Looker to help him attempt to resolve it. This leaves her with no Pokemon left to continue her Frontier challenge, but all is not lost, as Platinum opts for the Battle Factory as her next facility. Having had to swap her Pokemon with Dahlia for their match, she rationalises she will be able to cope with rental Pokemon just fine...


factoryplat8.png
factoryplat4.png


Ohhh my god I finally did it. Finally managed to get the gold. I'm not that experienced when it comes to gen IV's Frontier; after the debacle that the Castle and the Arcade were, I was starting to worry I wouldn't get the gold print in any of my challenges. But I lucked out with a final round that was a lot easier than it should have been, and Thorton having an utterly crap team on our second battle.

Praise time: I would not have made it without the incredible resources that are HeadsILoseTailsYouWin's level 50 Factory guide, and Glen's Open Level guide for the later rounds. After not shutting the tabs those guides were open in for the last 39 hours, I can probably recite them verbatim. It took me 9 attempts to get the gold which is far less than I would have guessed, and I'm crediting it all to these guys.

I actually found myself enjoying the first 3-4 rounds more than the later ones, though that might just be due to the crapness of the AI. Still, there's a lot to be said for being able to sweep 21 Pokemon straight with a Beautifly.


factoryplat10.png
factoryplat5.png

This is a writeup of my winning streak. The species I was mandated to use were Qwilfish, Grimer, Loudred, and Kadabra - only two of those appeared during the final run.

My aim was to get as many trades as possible, though this can backfire on you if you're too willing to give away something good for the sake of one good matchup in the next battle. Surprisingly, I made a very high number of trades in my winning streak, though given the poor picks I was presented with I'm not sure that mattered.

Round 1 is winnable with most picks thanks to the AI being so bad, but if you get lucky and get a monster like Growlithe or Butterfree you'll find this going a lot faster. Picking a solid Rock or Steel backup like Onix or Mawile is a major help, too. There is absolutely no reason not to trade every battle. I had a pretty lacklustre initial draw but the first trainer had Minun, which is one of the better picks - I leaned hard on that and just traded my backups for this entire round. Grimer showed up in battle 4, but I traded it away after battle 6 because it's pure crap.

Total trades: 7

Round 2 is a lot like round 1, but you should start to see some better picks come through. Bulky Fighting, Water, and Normal types are the big winners here. I got Linoone in my initial draft which isn't great but workable with good backups - eventually swapped it for Hitmonlee, whose first set isn't that great either but good enough to cover most things. You don't need fantastic sets here when half the time the AI doesn't choose an attacking move: so many bad matchups, like Primeape vs Zangoose, don't matter when the enemy Primeape just uses Foresight. Had to trade for Kadabra after battle 6 but it ended up not being used thanks to Hitmonlee and Gabite doing all the work.

Total trades: 14

Round 3. If you have 14 trades at this point, you'll start to see some good initial picks. I got very lucky and got Metagross1 which is a fantastic choice at this stage, as well as Pinsir1 which made a good backup. I put Metagross in position 2 and left my lead as the "churn slot" to counteract whatever the opponent was leading with. This proved tricky on a couple of occasions - you're still getting NFEs at this point - but thankfully the 6th trainer had a Dusclops, which I decided to lead with for Thorton. It was Dusclops1 which is the inferior set, but it ended up proving invaluable.

Thorton Silver
Thorton opened with Glalie, for whom both sets 1 and 2 are physical. This was welcome as Dusclops was able to burn then confuse it and then sponge off all its pitiful attacks while it slowly succumbed. Next out was Swampert (not sure if it was 1 or 2), who also got burned before it finished off Dusclops - Pinsir came in and got the KO with X-Scissor. And last was Rhyperior. A little worrisome, but Pinsir's Earthquake did more than I expected so I'm guessing it had Lightningrod - Metagross clinched the win with Bullet Punch.

Total trades: 21

Round 4 was the first round where I didn't trade all 7 times. I got a rather passable opening draft, the only mon of note being Gastrodon2. I put it into position 2 and tried to find a good lead. Garchomp1 showed up on the third battle, which I put into position 3. Then on battle 5 I faced Salamence1. A little late, but welcome - it proved an incredible lead in the next two matches. In Round 4 you still have the annoying tendency to face off against the previous round's draft. Having no desire to swap Salamence or Garchomp for Grotle, I kept the setup of Salamence/Gastrodon/Garchomp for battles 5-7. Not perhaps the most type-optimal, but it worked a treat.

Total trades: 26

Round 5, much like in the Castle and the Arcade, is tough. Very very tough. It was here that four of my nine total streaks ended (three in the third round, and one in the 4th. So much depends on good picks here, and there is so much potential for dead weight. Lucario2 showed up in my opening draft which is not a good Pokemon at all. But as the other options were abysmal (with the exception of Nidoking3, who I put in position 2, I had little choice). With Dewgong in the final slot, I barely squeaked through the first battle. Expected to crash and burn, but after trading away Lucario at the earliest possible opportunity things began to improve. This was such a janky round and I never found a rhythm. Traded after every battle but one - Infernape2 lasted the longest, with Hippowdon and Kingdra putting in some good work too.

Total trades: 32

Round 6 was the first and only round where I got a really good opening draft. Sod's law that it's not the Thorton gold round. Roserade3 was an immediate pick for lead - I'd used Roserade3 in an earlier run but been humiliated by Scizor, so I made sure to have something in the back to take care of it. Arcanine2 combo'd really well with it, Intimidate is such a crutch ability. Despite looking great on paper, Gardevoir2 just didn't pull its weight so I ended up jettisoning it, ironically picking up Empoleon for one battle in its place. Only one battle in this round was a close win - the rest were disarmingly straightforward. Made a lot of trades here because the enemy picks were in the main quite good.

Total trades: 39


Round 7. Imagine my happiness at getting here only to be presented with this absolutely woeful opening draft: Victreebel4, Quagsire3, Cradily4, Wailord2, Porygon-Z1, Tentacruel3. After about ten minutes of deliberation, I took Pory, Cradily, and Tentacruel in that order. The first battle was almost a wipeout - Porygon-Z 2HKO'd Claydol, I switched to Cradily for Blissey and 2HKO'd with Stone Edge whilst almost being finished off by Ice Beam. Then out came Aerodactyl. It killed Cradily and Porygon-Z, and - completely forgetting what item Tentacruel3 was holding - I switched it in thinking "well, it was a good run, but here we go." It uses Earthquake, Focus Sash triggers, and I kill it with Surf.

From there on things improved markedly. I swapped Pory for Aerodactyl(3, probably its best set overall) and swept the next 3 battles solo, swapping the second slot a few times but never needing to use the Pokemon I was swapping for. On the fifth battle, Aerodactyl went down to a Seed Bomb-using Lickilicky, but Tentacruel and the Flygon I swapped for were enough to cope.

The sixth battle was where my nerves were absolutely screaming. I find the battle before any Frontier Brain nervewracking, but this one more so. As it happened, I got very lucky. The lead Bastiodon went down to Earthquake, the backup Magmortar to a Rock Slide. Then out came Umbreon. Never a fun mon to play against with three such offensive mons. But I got a lucky flinch with Rock Slide and was able to 3HKO.

The attendant told me that Thorton had Normal-types. Mmm. I was hoping for Fire but we can't have everything. I traded Flygon for Umbreon, wanting something a bit bulky as a safeguard. My final team was therefore Aerodactyl, Umbreon, and Tentacruel. Not what I'd hoped for...

Thorton Gold

He led with Exploud1, which incredibly I flinched on the first turn, and which bafflingly chose to use Torment before I dropped it. Next up was Miltank1, which paralysed Aerodactyl and 2HKO'd with Iron Head. I brought out Tentacruel hoping to win the speed tie and, though it paralysed me, managed to finish it with Surf. In hindsight Umbreon would probably have been safer. His final Pokemon was Granbull! Though I was expecting to hit once then get pipped the next turn, Surf got a crit and OHKO'd. A fitting victory, since crits resulted in several of my losses.

Total trades: 44

factoryplat53.png


A very fitting image.

factorystreak.jpg
factoryprint.jpg


Final thoughts

This was actually a lot of fun. As I said on the Gen III Frontier thread recently, Factory has really grown on me over the years. It's still hellishly difficult but enjoyable for all that. I've only ever completed the Factory once before - years ago on SoulSilver - and avoided the place ever since, so it's nice to come at it from a new angle.

And I'm happy to have finally got one gold print! Let's see if I can keep that up - because next we're taking on that most famously difficult of facilities... the Battle Hall. Probably be sometime early next week.

hallplat.png

Current score - 4/10
 

QuentinQuonce

formerly green_typhlosion
hallplat3.png

Day 4
Battle Hall

Battle_Hall_Exterior.jpg

And we've reached facility number four. After being introduced to the fourth Frontier Brain, Argenta, and with her team returned from Stark Mountain bruised and battle-weary, Platinum resolves to fight her way through the Battle Hall and prove her worth. But with it all riding on one sole Pokemon, Platinum realises she will need to choose a tough fighter to stand a chance of making it to the end, and decides to use the Froslass given to her by Gym Leader Candice...


hallplat1.png


And we've reached it at last. The fourth and without question the hardest of the facilities. Man, Gen IV really doesn't let up. There really isn't an easy option here, unlike in Gen III's Frontier.

If I'm honest, the Battle Hall was the main reason I wanted to do this challenge at all. It's such a wickedly cool concept and so unlike the other battle facilities that I've always been fascinated by it. My SoulSilver save file has streaks of varying lengths done by all sorts of Pokemon, from the mighty Garchomp to the likes of Magikarp, Abra, and Sunkern. Really must head back there at some point and get my overall streak up to that coveted 10,000... But while any Pokemon can shine in the Hall given the chance, it takes a really exceptional individual to get all the way up to 170 and thus master every different type. A true star, as Argenta put it. Could Froslass be that mon?

I thought so. To succeed in the Hall you need to be able to account for all manner of trickery - priority, status, Quick Claw, OHKO moves - to a much greater extent than elsewhere. Froslass can handle a lot of these things, and has a wonderful offensive typing on top of two immunities to boot. I started looking at all the moves Froslass could learn and got to studying the list of Battle Hall sets, inputting their stats into Pokemon Showdown's Battle Calculator and trying to figure out which movesets and which EVs would be sufficient to guarantee victory against the maximum possible amount of enemies.

This is partly why it took so long for me to get round to doing this challenge, on top of breeding a truly hellish amount of Snorunt. I wanted to be absolutely sure I could pull this off. I wanted to be certain I could do it right. I wanted to be able to look at any given Pokemon on the list and know precisely how to deal with it.

Which ultimately led to me breaking one of my own rules. I'd said I'd give myself two days max on each facility. I actually started this on Saturday morning and finished it this morning, thus spending longer than two days. Naughty GT. Shame on you. But what made me do that was that I knew that I could do it. It took me seven attempts to get to the gold - the first six ending at 29, 58, 28, 49, 38, and 48 respectively before running right through to 170.

So, even though it wasn't within the time I'd set, I ultimately proved myself right. And because of that I'm saying good on me. No penalty.

Also because it's my challenge and I can do whatever the hell I want. Go figure.

hallplat6.png
hallplat7.png


Platinum_Froslass.png

Froslass. I've always liked this Pokemon, so was pretty excited about getting to use it seriously. Learns a decently versatile range of attacks - not quite as many as it wants, but more than enough to be interesting - including some unconventional options like Weather Ball, Wake-Up Slap, and Spikes. I remember well the heady early days of DP when this was really popular, and deservedly so.

It's forced to run a Quiet nature. Not actually the worst possible option, since running physical moves was a viable - necessary even - choice a lot of time, and with the level advantage you're generally still faster in most cases. Boosting Special Attack is welcome too.

I'm really impressed with how Froslass worked here. Bulky offense is the way to go in general in the Hall - anything with a lot of weaknesses will struggle to muscle past certain types, and Froslass definitely has a lot of weaknesses.


hallplat2.png
hallplat4.png


As most people do, I went through one type at a time, ordering them generally by how threatening they were. Summaries of what I used for each round and the most threatening foes are below. This will get long.

Note that all of the rounds were done at level 30. This was in order to make the most of a) Froslass' compromised Speed and b) the greater power disparity at lower levels.


  1. Steel
    478.png

    Froslass @ Babiri Berry (Snow Cloak)
    Hidden Power (Fighting)
    Thunderbolt
    Water Pulse
    Ice Shard
    252 Sp.Atk/Speed (Quiet)

    Predictably, starting off with a difficult type to face. HP Fighting was ultimately the superior choice over Ground or Fire, even though it doesn't hit everything - Thunderbolt is for Skarmory and Empoleon but not much else. I lost to Forretress once but otherwise managed this round without much issue. On my first run I encountered Registeel as my rank 10 fight and got very lucky with it - it TWaved, I attacked, it used Iron Head and I attacked again, getting a critical hit. Otherwise, it's a 3HKO at best and will kill you with paralysis. Scizor looks nasty on paper with a Focus Sash and priority but has a much worse bark than bite - it boosted, I used Thunderbolt, it used Bullet Punch, I survived and used Thunderbolt, then used Ice Shard for the KO. Wormadam was ironically the hardest kill overall since it's a very narrow 2HKO. When it showed up in the Bug round, I was more prepared to deal with it.

    Babiri Berry was overall the best item for this round, but I worried about meeting Heatran, who indeed turned out to be a run killer. But more on that later.

  2. Dark
    478.png

    Froslass @ Colbur Berry
    (Snow Cloak)
    Hidden Power (Fighting)
    Signal Beam
    Ice Beam
    Ice Shard
    252 Sp.Atk/Speed (Quiet)

    Dark is always a worrisome round, in part because of all the damned Focus Sashes. So Ice Shard was essential here. Thankfully it's not a contact move, which makes Sharpedo a lot less threatening.

    Signal Beam, HP Fighting, and Ice Beam take care of pretty much every Pokemon in this round. Absol sneakily used Shadow Claw instead of Night Slash, but it didn’t KO. Umbreon killed me early on - it got off a Confuse Ray, then Sucker Punched me to death. Drapion, who I fought at rank 10 both here and in the Poison round on three occasions, was a concern because Night Slash predictably critted through Colbur (didn’t KO, but I worried whether Signal Beam would 2HKO). Tyranitar was made to kill me, but I can OHKO if it's level 26 or below - hence doing Rock next.


  3. Rock
    478.png

    Froslass @ Focus Sash
    (Snow Cloak)
    Hidden Power (Fighting)
    Water Pulse
    Ice Beam
    Shadow Ball
    252 Sp.Atk/Speed (Quiet)

    Wish Froslass learned Grass Knot or something. Oh, well. Wasn't much need for priority in this round, but Rock has such a wide variety of secondary typings to consider that I really struggled to cover everything. For that reason, Focus Sash was chosen instead of Charti Berry this time around - too much can find other ways to hit me. Lunatone and Solrock are easy kills with Shadow Ball while most things that are also Ground (and Cradily) are taken care of by Ice Beam. Quick Claw Golem is some top-tier bullshit, though not a run killer. Meanwhile HP Fighting was the optimal Hidden Power to take care of Aggron, Probopass, and, as noted, Tyranitar. Shuckle was a pain, but only because it can potentially be a 4HKO and has Rollout. I only encountered it once and was able to overcome it.


  4. Fire
    478.png

    Froslass @ Focus Sash
    (Snow Cloak)
    Hidden Power (Rock)
    Water Pulse
    Psychic
    Ice Shard
    252 Sp.Atk/Speed (Quiet)

    Fire: another type Froslass greatly dislikes. And the first round where I meet an impenetrable wall.

    Even with a Quiet nature, Max speed just about outruns Infernape, since rank 10 Pokemon have IVs of 26 across the board. HP Rock is the more optimal choice over HP Ground, as Rock hits more Pokemon neutrally while being super-effective on Charizard and Moltres. Otherwise, Moltres can live through Thunderbolt and potentially score a burn with Fire Blast. Ninetales is always a 2HKO, but fine, while Entei is a threat thanks to Quick Claw but still an easy 2HKO.

    There are two glaring exceptions, though. Houndoom is very, very, very, very difficult to beat. With a Choice Scarf, it far outspeeds me and every single one of its moves is Dark or Fire. At a high enough damage roll, however, HP Rock + Ice Shard can just score a 2HKO. This is obviously easier the earlier I fight it, but far from certain.

    The other is, of course, Heatran. Water Pulse, sadly, is only a 3HKO. The first time I played this round, I ran Occa Berry over Focus Sash because for nearly all of the Pokemon in this set their strongest option is a Fire attack, and having a chunk of HP left prevents errant burns from picking me off. Heatran showed me why this was a bad idea when it used Flash Cannon and OHKO'd. I guess the AI prefers Flash Cannon due to its higher accuracy. Sigh. So how to deal with Heatran? Well, HP Ground is a potential 2HKO, but that means forgoing HP Rock. What about Natural Gift with some Attack investment and an Apicot Berry? Mmm, has some mileage, but then I have to forgo either of the other two items.

    Reluctantly, therefore, I was forced to come to the conclusion that the only way to beat Heatran was not to battle it at all. It's not the best method - trusting to luck - but for this, it's the best I could do. After meeting Heatran twice early on and cursing my fate, I subsequently managed to avoid it after that.


  5. Water
    478.png

    Froslass @ Focus Sash
    (Snow Cloak)
    Hidden Power (Grass)
    Thunderbolt
    Signal Beam
    Ice Shard
    252 Sp.Atk/Speed (Quiet)

    Why Water for round 5? You might well ask. It's not one of the more threatening types, and I initially intended to save it for later, opting for Fire, Normal, or Ice as the fifth round. However, all three of those options require me to run movesets with what you might call crippling overspecialisation, so after a few tries I settled on doing Water fifth. This way, I could confidently go up against Argenta with a more versatile moveset and be more prepared to take on whatever she had. Also, some of the top water mons are tricky to face later on; Suicune for instance is a very narrow 2HKO depending on when it's fought.

    Not much here I couldn't handle. Most of the bulky waters are comfortable 2HKOs.


    froslass.jpg


    Yes, I literally did name each of my Froslass after the type they were designed to take on, made things so much easier.


    Argenta Silver
    I fought her four times in total. The first time she brought Kingler, which is an easy 2HKO with Thunderbolt; the second, wherein I lost to her, she brought Golem; on the third she brought Tauros which is a squeaky 3HKO, and on my winning run she used Toxicroak, who has the scary-looking but ultimately very weak Bullet Punch.


  6. Normal
    478.png

    Froslass @ Focus Sash
    (Snow Cloak)
    Hidden Power (Fighting)
    Wake-Up Slap
    Ice Beam
    Ice Shard
    252 Attack/Sp. Atk (Quiet)

    Normal gets sixth billing as it's a slightly scary round, and it's here I've mixed things up by running a physical move. The reason, of course, are those notorious fat pink bitches Chansey and Blissey. If Froslass didn't learn a decent physical move, I wouldn't have even bothered trying for the gold in this facility. Just completely pointless. HP Fighting is only just a 5HKO on Blissey if I'm lucky, while it and its younger sister can roast me with a potentially Serene Grace-enhanced Fire Blast. However, with full Attack investment Wake-Up Slap can potentially OHKO.

    Naturally, the first time I went up against a Chansey... I got a critical hit and felled it in one. Good old sod's law.

    Ice Beam is the best backup move, since the majority of dual-typed Normals are Flying. Girafarig isn't a threat. Still, the fact that so many Normal-types tend to be bulky was an incentive to get this round done ASAP. Lickilicky, for instance, is a serious threat I can't be certain of 2HKOing. It would have been nice to carry a Black Belt or a Fist Plate during this round to beef up all those super-effective Fighting moves and turn uncertain 2HKOs into certain ones, but unfortunately that wasn't an option.

    The reason is Snorlax. Guaranteed run killer and massive pain in my arse. Crunch is an easy OHKO on me, while I can just barely 2HKO with Wake-Up Slap but only if I'm holding a Black Belt. And if I do that I can't survive a Crunch. With no way to square that circle, my only answer to Snorlax was the same as my answer to Heatran - pray it doesn't show up. I got lucky and only ran into it once; unfortunately that once was the end of that particular run.


  7. Ice
    478.png

    Froslass @ Watmel Berry
    (Snow Cloak)
    Hidden Power (Fighting)
    Thunderbolt
    Natural Gift
    Ice Shard
    252 Attack/Sp. Atk (Quiet)

    Ice is an unusual choice for the seventh round, as it's relatively easy for the most part. At least it was until I ran into Abomasnow, which slaughtered me. HP Fighting only does around 60% to it - fine, but of course it's carrying Sitrus Berry, and the second hit falls short, so I get destroyed by Iron Tail, which hit all three times because of course it did. Switching to HP Fire was an option, but I didn't want to lose the 2HKO on Mamoswine, nor run Wake-Up Slap given how physically bulky Ice-types tend to be. Regice is a 3HKO with HP Fighting, but generally can't 3HKO me.

    Then the answer hit me. Natural Gift. Watmel Berry gives an 80 BP Physical Fire move that easily OHKOs Aboma and hits a lot of the others fairly hard. Only problem is that carrying Watmel Berry leaves me naked against Weavile, from whom Night Slash is a guaranteed KO.

    But the thing is, Weavile still beats me even with a Focus Sash. It outspeeds even when I'm fully invested in Speed, hits for the KO, and then because it's faster its Ice Shard hits before mine. The only way to beat Weavile is to carry a Colbur Berry so that it uses Night Slash again on the second turn, but then we're back to Abomasnow being a problem. Literally can’t win them all. So, this way it is, and once again just hope that Weavile doesn't show up.

    God, Weavile might just be the worst Pokemon in the Hall (in general).


  8. Psychic
    478.png

    Froslass @ Focus Sash
    (Snow Cloak)
    Hidden Power (Fire)
    Shadow Ball
    Sucker Punch
    Ice Beam
    96 Attack, 252 Sp. Atk, 160 Speed (Quiet)

    Ah, a dicey round for number 8. Most of the opponents in the Psychic set are "I can easily kill them, if not for [thing]". Metagross is just about possible to beat as long as it's not the rank 10 fight. Bronzong is a slim 2HKO - not even worth bothering with HP Fire to find out if it has Heatproof, Shadow Ball is always the superior choice. Anything that uses a sleep move is a real pain. Slowbro is a worry because it can burn with Flamethrower, which comes close to an OHKO. Wobbuffet is a narrow 2HKO depending on the level and AI stupidity. Gardevoir is a tricky Trick user which outspeeds and then Protects to make you suffer Sticky Barb's damage - it will attack eventually though, so best to keep using Sucker Punch over and over. Espeon was the rank 10 fight on my final streak - it got off a Double Team and my first attack missed. It then used Double Team again and my second attack missed. By now I'm panicking. Luckily my third Shadow Ball hit as it attacked. That left it with some HP, but miraculously Sucker Punch hit.

    There are some easy foes - I never saw any of the lake trio, but they'd all have been easy wins. Cresselia has a hilariously awful moveset and nature, I kind of wanted to fight it just for the lols. But overall this round is a teeth-grinder. I initially intended to save it for later but after reading through all of the sets I knew that this had to be done as early on as possible (which still isn't that early, but y'know, priorities).


  9. Fighting
    478.png

    Froslass @ Focus Sash
    (Snow Cloak)
    Hidden Power (Fighting)
    Psychic
    Shadow Ball
    Ice Shard
    252 Sp. Atk/Speed (Quiet)

    Not too bad, as they go. This is the first round where I didn't much need Hidden Power at all; Fighting hits Lucario, who I'd assumed would be a tough opponent. But get this: Lucario can't hit Froslass. Like, at all. It only knows Fighting and Normal moves. That'd be a cheap and easy win - so of course, I never met a single Lucario during my time in the Hall, on any of my runs. Typical. Similarly, I only fought Machamp once (only knows Fighting moves, but has Foresight).

    Hariyama is the most dangerous opponent here – it’s a narrow 2HKO, uses Payback, and carries a Focus Band just to ruin my day. Gallade, like Heracross, has the Salac Berry but doesn't know Endure: since Shadow Ball isn’t a guaranteed KO, it's best in both cases to use Ice Beam for chip damage and then blast with the powerful super-effective hit. Poliwrath was nerve-wracking – used Hypnosis, but thankfully missed. Hitmontop was the rank 10 fight on my final run – it used Aerial Ace then got its Salac boost, but for some reason used Twister instead of Thief (even though Thief would have done less than needed for a KO, it’s still better than Twister).


  10. Bug
    478.png

    Froslass @ Focus Sash
    (Snow Cloak)
    Hidden Power (Fire)
    Ice Beam
    Protect
    Ice Shard
    252 Sp. Atk/Speed (Quiet)

    Some potentially difficult foes in this round. But also lots of part-Flyings which are all blessedly easy kills with Ice Beam. Armaldo is a 2HKO. As mentioned in the last round, Heracross is potentially dangerous because of Salac (though can only hit me with Megahorn) but doesn’t have Endure, so the strategy is to hit soft then blast with HP Fire (or Ice Beam, which actually weirdly has a higher damage threshold). Much as in the Steel round, Scizor is dangerous but now I have HP Fire instead of Thunderbolt. Protect was included purely for Shuckle, just to prevent any errant Rollout misfortune.


  11. Electric
    478.png

    Froslass @ Focus Sash
    (Snow Cloak)
    Hidden Power (Ground)
    Ice Beam
    Shadow Ball
    Ice Shard
    252 Attack/Sp. Atk (Quiet)

    Much as with the Psychic round, most of the foes here are "I can easily kill them, if not for [thing]", with [thing] in this case being paralysis. Raikou is a very, very narrow 2HKO with HP Ground and Ice Shard assuming it uses Thunder and either misses or fails to paralyse; this was moot, as I never fought it. Lanturn is a narrow 2HKO but 3HKOs me with Discharge and/or Brine assuming no paralysis. Electivire is a comfortable 2HKO with HP Ground + Ice Shard thanks to the fact that it carries a Life Orb (it actually can potentially KO itself if the first hit gets a high damage roll, which is neat), but again, you have to avoid paralysis. I actually didn't have problems with any Pokemon in this round except the last one I expected: Pachirisu. It TWaved and I suffered two consecutive turns of full paralysis. Luckily Thunder missed the first time it used it and I got an Ice Shard off in time.

    Due to everything in this round trying to paralyse you, Speed investment is kind of a waste, but I need the full attack investment to ensure Ice Shard gets the KOs it needs to.


  12. Poison
    478.png

    Froslass @ Focus Sash
    (Snow Cloak)
    Hidden Power (Ground)
    Ice Beam
    Psychic
    Ice Shard
    252 Sp. Atk/Speed (Quiet)

    And we're on to a reliably easy round at last. Tentacruel and Swalot are narrow 2hkos. Most of the really bulky things, like Weezing, sacrifice their offenses to be so and so can’t reliably KO me in turn. The rest are taken care of by Ice Beam. The rank 10 fight was Drapion, who used Acupressure to boost its Special Attack as I 2HKO'd with HP Ground.


  13. Ground
    478.png

    Froslass @ Focus Sash
    (Snow Cloak)
    Hidden Power (Grass)
    Ice Beam
    Water Pulse
    Ice Shard
    252 Sp. Atk/Speed (Quiet)

    Due to the overlap between Ground and Rock, I initially opted to do this one early on. But very few Pokemon in the Ground set are threatening, and most are outright OHKOs. HP Grass is for all the Water/Grounds, and is a 2HKO on Mamoswine too. The rank 7 fight, Dugtrio, was the only really dangerous one - outspeeding me, it set up Sandstorm and Ice Beam missed. Then it hit me with Earthquake for an almost-KO, but thankfully Ice Beam hit. Rank 10 was Steelix, which has a monstrous Gyro Ball but is a 2HKO.


  14. Grass
    478.png

    Froslass @ Focus Sash
    (Snow Cloak)
    Hidden Power (Fire)
    Ice Beam
    Psychic
    Ice Shard
    252 Sp. Atk/Speed (Quiet)

    On paper, everything looks manageable. And honestly they pretty much were. After what happened in the Ice round, I was wary of Abomasnow, but of course this time I had HP Fire for it and swiftly OHKO'd. Everything else fell to Ice Beam. Venusaur was the rank 10 fight – holds a Focus Sash but it just used Toxic.


  15. Flying
    478.png

    Froslass @ Focus Sash
    (Snow Cloak)
    Hidden Power (Rock)
    Ice Beam
    Thunderbolt
    Ice Shard
    252 Sp. Atk/Speed (Quiet)

    What I said about Grass applies here too. Froslass was basically made to kill Flying-types. The only slightly scary fight was Salamence: I missed with Ice Beam, it used Dragon Claw and got a critical hit. But I killed it the next turn, naturally.


  16. Dragon
    478.png

    Froslass @ Focus Sash
    (Snow Cloak)
    Hidden Power (Dragon)
    Ice Beam
    Shadow Ball
    Ice Shard
    252 Sp. Atk/Speed (Quiet)

    The fun round. Dragons are fun to play against when you've got an advantage. The only problematic foe is Kingdra - Ice Beam and HP Dragon do similar amounts of damage (though HP Dragon has the higher minimum) but it's not always a certain 2HKO. For this reason, I briefly debated carrying an Expert Belt - nothing in the Dragon round has priority and everything else bar the Lati twins is a straight OHKO, so it had some merit. But in the end, based on the Salamence fight from before, I figured being cautious was best. Luckily, I fought Kingdra at rank 9, meaning that the odds of a 2HKO are 97.3% according to the damage calculator. I'll take those odds! Both Latis are interesting fights, but neither showed up: rank 10 was Dragonite, which is ironic given that that's Argenta's Pokemon in the manga.

  17. Ghost
    478.png

    Froslass @ Focus Sash
    (Snow Cloak)
    Ice Beam
    Thunderbolt
    Shadow Ball
    Ice Shard
    252 Sp. Atk/Speed (Quiet)

    Why save Ghost for last? A couple of reasons: it's a problematic type, so the chance to only fight 9 of them rather than 10 appealed. But there's also the same rationale as choosing Water for round 5: so I can have some versatility for Argenta.

    Even though most of the foes in the Ghost round are relatively easy kills, there are a couple of dangerous ones. Spiritomb is a very tight 2HKO, dependent on high damage rolls, but absolutely slaughters me with Dark Pulse. Luckily, it didn't show up. Dusknoir is an extremely tense foe - Shadow Ball easily 2HKOs it, but it has the dreaded Quick Claw. Predictably, it showed up as the rank 9 battle. I am not kidding when I say that my entire body tensed. If I'd gripped my DS any harder I'd have probably broken it.

    I hit it with Shadow Ball, it responded with Shadow Punch. Okay. Time to grin and bear it. I used Shadow Ball again and blessedly the Quick Claw did not activate.​


hallplat5.png


moment of truth.jpg


Moment of truth time.

Argenta enters and sends out... Gyarados.

Aaaaaaaaaand breathe. That should be an easy KO. I strike with Thunderbolt, and it drops it in one.


hallplat8.png


hallprint.jpg
hallrecord.jpg


Final thoughts

Well, this was the most fun by far I've had during this challenge. I've always thought of the Hall as being very high-risk/high-reward - but actually it isn't, at least for the most part. Barring the Pokemon dependent on damage rolls to kill, with most foes it's a straight case of you either win or you lose against them. For most of the types, I could beat all but one possible Pokemon, so it became a nerve-wracking game of “will __ show up?” And thankfully enough of them didn't.

Definitely going back to the Hall on my SoulSilver file once all this is over.

And we're done! That's all the facilities Platinum challenged on-page. The only one left is the Tower. And we'll be doing that in time. Stay tuned for that one, shouldn't be too long to wait...


towerpreview.png


Current score - 6/10
 
Last edited:

QuentinQuonce

formerly green_typhlosion
towerpreview2.png

Final Day
Battle Tower

Battle_Tower_HGSS.png

Finally, we come to the end of this challenge. With the crisis in Sinnoh at an end, and Team Galactic soundly defeated, Platinum and her friends celebrate as peace returns to the region - but Palmer reminds her that she still has one challenge left: her battle against the legendary Tower Tycoon and his powerful signature Cresselia...


towerplat4.JPG


The end of the challenge at last. How time flies. So, here we go...

Challenging the Tower paradoxically gave me a sense of freedom alongside the sense of being incredibly constrained. After all, Platinum never challenges Palmer on-panel, so it's left to the reader's imagination as to how exactly she does it. So I can use anything! ...anything as long as it's one of the six Pokemon on her team, that is. Finally being able to use a team of three with the items I want, and being able to select an entirely new strategy to those before, made things interesting and I had a lot of fun with this stage.

The three strongest performers throughout this challenge have definitely been Empoleon, Froslass, and Rapidash, amusingly reflecting their prominence throughout the story. However, given that her final three team members (Cherrim in particular) see so little use in the Platinum chapter, I decided that I wanted to give all six players equal time to shine, and so devised two different rosters, each consisting of one half of Platinum's team.

It worked out... kind of okay. Amusingly, the "weaker" team which I only used up until battle 35 actually performed much better. The "stronger" team I reserved for the later rounds struggled a lot more. Of my five losses, four were with the second team - I made it past Palmer's Silver fight every time, and only failed to get to battle 35 once.


towerplat2..JPG
towerplat.jpeg


Team A

This team was used up until battle #35.


Platinum%27s_Froslass_Wake-Up_Slap.png


Froslass @ Focus Sash (Snow Cloak)
Ice Beam
Thunderbolt
Shadow Ball
Destiny Bond
252 Sp.Atk/Speed, 6 HP (Quiet)

She's back, and better than ever. God, Froslass really is an underrated mon (or else I've not been looking hard enough). Fantastic in the Hall, and here it makes a stellar lead. I've never led with a Destiny Bond user before, but I see the appeal for sure: it's so satisfying to come up against something you can't beat and take the wind out of their sails, particularly after you've dispatched one or two already. Misses the security Ice Shard provides, but the three offensive moves give great coverage. Focus Sash allows it to take out faster foes like Gengar and live to 2HKO bulkier mons like Bronzong and Magneton.


Platinum_and_Rapidash.png


Rapidash @ Choice Band (Flash Fire)
Flare Blitz
Poison Jab
Megahorn
Bounce
252 Attack/Speed, 6 HP (Modest)

Old reliable Rapidash. As before, it makes a decent cleaner, and is fast enough to outspeed a lot of foes. In general, as long as you don't expect too much from Rapidash, it performs quite well and actually finds a lot of defensive synergy with the final team member.


cherrim.JPG


Cherrim @ Big Root (Flower Gift)
Giga Drain
Leech Seed
Protect
Tickle
96 HP, 252 Sp.Atk, 196 Speed (Docile)

I've always had a fondness for Cherrim, so using it here was interesting. I was expecting to be let down, but actually, much like Rapidash, as long as you don't expect the world, it does pretty well. It actually wasn't needed too often thanks to Froslass' fantastic capability and Rapidash's tendency to OHKO the third foe if Froslass got off a successful Destiny Bond against the second mon. Leech Seed and Tickle both provide the rest of the team some limited support - Tickle was a fun option in particular as it nudges many Pokemon into KO range from Rapidash after one or two uses. Cherrim also serves a cool niche against Palmer which you can read about later on.


Team B

This team was used for battles #35-49.

Platinum's_Lopunny.png


Lopunny @ Choice Scarf (Cute Charm)
Switcheroo
Mud-Slap
Thunder Wave
Charm
252 HP/Speed, 6 Def (Naive)

Finally using Lopunny the way nature intended - yep, it's a TrickScarf lead. Being forced to run Cute Charm was annoying, but a minor annoyance all things considered. Lopunny can usually survive a couple of attacks past the initial hit and start to soften up the foe. Charm is essential given that Lopunny and Empoleon share a weakness to Fighting moves - in the event that the foe's lead got locked into one of those, there's not much to do but pray. Luckily, Pachirisu can lend a hand.

pachirisu.JPG


Pachirisu @ Brightpowder (Run Away)
Thunder Wave
Sweet Kiss
Charm
Flash
252 HP/Defence, 6 Sp.Def (Quirky)

Backup crippler. I was reminded a lot of the two-crippler team I ended up using in my Emerald challenge with this. I guess crippler teams really are the way to go, despite how little patience I have for them. Ah well, they're fun to use for a change. Pachirisu's role is to come in once Lopunny is knocked out by whatever move the lead is locked into and finish the job. They'll ideally be paralysed already. Sweet Kiss buys some more time if it's a particularly aggressive foe; Flash was essential since Lopunny only learns Mud-Slap, which obviously is useless against airborne foes. As Se Jun Park proved, Pachirisu can be an effective bulky supporter if given the chance, and I actually found it the most consistent member of the team. Its job is to set up Empoleon for a sweep, and it does that very well.


Platinum's_Empoleon.png


Empoleon @ Leftovers (Torrent)
Substitute
Swords Dance
Aqua Jet
Drill Peck
236 HP/252 Attack/12 Def/4 Sp.Def/4 Speed (Serious)

I suppose it's only fitting that Empoleon be the cornerstone of this team. After going the Special route with it previously, I went physical here as Aqua Jet's priority meant I had much less to fear from Quick Claw hax - always a run killer eventually. Drill Peck gave the best overall coverage alongside it. It's still not that bulky but it's the best candidate in general for a boosted sweeper - wish it learned Bulk Up or something though. Or just had five more moveslots.

It performed really well, as expected. As long as it has a Sub up, the world's your oyster - but it does need all three boosts to sweep properly. Even then it's not a sure thing. I lost to Rhydon 1 (carries a Passho Berry, meaning that even at +6 you still don't OHKO) on my first run. Bloody Rhydon.

In general, this team isn't great. The lack of defensive synergy means that if you get unlucky with the lead, you're boned. Two of my losses were to OHKO users - first time Dugtrio (it missed the first two Fissures, allowing Lopunny to get one Mud-Slap off, then missed the third but hit the fourth and fifth), second time Donphan (all three Fissures hit in succession) - and a third was due to locking a Jolteon into Rain Dance; it quickly ran out of PP, Struggled to death, and out came Magnezone, which ran amok. But it didn't need to be perfect, just good enough to get me to 49 wins - and in the end, it did.


team.jpg


You did great, guys.


save for tower or hall.png


Battle #1-20

Due to Froslass' overwhelming force, the first three rounds passed very quickly, with Rapidash cleaning up where needed. As you might expect, there's really very little to say about these ones.

Palmer Silver

The first fight against Palmer is a relatively easy one if he leads with Dragonite or Rhyperior, both of whom are swiftly OHKOed by Ice Beam.

If Palmer leads with Milotic, things go differently. Switch out Froslass, sacrificing Rapidash, and send out Cherrim. Ice Beam cannot OHKO, so set a Leech Seed, Protect, then use Giga Drain. This will bring Milotic down to ~30%, allowing Froslass to come back in and use Thunderbolt for the KO.

Battle #22-35

This is where things start to get interesting. As we know, Round 4 and 5 see some more competent adversaries start to show up. However, Froslass is usually capable of getting - bare minimum - one kill, so it's not as tough as the Castle or the Arcade. I only lost once here, to a team with a lead Tyranitar, which used Payback for the KO and then survived a Megahorn from Rapidash.

Battle 36-48

And we switch to using Team B. As discussed in that section, it's not the most optimal. A lot of battles came down to a good lead matchup and how many cripples Lopunny and Pachirisu could cram in. Unsurprisingly, this led to several losses. But Empoleon's good coverage and ability to shrug off many resisted hits proved invaluable. Met lots of OHKO users (urgh) but no legendaries (yay).

Palmer Gold

He started with Cresselia, which is probably the most beneficial of his squad to face as a lead. It got locked into Psychic, but even despite Lopunny's compromised Special Defense, it's a 3HKO thanks to Palmer not investing in offenses. Lopunny was able to paralyse it before it went down as well as getting off a pointless Charm, and then Pachirisu confused it before getting off all six uses of Flash. I might as well have not bothered, though - it only missed two hits with Psychic, and when it ran out of PP not one of its Struggle hits failed to connect. By that point Empoleon was out, and it managed to bag all three boosts before Cresselia finally knocked itself out.

Heatran next. It used Magma Storm and - hilariously - missed. How ironic.

Regigigas came out last. This was the mon I was most apprehensive about. I used Drill Peck, doing around 60%, as it replied with Earthquake. Even with Slow Start, it broke my Sub. Fortunately, Aqua Jet did enough to finish it off the next turn.


medals.jpg
streak.jpg


Final thoughts

I wasn't as concerned about the Tower as I was the other facilities, and it definitely felt less pressured. Team A was definitely the "fast" team - used to sweep through those often-dull earlier rounds as quickly as possible, while Team B required more finessing. Beating Palmer with a Cherrim was incredibly satisfying, though!

So, that's this challenge over and done with. Much, much harder than the corresponding Emerald one (and before anyone asks, no I will not be challenging the Battle Subway with a team of Deerling, Servine, and Braviary...) but somehow more rewarding! I think that's probably because I'm far less experienced with Gen IV's Frontier, having only completed it the once a long time ago. I had a lot of fun with this, and it was super interesting to delve into the sets and think up ways to get around them.

Oh yeah, and before I forget: final score: 8/10. Not bad at all.

I really hope you've enjoyed reading this, and thanks for following along with it if you have. Till next time.
 
Last edited:

Users Who Are Viewing This Thread (Users: 1, Guests: 0)

Top