This guide was created to serve as a comprehensive and definitive resource in planning teams in Pokémon XD, for everyone from casual first-time players to those aiming to challenge run the Orre Colosseum. Many helpful resources are included, from a breakdown of every individual Pokémon available, to teambuilding strategy against the game's major bottlenecks, to an overview of building teams for the Orre Colosseum using only in-game resources, to even a teambuilding compendium. There are also statistics on when Pokémon are obtained through the game and what their offensive efficiencies are, which further inform comparison and considerations of choosing Pokémon for a playthough.
The following principles are important for a successful and efficient all-Shadow Pokémon playthrough:
Offensively Efficient Pokémon
An all-Shadow Pokémon playthough features 265 battles against 940 Pokémon. These high numbers mean it doesn't make a lot of sense to utilize strategies that require a high number of turns, or Pokémon that are slow or offensively weak. Real stall tactics are overkill and unnecessarily long to execute. With some exceptions, it usually doesn't make sense to use moves that lower the opposing Pokémon's stats, and only in major battles does it make sense to use stat boosting moves of your own. Strategies more complex than weather setting typically aren't worth the turns and moveslots required to execute them. Offensively efficient Pokémon are ones that typically move first and can OHKO a variety of targets. In general, Pokémon with base 85 Speed and above will typically move first against AI Pokémon of similar level, and Pokémon with base 130 offenses and above with a high-BP STAB attack typically have the sheer power to OHKO even neutral targets; these should be your top candidates for a team.
Use The Best Attacking Types
All types are not offensively equal, and certain types are far more essential for efficient play than others. Every Pokémon XD team should probably have an Electric-type and a Fire-type; both types have a variety of good Pokémon to choose from, sport powerful and accurate STAB attacks, and cover a wide range of targets, including otherwise hard-to-hit Water / Flying and Bug / Steel types. Every Pokémon XD team should strongly consider a Fighting-type and a Psychic-type; Fighting-types are the only types that can crush common Normal-types and have a wide range of other type trumps, while Psychic-types have a strong and accurate STAB attack in Psychic and are the only easy way to hit Poison-types. One or two Ice- and Grass-type attacks are useful for hitting 4x weaknesses, particularly Dragon-types and Water / Ground types, respectively, but they exploit these weaknesses hard enough to where they don't necessarily need STAB. Normal-, Ground-, and Flying-types are all solid but far from required, and they sometimes struggle with move availability. Normal-types want STAB Return, but the move distribution is highly limited, and the TM is locked behind the Orre Colosseum; most Ground-types struggle with Earthquake availability, which is such a key move that it often partially defines how teams get laid out; Flying-types only have Drill Peck as a good STAB attack, which has highly limited distribution, and otherwise have to make do with Aerial Ace, which both is weak and also has distribution issues. Water-types aren't particularly useful, especially since the best Water-type attack Waterfall has limited distribution, while moves like Surf have their power split due to being a double battle and Hydro Pump is only really available to high-level Pokémon. Dark-types are a luxury for dealing with Psychic-types and don't do much else. Other offensive types are niche, and while they can add great utility to a team, they are more often than not something used just to diversify attacking options.
Status
Status conditions simultaneously drastically increase the likelihood of successful snags while reducing the ability of Shadow Pokémon to hit your own Pokémon with their super effective Shadow attacks, thus making teambuilding with status conditions in mind essential. Because poison and burn can cause uncontrollable chip damage to Shadow Pokémon, and because no move reliably induces freeze, paralysis and sleep are the status conditions of greatest benefit. Spore induces sleep with high accuracy, making it the best status move in the game, though it has highly limited distribution. Sleep Powder and Hypnosis are fairly accurate alternatives. Thunder Wave is an excellent status option with its high accuracy, though it cannot affect Ground-types. Stun Spore, Sing, and Yawn are other notable moves capable of inducing paralysis or sleep. Certain moves such as Body Slam and Dragonbreath are doubly effective at chipping Shadow Pokémon and can also induce paralysis. Every team should strive to have at least one paralysis- and one sleep-inducing move, and ideally many more so that a team is capable of statusing a Shadow Pokémon regardless of what pair of Pokémon is in battle. Inducing status on Shadow Pokémon is especially pivotal during the final gauntlet, in which opposing Shadow Pokémon are capable of 2HKOing or even OHKOing purified Pokémon.
Safe Chip Damage
Due to the sheer number of Shadow Pokémon in the game, it is likely that an untimely critical hit will accidentally KO a Shadow Pokémon if you're not utilizing moves that can safely deal chip damage. Moves like Seismic Toss and Night Shade deal precise damage equal to the user's level and can never score a critical hit, making them safe attacks to click against Shadow Pokémon. Similarly, False Swipe can never KO a Pokémon and is the only way to reliably bring Pokémon down to a single HP, which is crucial in increasing snag chances against some of the difficult-to-snag Pokémon. Safe chip damage is not quite as critical a teambuilding component as status moves, but every team should strive to have at least one attack that deals safe chip damage, and more if possible.
Bulky Shadow Pokémon
Throughout the game, the major boss battles feature Shadow Pokémon that are capable of dealing good damage to purified Pokémon. This is especially noticable in the final boss gauntlet, where Pokémon use immensely powerful Shadow moves that are capable of 2HKOing or even OHKOing purified Pokémon of similar level. Because bosses utilize strong Shadow Pokémon that take time to be snagged, their high damage output becomes a major problem. By far the most sensible way to accommodate this is to consistently utilize a high-level Shadow Pokémon that can effectively wall the boss's Shadow Pokémon. Not only can your own Shadow Pokémon sponge attacks from the opposing Shadow Pokémon, its effectively free turns can also be used to throw Snag Balls, heal teammates, or deal safe chip damage against the opposing Shadow Pokémon. This also has the effect of allowing teams to instead focus on dumping their Exp into four or five really good Pokémon, further increasing the efficiency of playthroughs and the potency of your purified Pokémon. Of particular note are Shadow Salamence and Shadow Lugia, which are so good against Greevil that a player cannot reasonably afford to pass up using one or both against him.
Pokémon List
The following list breaks down the final evolution of each Pokémon in order of availability. Notable moves highlight the best or most unique tactics available to that Pokémon. Sample sets are also provided for an all-Shadow Pokémon playthrough, as well as for the Orre Colosseum if that Pokémon has high or very high potential there. Note that some TMs and moves are effectively unavailable for an all-Shadow Pokémon playthrough due to them being only given upon clearing a round of the Orre Colosseum or as a prize for a very high area in Mt. Battle or only being learned at a very high level. These include TMs for Aerial Ace (Mt. Battle Area 9), Toxic (Orre Colosseum Round 1), Return (Orre Colosseum Round 2), Skill Swap (Orre Colosseum Round 3), Sludge Bomb (Orre Colosseum Round 4), Rest (Orre Colosseum Round 5), Steel Wing (Orre Colosseum Round 6), Dragon Claw (Orre Colosseum Round 7), and any move learned beyond LV. 60. These moves will not be listed in a Pokémon's notable moves or their sets for an all-Shadow Pokémon playthrough, but they may be listed in their Orre Colosseum sets if the move in question is essential for that Pokémon.
Flareon
Jolteon
Vaporeon
Espeon
Umbreon
Ursaring
Ledian
Mightyena
Houndoom
Walrein
Claydol
Ampharos
Swalot
Shiftry
Ariados
Camerupt
Sharpedo
Breloom
Delcatty
Electrode
Sandslash
Gligar
Flygon
Jumpluff
Donphan
Masquerain
Crobat
Aggron
Quagsire
Shuckle
Tyranitar
Medicham
Hariyama
Ninetales
Dusclops
Gardevoir
Mawile
Glalie
Forretress
Xatu
Roselia
Persian
Piloswine
Fearow
Muk
Dewgong
Lunatone
Zangoose
Nosepass
Togetic
Parasect
Arcanine
Cloyster
Beedrill
Pidgeot
Tangela
Butterfree
Magneton
Venomoth
Victreebel
Arbok
Primeape
Hypno
Raticate
Golduck
Sableye
Dodrio
Farfetch'd
Altaria
Kangaskhan
Banette
Magmar
Pinsir
Magcargo
Rapidash
Hitmonchan
Hitmonlee
Lickitung
Scyther
Blissey
Solrock
Starmie
Electabuzz
Swellow
Snorlax
Poliwrath
Mr. Mime
Dugtrio
Manectric
Salamence
Marowak
Lapras
Lugia
Zapdos
Moltres
Articuno
Rhydon
Exeggutor
Tauros
Dragonite
Meganium
Typhlosion
Feraligatr
Click on the images to read the Pokémon's descriptions!
Flareon
Obtained as: Eevee at LV. 10
Location: Starter Pokémon
Evolution Requirements: Fire Stone
Stats: 65 HP / 130 ATK / 60 DEF / 95 SPA / 110 SPD / 65 SPE
Ability: Flash Fire
Notable Moves:
Helping Hand (Starting)
Ember (LV. 16)
Quick Attack (LV. 23)
Bite (LV. 30)
Flamethrower (LV. 52 or TM35)
Hidden Power (TM10)
Sunny Day (TM11)
Hyper Beam (TM15)
Protect (TM17)
Iron Tail (TM23)
Return (TM27)
Shadow Ball (TM30)
Fire Blast (TM38)
Overheat (TM50)
Substitute (Tutor)
Body Slam (Tutor)
Double-Edge (Tutor)
% of Game Remaining After Being Obtained: 100%
% of Game Remaining After Being Evolved: 99.36%
Offensive Efficiency: 0.7554
Potential in an All Shadow Pokémon Playthrough: High
Potential in the Orre Colosseum: Moderate
Set for All Shadow Pokémon Playthrough
Held Item: Charcoal / Leftovers / Quick Claw
Move 1: Protect / Helping Hand
Move 2: Hidden Power / Body Slam
Move 3: Flamethrower
Move 4: Fire Blast
Flareon is a solid Fire-type and the first one that can be obtained. Like the other Eeveelutions, it can evolve as early as Gateon Port, and it is the only Eeveelution that makes a good mixed attacker. Its overall best move is Fire Blast, which is obtained fairly early at Realgam Tower after defeating Cipher Cmdr. Exol. Flareon does not have access to specific coverage moves that would help it blast through Water-, Rock-, Dragon-, or opposing Fire-types, but it does have a variety of handy physical attacks such as Shadow Ball, Iron Tail, Body Slam, Double-Edge, and Hyper Beam to pair with its great base Attack. Overall, Flareon is beginner friendly and offensively efficient.
Jolteon
Obtained as: Eevee at LV. 10
Location: Starter Pokémon
Evolution Requirements: Thunder Stone
Stats: 65 HP / 65 ATK / 60 DEF / 110 SPA / 95 SPD / 130 SPE
Ability: Volt Absorb
Notable Moves:
Helping Hand (Starting)
Thundershock (LV. 16)
Bite (LV. 30 as Eevee or Move Relearner)
Thunder Wave (LV. 42 or Tutor)
Thunder (LV. 52 or TM25)
Hidden Power (TM10)
Protect (TM17)
Rain Dance (TM18)
Thunderbolt (TM24)
Shock Wave (TM34)
Substitute (Tutor)
Offensive Efficiency: 0.8511
% of Game Remaining After Being Obtained: 100%
% of Game Remaining After Being Evolved: 99.36%
Potential in an All Shadow Pokémon Playthrough: Very High
Potential in the Orre Colosseum: High
Set for All Shadow Pokémon Playthrough
Held Item: Magnet
Move 1: Protect / Helping Hand / Thunder
Move 2: Thunder Wave
Move 3: Hidden Power / Bite
Move 4: Thunderbolt
Jolteon is the second fastest Pokémon in the game and one of the strongest Electric-types available. Its early evolution helps to make it the second most offensively efficient Pokémon in the entire game. Electric-types have good offensive matchups and are handy in many of the game's major bottlenecks. Thunder Wave makes Jolteon a great Pokémon for snag support. Perhaps Jolteon's only substantial shortcoming is a shallow movepool that is reliant on Hidden Power or Bite to damage Ground-types. Nevertheless, Jolteon is one of the best Pokémon to run the game and should be the first Pokémon considered for a team's Electric-type.
Set for Orre Colosseum
Held Item: Magnet
EVs: 4 HP / 252 SpA / 252 Spe
Nature: Modest
Move 1: Protect
Move 2: Thunder Wave / Helping Hand
Move 3: Hidden Power / Bite
Move 4: Thunderbolt
With its wicked Speed and solid Special Attack, Jolteon is a capable Electric-type offensive threat in the Orre Colosseum that also provides mild team support. Most of Jolteon's usefulness is its capability to outspeed and OHKO threats that can be difficult to hit otherwise such as Gyarados, Swellow, Dodrio, Feraligatr, Blastoise, and Starmie. Jolteon also has the typing and bulk to tank at least one attack that is not Earthquake or boosted by a Choice Band, giving it two opportunities to pick off opposing threats. Ideal types for Hidden Power are those that allow Jolteon to deal decent damage to foes that resist Electric, such as Ice, Water, Fire, and Grass. If one of these Hidden Power types isn't obtained, Bite at least gives Jolteon a way to hit Ground-types. Volt Absorb gives Jolteon an occassional safe switch opportunity. Unfortunately, Jolteon's EVs cannot be completely protected from the first few battles of the game prior to snagging Ledyba or Poochyena.
Vaporeon
Obtained as: Eevee at LV. 10
Location: Starter Pokémon
Evolution Requirements: Water Stone
Stats: 130 HP / 65 ATK / 60 DEF / 110 SPA / 95 SPD / 65 SPE
Ability: Water Absorb
Notable Moves:
Helping Hand (Starting)
Water Gun (LV. 16)
Bite (LV. 30)
Aurora Beam (LV. 36)
Haze (LV. 42)
Acid Armor (LV. 47)
Hydro Pump (LV. 52)
Water Pulse (TM03)
Toxic (TM06)
Hidden Power (TM10)
Ice Beam (TM13)
Blizzard (TM14)
Protect (TM17)
Rain Dance (TM18)
Icy Wind (Tutor)
Substitute (Tutor)
Offensive Efficiency: 0.7449
% of Game Remaining After Being Obtained: 100%
% of Game Remaining After Being Evolved: 99.36%
Potential in an All Shadow Pokémon Playthrough: High
Potential in the Orre Colosseum: Moderate
Set for All Shadow Pokémon Playthrough
Held Item: Mystic Water / Leftovers
Move 1: Protect / Helping Hand / Icy Wind
Move 2: Hidden Power / Bite
Move 3: Ice Beam
Move 4: Hydro Pump
Vaporeon is the best Water-type available early in the game. Due to its defensive typing and substantial bulk, it's difficult for the AI to KO, which makes it an excellent beginner's choice for running the game. The combination of Ice Beam and Hydro Pump makes Vaporeon an effective offensive tank, allowing its remaining two moves to round out its coverage or provide team support. Vaporeon can tend to feel a bit slow, however, and later into the game it will feel like an Exp sink, especially to get it to LV. 52 to learn Hydro Pump. Despite Water-types not being the most offensively useful in Pokémon XD, Vaporeon remains one of the better options available and comes with several unique and useful quirks.
Espeon
Obtained as: Eevee at LV. 10
Location: Starter Pokémon
Evolution Requirements: Sun Shard + Friendship at Level Up
Stats: 65 HP / 65 ATK / 60 DEF / 130 SPA / 95 SPD / 110 SPE
Ability: Synchronize
Notable Moves:
Helping Hand (Starting)
Confusion (LV. 16)
Bite (LV. 30 as Eevee or Move Relearner)
Psybeam (LV. 36)
Psychic (LV. 47 or TM29)
Morning Sun (LV. 52)
Calm Mind (TM04)
Hidden Power (TM10)
Sunny Day (TM11)
Protect (TM17)
Reflect (TM33)
Skill Swap (TM48)
Substitute (Tutor)
Dream Eater (Tutor)
Offensive Efficiency: 0.8610
% of Game Remaining After Being Obtained: 100%
% of Game Remaining After Being Evolved: 99.36%
Potential in an All Shadow Pokémon Playthrough: Very High
Potential in the Orre Colosseum: High
Set for All Shadow Pokémon Playthrough
Held Item: Twistedspoon
Move 1: Calm Mind / Protect / Helping Hand
Move 2: Morning Sun / Reflect
Move 3: Hidden Power / Bite
Move 4: Psychic
Espeon is one of the most offensively efficient Pokémon in the game, sporting a powerful base 130 Special Attack complemented by a fast base 110 Speed. Perhaps Espeon's only true weakness is its lack of offensive coverage, which leaves it stagnant against Pokémon resistant or immune to Psychic-type attacks. Espeon does at least have some good support moves in Helping Hand and Reflect to alleviate its shallow movepool. It remains an especially notable team pick for being the first Psychic-type available and the strongest Psychic-type in the game, even though it's a one-dimensional KO machine for a team.
Set for Orre Colosseum
Held Item: Twistedspoon / Leftovers
EVs: 4 HP / 252 SpA / 252 Spe
Nature: Timid
Move 1: Protect / Substitute
Move 2: Calm Mind / Helping Hand
Move 3: Hidden Power / Bite
Move 4: Psychic
Espeon is a bit less notable in the Orre Colosseum, where its lack of good offensive coverage is felt much harder, but it nevertheless remains one of the better offensive Pokémon available. Protect or Substitute is important to allow Espeon to survive the powerful and omnipresent Earthquake and Explosions as well as to bait out Shadow Balls or other strong physical attacks, especially from fast attackers such as Tauros and Gengar. Substitute has great synergy with Calm Mind and Leftovers, which combined have good matchups against the passive status users of Round 1 and against some of the other setup Pokémon in later rounds. Ideal Hidden Power types are Ice, Electric, Water, and Grass, which complement Psychic fairly well against dual-type Dark foes. Overall a strong offensive Psychic-type is fairly effective in the Orre Colosseum, but Espeon needs good matchups and offensive coordination with its partner to shine.
Umbreon
Obtained as: Eevee at LV. 10
Location: Starter Pokémon
Evolution Requirements: Moon Shard + Friendship at Level Up
Stats: 95 HP / 65 ATK / 110 DEF / 60 SPA / 130 SPD / 65 SPE
Ability: Synchronize
Notable Moves:
Helping Hand (Starting)
Bite (LV. 30 as Eevee or Move Relearner)
Confuse Ray (LV. 30)
Faint Attack (LV. 36)
Moonlight (LV. 52)
Toxic (TM06)
Sunny Day (TM11)
Taunt (TM12)
Protect (TM17)
Rain Dance (TM18)
Substitute (Tutor)
Body Slam (Tutor)
% of Game Remaining After Being Obtained: 100%
% of Game Remaining After Being Evolved: 99.36%
Offensive Efficiency: 0.6376
Potential in an All Shadow Pokémon Playthrough: Moderate
Potential in the Orre Colosseum: Moderate
Set for All Shadow Pokémon Playthrough
Held Item: Leftovers
Move 1: Helping Hand
Move 2: Moonlight
Move 3: Body Slam
Move 4: Faint Attack / Bite
Umbreon is an effective Pokémon for just about any team in Pokémon XD, but it is inefficient to use due to its mediocre Speed, low offenses, and lack of strong attacks. Umbreon is, however, notable for being virtually impossible for the AI to KO, especially once it learns Moonlight. Throughout a playthrough Umbreon finds most of its utility in paralyzing Shadow Pokémon with Body Slam, chipping away at them with its relatively weak attacking moves, and sponging Shadow moves during snag attempts. Umbreon is a great team choice for players who want a reliable starter and aren't in a rush to speed through the game.
Ursaring
Obtained as: Teddiursa at LV. 11
Location: Pokémon HQ Lab
Evolution Requirements: LV. 30
Stats: 90 HP / 130 ATK / 75 DEF / 75 SPA / 75 SPD / 55 SPE
Ability: Guts
Notable Moves:
Return (Starting)
Lick (Starting)
Focus Punch (TM01)
Bulk Up (TM08)
Hidden Power (TM10)
Sunny Day (TM11)
Hyper Beam (TM15)
Protect (TM17)
Rain Dance (TM18)
Earthquake (TM26)
Brick Break (TM31)
Rock Tomb (TM39)
Aerial Ace (TM40)
Facade (TM42)
Substitute (Tutor)
Body Slam (Tutor)
Double Edge (Tutor)
% of Game Remaining After Being Obtained: 99.36%
% of Game Remaining After Being Evolved: 60.43%
Offensive Efficiency: 0.7534
Potential in an All Shadow Pokémon Playthrough: Very High
Potential in the Orre Colosseum: Moderate
Set for All Shadow Pokémon Playthrough
Held Item: Silk Scarf / Leftovers
Move 1: Protect / Bulk Up
Move 2: Hidden Power / Lick / Hyper Beam
Move 3: Brick Break / Earthquake
Move 4: Return / Body Slam
Despite its low Speed, Ursaring is one of the most offensively efficient Pokémon in the entire game. It's the first Shadow Pokémon obtained, has immense base 130 Attack, and has a powerful STAB move in Return. Brick Break or Earthquake allows Ursaring to bypass Rock- and Steel-types too, making the uncommon Ghost-types the only opposing Pokémon it might ever struggle to KO. Lick is a great move for dealing weak damage to Shadow Pokémon with a good rate of paralysis, and Ursaring can also run moves such as Bulk Up or Hyper Beam to ensure even the strongest of Pokémon are KOed by its attacks. If you are looking for an efficient and easy-to-use physical attacker, Ursaring is the best one around.
Ledian
Obtained as: Ledyba at LV. 10
Location: Gateon Port
Evolution Requirements: LV. 18
Stats: 55 HP / 35 ATK / 50 DEF / 55 SPA / 110 SPD / 85 SPE
Ability: Swarm / Early Bird
Notable Moves:
Aerial Ace (Starting)
Psybeam (Starting)
Light Screen (LV. 24)
Reflect (LV. 24)
Hidden Power (TM10)
Sunny Day (TM11)
Protect (TM17)
Giga Drain (TM19)
Solarbeam (TM22)
Substitute (Tutor)
% of Game Remaining After Being Obtained: 98.30%
% of Game Remaining After Being Evolved: 88.30%
Offensive Efficiency: 0.5687
Potential in an All Shadow Pokémon Playthrough: Low
Potential in the Orre Colosseum: Low
Set for All Shadow Pokémon Playthrough
Held Item: Sharp Beak
Move 1: Light Screen / Sunny Day
Move 2: Reflect / Sunny Day
Move 3: Psybeam / Giga Drain
Move 4: Aerial Ace
Ledian is a contender for being the worst Pokémon in all of Pokémon XD. Both of its STAB types are physical and are fired off a horrible base 35 Attack stat. It learns no usable Bug-type STAB attacks at all, and its best Flying-type attack, Aerial Ace, only has 60 Base Power. Ledian also has a defensive typing with many weaknesses and doesn't actually have many support moves except for screens and Sunny Day, which require TMs. The only reason to use Ledian is for a challenge run.
Mightyena
Obtained as: Poochyena at LV. 10
Location: Gateon Port
Evolution Requirements: LV. 18
Stats: 70 HP / 90 ATK / 70 DEF / 60 SPA / 60 SPD / 70 SPE
Ability: Intimidate
Notable Moves:
Heal Bell (Starting)
Poison Fang (Starting)
Bite (LV. 13)
Crunch (LV. 47)
Hidden Power (TM10)
Hyper Beam (TM15)
Protect (TM17)
Iron Tail (TM23)
Shadow Ball (TM30)
Substitute (Tutor)
Body Slam (Tutor)
Double-Edge (Tutor)
% of Game Remaining After Being Obtained: 98.30%
% of Game Remaining After Being Evolved: 95.00%
Offensive Efficiency: 0.5990
Potential in an All Shadow Pokémon Playthrough: Low
Potential in the Orre Colosseum: Low
Set for All Shadow Pokémon Playthrough
Held Item: Blackglasses
Move 1: Protect / Heal Bell
Move 2: Iron Tail / Poison Fang
Move 3: Body Slam / Hyper Beam
Move 4: Crunch
Mightyena isn't a much better choice than Ledian, since it's a weak physical attacker that is a Dark-type. Its few notable physical attacks such as Iron Tail and Body Slam require a TM and the move tutor, respectively. Intimidate is a fantastic ability, but Mightyena is so mediocre otherwise there isn't a way to capitalize on what should be a great asset. Heal Bell is also notable, but, again, Mightyena's low bulk and Speed make it hard to be excited about such a rare support move. Houndoom is available just as early, also fills a team's dog quota, and is better at running the game in every conceivable way. Only use this Pokémon for challenge runs.
Houndoom
Obtained as: Houndour at LV. 17
Location: Cipher Lab
Evolution Requirements: LV. 24
Stats: 75 HP / 90 ATK / 50 DEF / 110 SPA / 80 SPD / 95 SPE
Ability: Flash Fire
Notable Moves:
Faint Attack (Starting)
Ember (Starting)
Bite (LV. 27)
Flamethrower (LV. 51)
Crunch (LV. 59)
Hidden Power (TM10)
Sunny Day (TM11)
Protect (TM17)
Solarbeam (TM22)
Fire Blast (TM28)
Overheat (TM50)
Substitute (Tutor)
Dream Eater (Tutor)
% of Game Remaining After Being Obtained: 95.00%
% of Game Remaining After Being Evolved: 79.68%
Offensive Efficiency: 0.7650
Potential in an All Shadow Pokémon Playthrough: Very High
Potential in the Orre Colosseum: High
Set for All Shadow Pokémon Playthrough
Held Item: Charcoal
Move 1: Hidden Power / Protect
Move 2: Crunch / Bite
Move 3: Fire Blast / Solarbeam
Move 4: Flamethrower
Houndoom sports among the highest Special Attack and Speed stats available early in the game. Coupled with powerful STAB attacks, it is one of the most offensively efficient Pokémon available and should be the first consideration for any team's Fire- or Dark-type Pokémon. Houndoom evolves early and also can be taught Fire Blast via TM after defeating Exol. With all these strengths, Houndoom's only notable weaknesses are that it relies on sun support to have a strong coverage move in Solarbeam and that Crunch is not obtained until LV. 59, which requires extensive grinding for an equally leveled team of six Pokémon. Aside from these minor points, Houndoom makes for one of the best Pokémon for completing the game, largely in part due to fast and powerful Fire-type attacks that never stop being useful.
Set for Orre Colosseum
Held Item: White Herb
EVs: 4 HP / 252 SpA / 252 Spe
Nature: Timid
Move 1: Protect / Substitute
Move 2: Crunch
Move 3: Flamethrower
Move 4: Overheat
Houndoom isn't quite as notable in the Orre Colosseum as it is for completing the game, but it does have the Speed and Special Attack to viably function as an Overheat user. Houndoom is in competition with Arcanine, Moltres, and Typhlosion for this role, with its most notable advantages being that it has STAB coverage in Crunch and is fairly easy to acquire and reset for. Protect or Substitute is important to prevent Houndoom from being easily picked off by faster attackers or Earthquakes. Crunch hits the fairly common Psychic-types in the Colosseum for great damage and deals respectable chip to most Pokémon that resist Fire. Flamethrower is used for reliable accuracy and for picking off targets without using one of Houndoom's two strong Overheats per battle.
Walrein
Obtained as: Spheal at LV. 17
Location: Cipher Lab
Evolution Requirements: LV. 44
Stats: 110 HP / 80 ATK / 90 DEF / 95 SPA / 90 SPD / 65 SPE
Ability: Thick Fat
Notable Moves:
Aurora Beam (Starting)
Water Gun (Starting)
Body Slam (LV. 19)
Hail (LV. 31)
Blizzard (LV. 50)
Sheer Cold (LV. 61)
Water Pulse (TM03)
Hidden Power (TM10)
Ice Beam (TM13)
Hyper Beam (TM15)
Protect (TM17)
Rain Dance (TM18)
Iron Tail (TM23)
Earthquake (TM26)
Rock Tomb (TM39)
Icy Wind (Tutor)
Double-Edge (Tutor)
% of Game Remaining After Being Obtained: 95.00%
% of Game Remaining After Being Evolved: 23.56%
Offensive Efficiency: 0.6385
Potential in an All Shadow Pokémon Playthrough: High
Potential in the Orre Colosseum: Moderate
Set for All Shadow Pokémon Playthrough
Held Item: Leftovers / Shell Bell
Move 1: Hidden Power / Protect
Move 2: Water Pulse / Icy Wind
Move 3: Body Slam
Move 4: Ice Beam
With fairly solid offenses, high bulk, and STAB Ice-type attacks, Walrein finds itself as one of the most notable Water-types in the entire game. Although it evolves at a high level, it's obtained early and easily and can reach its final evolution without extensive grinding before the end of Cipher Key Lair. Walrein benefits from also learning a variety of physical coverage moves in addition to its STAB Water- and Ice-type attacks, with the most notable being Body Slam at only LV. 19. Overall Walrein is a Water-type that a team grows into, whereas many of the others feel that their usefulness begins to ebb near the end of the game or are only available until right before the final battle.
Claydol
Obtained as: Baltoy at LV. 17
Location: Shadow Pokémon Lab
Evolution Requirements: LV. 36
Stats: 60 HP / 70 ATK / 105 DEF / 70 SPA / 120 SPD / 75 SPE
Ability: Levitate
Notable Moves:
Rock Tomb (Starting)
Psybeam (Starting)
Selfdestruct (LV. 19)
Ancientpower (LV. 25)
Hyper Beam (LV. 36 or TM15)
Explosion (LV. 55)
Hidden Power (TM10)
Sunny Day (TM11)
Ice Beam (TM13)
Protect (TM17)
Rain Dance (TM18)
Solarbeam (TM22)
Earthquake (TM26)
Psychic (TM29)
Shadow Ball (TM30)
Dream Eater (Tutor)
Double-Edge (Tutor)
% of Game Remaining After Being Obtained: 95.00%
% of Game Remaining After Being Evolved: 37.13%
Offensive Efficiency: 0.6145
Potential in an All Shadow Pokémon Playthrough: Moderate
Potential in the Orre Colosseum: Moderate
Set for All Shadow Pokémon Playthrough
Held Item: Twistedspoon
Move 1: Ancientpower / Sunny Day / Rain Dance
Move 2: Ice Beam
Move 3: Psychic
Move 4: Earthquake / Hyper Beam
Despite its mediocre offensive efficiency, Claydol remains a solid and enjoyable Pokémon to add to a team. Levitate is a fantastic ability, and big moves such as STAB Earthquake, Explosion, STAB Psychic, Ice Beam, and Ancientpower are exciting additions. Claydol also learns Sunny Day and Rain Dance, which makes it a unique Pokémon to pair with weather-oriented teams. Aside from its low Speed and mediocre offensive stats, Claydol is unfortunately also a bit of an investment to train up to LV. 36 for its evolution. Although its bulk is solid, many other Pokémon have the defensive typing and raw stats to prove far more difficult for the AI to KO, further limiting Claydol's desirability.
Ampharos
Obtained as: Mareep at LV. 17
Location: Cipher Lab
Evolution Requirements: LV. 30
Stats: 90 HP / 75 ATK / 85 DEF / SPA 115 / 90 SPD / SPE 55
Ability: Static
Notable Moves:
Heal Bell (Starting)
Body Slam (Starting)
Thunder Wave (Starting)
Thundershock (Starting)
Thunderpunch (LV. 30)
Thunder (LV. 57. or TM25)
Focus Punch (TM01)
Hidden Power (TM10)
Protect (TM17)
Rain Dance (TM18)
Thunderbolt (TM24)
Seismic Toss (Tutor)
% of Game Remaining After Being Obtained: 95.00%
% of Game Remaining After Being Evolved: 60.00%
Offensive Efficiency: 0.6830
Potential in an All Shadow Pokémon Playthrough: High
Potential in the Orre Colosseum: Low
Set for All Shadow Pokémon Playthrough
Held Item: Magnet
Move 1: Hidden Power / Protect
Move 2: Thunder Wave
Move 3: Seismic Toss / Thunder
Move 4: Thunderbolt
Ampharos is one of the most effective and obvious choices for an Electric-type if deciding to use an Eeveelution not named Jolteon. Although its Speed isn't great, it has a powerful Special Attack and early access to Thunder Wave. As a bulky Electric-type, Ampharos is virtually impossible for the AI to KO in a single attack without using a powerful Earthquake. Like Jolteon and many other Electric-types available, Ampharos does unfortunately lack coverage moves, having to rely on Hidden Power, Focus Punch, or teammates for tackling Ground- and opposing Electric-types. Ampharos can at least focus on running support moves such as Protect, Thunder Wave, and Seismic Toss, making it a great asset for snagging Shadow Pokémon.
Swalot
Obtained as: Gulpin at LV. 17
Location: Cipher Lab
Evolution Requirements: LV. 26
Stats: 100 HP / 73 ATK / 83 DEF / 73 SPA / 83 SPD / 55 SPE
Ability: Liquid Ooze / Sticky Hold
Notable Moves:
Shock Wave (Starting)
Sing (Starting)
Sludge (Starting)
Toxic (Starting)
Yawn (Starting)
Body Slam (LV. 26 or Tutor)
Sludge Bomb (LV. 48)
Water Pulse (TM03)
Hidden Power (TM10)
Ice Beam (TM13)
Hyper Beam (TM15)
Protect (TM17)
Giga Drain (TM19)
Solarbeam (TM22)
Shadow Ball (TM30)
Dream Eater (Tutor)
Double-Edge (Tutor)
Selfdestruct (Tutor)
% of Game Remaining After Being Obtained: 95.00%
% of Game Remaining After Being Evolved: 66.81%
Offensive Efficiency: 0.5641
Potential in an All Shadow Pokémon Playthrough: Moderate
Potential in the Orre Colosseum: Low
Set for All Shadow Pokémon Playthrough
Held Item: Leftovers / Poison Barb
Move 1: Sing / Yawn
Move 2: Body Slam / Protect
Move 3: Shadow Ball / Ice Beam / Giga Drain
Move 4: Sludge Bomb
Despite its unexciting Poison typing and low Speed, Swalot is a surprisingly potent and effective Pokémon for completing the game. It learns two moves that induce sleep, learns Body Slam without using the tutor, and has many interesting coverage options, including Shock Wave, Water Pulse, Ice Beam, Giga Drain, and Shadow Ball. Swalot also evolves early, making for a Pokémon with very high comparable bulk that tosses around strong moves. Its usefulness ebbs later into the game, but it still maintains enough bulk with status moves to be very useful for capturing Shadow Pokémon.
Shiftry
Obtained as: Seedot at LV. 17
Location: Cipher Lab
Evolution Requirements: Leaf Stone
Stats: 90 HP / 100 ATK / 60 DEF / 90 SPA / 60 SPD / 80 SPE
Ability: Chlorophyll / Early Bird
Notable Moves:
Giga Drain (Starting)
Nature Power (LV. 13)
Synthesis (LV. 21 Seedot)
Sunny Day (LV. 31 Seedot or TM11)
Explosion (LV. 43 Seedot)
Fake Out (LV. 19 Nuzleaf)
Faint Attack (LV. 31 Nuzleaf)
Extrasensory (LV. 49 Nuzleaf)
Hidden Power (TM10)
Hyper Beam (TM15)
Protect (TM17)
Solarbeam (TM22)
Shadow Ball (TM30)
Brick Break (TM31)
Rock Tomb (TM39)
Aerial Ace (TM40)
Substitute (Tutor)
Body Slam (Tutor)
Double-Edge (Tutor)
Selfdestruct (Tutor)
% of Game Remaining After Being Obtained: 95.00%
% of Game Remaining After Being Evolved: 95.00%
Offensive Efficiency: 0.6744
Potential in an All Shadow Pokémon Playthrough: High
Potential in the Orre Colosseum: Moderate
Set for All Shadow Pokémon Playthrough
Held Item: Miracle Seed
Move 1: Fake Out / Sunny Day
Move 2: Body Slam / Brick Break
Move 3: Shadow Ball / Faint Attack
Move 4: Giga Drain / Solarbeam
Shiftry is the first available Grass-type in the game and even starts off with Giga Drain. It has solid mixed offenses and a decent Speed stat, allowing it to function fairly well as a fast mixed attacker for running the game. Naturally Shiftry works well for sun squads thanks to Chlorophyll and access to Sunny Day without a TM, along with a unique edge with Fake Out and fairly strong physical attacks such as Shadow Ball, Body Slam, and Brick Break. Its greatest weakness is that it's in competition with Breloom, a much stronger physical attacker with Grass-type STAB that also happens to be snagged in the Shadow Pokémon Lab.
Ariados
Obtained as: Spinarak at LV. 14
Location: Cipher Lab
Evolution Requirements: LV. 22
Stats: 70 HP / 90 ATK / 70 DEF / 60 SPA / 70 SPD / 40 SPE
Ability: Swarm / Insomnia
Notable Moves:
Signal Beam (Starting)
Night Shade (Starting)
Agility (LV. 53)
Hidden Power (TM10)
Hyper Beam (TM15)
Protect (TM17)
Body Slam (Tutor)
Double-Edge (Tutor)
% of Game Remaining After Being Obtained: 92.13%
% of Game Remaining After Being Evolved: 87.98%
Offensive Efficiency: 0.6356
Potential in an All Shadow Pokémon Playthrough: Low
Potential in the Orre Colosseum: Low
Set for All Shadow Pokémon Playthrough
Held Item: Silver Powder
Move 1: Protect / Agility
Move 2: Night Shade
Move 3: Body Slam / Hidden Power
Move 4: Signal Beam
Despite a fair Attack stat, early availability, and a few interesting moves to play around with, Ariados is not a notable Pokémon to utilize on a team. Its low Speed and large number of weaknesses make justifying its use difficult, especially later into the game. Ariados does at least have some utility in doing well versus Shadow Pokémon thanks to Night Shade, but its only good option for status requires Body Slam from the move tutor. Overall, Ariados should only be used for challenge runs.
Camerupt
Obtained as: Numel at LV. 14
Location: Cipher Lab
Evolution Requirements: LV. 33
Stats: 70 HP / 100 ATK / 70 DEF / 105 SPA / 75 SPD / 40 SPE
Ability: Magma Armor
Notable Moves:
Ember (Starting)
Magnitude (LV. 19)
Rock Slide (LV. 33)
Earthquake (LV. 37 or TM26)
Eruption (LV. 45)
Fissure (LV. 55)
Hidden Power (TM10)
Sunny Day (TM11)
Hyper Beam (TM15)
Protect (TM17)
Flamethrower (TM35)
Fire Blast (TM38)
Tock Tomb (TM39)
Overheat (TM50)
Body Slam (Tutor)
Double-Edge (Tutor)
Selfdestruct (Tutor)
% of Game Remaining After Being Obtained: 91.81%
% of Game Remaining After Being Evolved: 52.77%
Offensive Efficiency: 0.6500
Potential in an All Shadow Pokémon Playthrough: High
Potential in the Orre Colosseum: Low
Set for All Shadow Pokémon Playthrough
Held Item: Charcoal / Soft Sand / Quick Claw
Move 1: Protect / Body Slam
Move 2: Rock Slide / Body Slam
Move 3: Fire Blast / Flamethrower / Eruption
Move 4: Earthquake
With strong base 100 Attack, 105 Special Attack, and access to powerful moves such as Earthquake, Eruption, and Rock Slide, Camerupt is a slow but powerful addition to a team. Ground and Fire are among the most effective offensive types and allow Camerupt to deal major damage in nearly all matchups. Camerupt is also one of only a few Pokémon to learn Earthquake without requiring TM26 and is the first obtainable Pokémon to do so. Because of Camerupt's low Speed and high vulnerability to Water-type moves, it is especially important to pair it with fast Electric- or Grass-types. Pokémon with Ground immunities, especially ones with high Speed or Electric- or Grass-type moves, also synergize well, as they make it easier for Camerupt to safely utilize Earthquake.
Sharpedo
Obtained as: Carvanha at LV. 15
Location: Cipher Lab
Evolution Requirements: LV. 30
Stats: 70 HP / 120 ATK / 40 DEF / 95 SPA / 40 SPD / 95 SPE
Ability: Rough Skin
Notable Moves:
Water Pulse (Starting)
Bite (Starting)
Crunch (LV. 22)
Slash (LV. 33)
Skull Bash (LV. 48)
Hidden Power (TM10)
Ice Beam (TM13)
Blizzard (TM14)
Hyper Beam (TM15)
Protect (TM17)
Rain Dance (TM18)
Earthquake (TM26)
Rock Tomb (TM39)
Icy Wind (Tutor)
Double-Edge (Tutor)
% of Game Remaining After Being Obtained: 89.57%
% of Game Remaining After Being Evolved: 60.00%
Offensive Efficiency: 0.6689
Potential in an All Shadow Pokémon Playthrough: Moderate
Potential in the Orre Colosseum: Moderate
Set for All Shadow Pokémon Playthrough
Held Item: Blackglasses / Mystic Water
Move 1: Protect / Ice Beam
Move 2: Hidden Power / Earthquake
Move 3: Water Pulse
Move 4: Crunch
Sharpedo has appealing base offenses of 120 Attack, 95 Special Attack, and 95 Speed, but unfortunately it lacks the STAB types and movepool to fully utilize them. Instead of primarily utilizing its higher Attack stat, Sharpedo is mostly restricted to clicking the Water Pulse and Crunch with their already somewhat poor Base Power on its lower Special Attack stat. Sharpedo doesn't have many appealing physical moves, and the few it does learn like Earthquake and Double-Edge require TMs or Tutors. Despite these shortcomings, Sharpedo remains a somewhat effective offensive Pokémon, albeit a very fragile one.
Breloom
Obtained as: Shroomish at LV. 15
Location: Cipher Lab
Evolution Requirements: LV. 23
Stats: 60 HP / 130 ATK / 80 DEF / 60 SPA / 60 SPD / 70 SPE
Ability: Effect Spore
Notable Moves:
False Swipe (Starting)
Mega Drain (Starting)
Stun Spore (Starting)
Leech Seed (Starting)
Headbutt (LV. 22)
Giga Drain (LV. 45 as Shroomish or TM19)
Spore (LV. 54 as Shroomish)
Mach Punch (LV. 23)
Sky Uppercut (LV. 36)
Mind Reader (LV. 45)
Dynamicpunch (LV. 54)
Focus Punch (TM01)
Bulk Up (TM08)
Hidden Power (TM10)
Sunny Day (TM11)
Hyper Beam (TM15)
Protect (TM17)
Solarbeam (TM22)
Iron Tail (TM23)
Brick Break (TM31)
Seismic Toss (Tutor)
Substitute (Tutor)
Body Slam (Tutor)
Double-Edge (Tutor)
% of Game Remaining After Being Obtained: 88.94%
% of Game Remaining After Being Evolved: 87.98%
Offensive Efficiency: 0.6571
Potential in an All Shadow Pokémon Playthrough: Very High
Potential in the Orre Colosseum: Moderate
Set for All Shadow Pokémon Playthrough
Held Item: Black Belt / Miracle Seed
Move 1: False Swipe / Seismic Toss / Focus Punch
Move 2: Stun Spore / Body Slam / Mach Punch
Move 3: Giga Drain / Solarbeam
Move 4: Sky Uppercut
Breloom is among one of the most powerful and effective Pokémon to utilize due to its powerful base 130 Attack stat, unique Grass / Fighting typing, workable base 70 Speed stat with an optional priority move, status movepool, and early availability. Because of these strengths, Breloom is great Pokémon to utilize on just about any team, matching up well against both Pokémon to be KOed and Pokémon to be snagged, especially against many of the game's major bosses. Perhaps Breloom's only true weakness is that its defensive typing leaves it susceptible to many different types of attacks, but nevertheless Breloom has the tools to often circumvent these issues before even being struck. Unfortunately when it comes to the Orre Colosseum, its comparatively low Speed and common weaknesses are felt much harder, making it a difficult Pokémon to utilize there.
Delcatty
Obtained as: Delcatty at LV. 18
Location: Cipher Lab
Evolution Requirements: None
Stats: 70 HP / 65 ATK / 65 DEF / 55 SPA / 55 SPD / 90 SPE
Ability: Cute Charm
Notable Moves:
Secret Power (Starting)
Attract (Starting)
Shock Wave (Starting)
Sing (Starting)
Calm Mind (TM03)
Hidden Power (TM10)
Sunny Day (TM11)
Ice Beam (TM13)
Blizzard (TM14)
Hyper Beam (TM15)
Protect (TM17)
Rain Dance (TM18)
Solarbeam (TM22)
Iron Tail (TM23)
Thunderbolt (TM24)
Thunder (TM25)
Shadow Ball (TM30)
Thunder Wave (Tutor)
Icy Wind (Tutor)
Dream Eater (Tutor)
Body Slam (Tutor)
Double-Edge (Tutor)
% of Game Remaining After Being Obtained: 87.98%
% of Game Remaining After Being Evolved: 87.98%
Offensive Efficiency: 0.6748
Potential in an All Shadow Pokémon Playthrough: Low
Potential in the Orre Colosseum: Low
Set for All Shadow Pokémon Playthrough
Held Item: Silk Scarf / Leftovers
Move 1: Protect / Sunny Day / Rain Dance
Move 2: Sing
Move 3: Thunder Wave / Solarbeam / Thunder
Move 4: Body Slam / Double-Edge / Hyper Beam
Delcatty is not a very notable Pokémon to utilize on a team. Its base stats are not conducive to an offensive or defensive role, and its Normal typing doesn't inspire much for utilizing its wide offensive movepool. Delcatty can provide some forms of team support through the use of weather or status. Sing is highly effective for the snagging of Shadow Pokémon but has irritatingly low accuracy. All of Delcatty's best STAB moves require the move tutor or a TM, as do its other notable moves beyond Sing. As a result, Delcatty should not be considered for a playthough except as part of a challenge run.
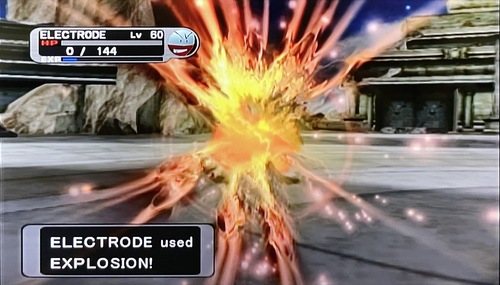
Electrode
Obtained as: Voltorb at LV. 19
Location: Cave Poké Spot
Evolution Requirements: LV. 30
Stats: 60 HP / 50 ATK / 70 DEF / 80 SPA / 80 SPD / 150 SPE
Ability: Soundproof / Static
Notable Moves:
Mirror Coat (Starting)
Spark (Starting)
Selfdestruct (LV. 27)
Light Screen (LV. 41 or TM16)
Explosion (LV. 54)
Hidden Power (TM10)
Protect (TM17)
Rain Dance (TM18)
Thunderbolt (TM24)
Thunder (TM25)
Thunder Wave (Tutor)
Substitute (Tutor)
% of Game Remaining After Being Obtained: 80.80%
% of Game Remaining After Being Evolved: 60.00%
Offensive Efficiency: 0.7331
Potential in an All Shadow Pokémon Playthrough: High
Potential in the Orre Colosseum: High
Set for All Shadow Pokémon Playthrough
Held Item: Magnet
Move 1: Protect / Rain Dance
Move 2: Thunder Wave
Move 3: Hidden Power / Rain Dance
Move 4: Thunderbolt / Thunder
Electrode is the fastest Pokémon available in Pokémon XD. It functions similarly to Jolteon in a playthrough, but with more speed and less power. Like many of the early Electric-types, Electrode lacks good coverage moves and must run Hidden Power or rely on teammates to hit Ground-types. Thunder Wave and Rain Dance are not learned via level-up but remain great ways to support the snagging of Pokémon, take on Water-types, or even set up its own use of Thunder. Overall Electrode is a great alternative to Jolteon if you want to use a different Eeveelution while still utilizing an Electric-type with high Speed.
Set for Orre Colosseum
Held Item: Liechi Berry
EVs: 4 HP / 252 Atk / 252 Spe
Nature: Naughty
Move 1: Substitute
Move 2: Hidden Power / Rain Dance
Move 3: Thunderbolt / Thunder
Move 4: Explosion
In the Orre Colosseum Electrode excels with its incredible Speed combined with Explosion. Very few Pokémon are capable of stopping Electrode from Exploding, and when combined with Substitute and a Liechi Berry Electrode becomes especially effective for early two-for-one Pokémon trades against the AI, or even to set up other pinch Berry users like Hitmonchan. Fast Thunderbolt can even be helpful in its own right for picking off weakened targets, as can a favorable Hidden Power type such as Ice or Grass. Electrode can even be used to quickly set rain; it's just unfortunate there are no Pokémon exclusive to XD to fully take advantage of rain support.
Sandslash
Obtained as: Sandshrew at LV. 10 to LV. 25
Location: Rock Poké Spot
Evolution Requirements: LV. 22
Stats: 75 HP / 100 ATK / 110 DEF / 45 SPA / 55 SPD / 65 SPE
Ability: Sand Veil
Notable Moves:
Slash (LV. 24)
Focus Punch (TM01)
Hidden Power (TM10)
Sunny Day (TM11)
Hyper Beam (TM15)
Protect (TM17)
Iron Tail (TM23)
Earthquake (TM26)
Brick Break (TM31)
Sandstorm (TM37)
Rock Tomb (TM39)
Seismic Toss (Tutor)
Substitute (Tutor)
Body Slam (Tutor)
Double-Edge (Tutor)
% of Game Remaining After Being Obtained: 80.80%
% of Game Remaining After Being Evolved: 80.80%
Offensive Efficiency: 0.6704
Potential in an All Shadow Pokémon Playthrough: Low
Potential in the Orre Colosseum: Moderate
Set for All Shadow Pokémon Playthrough
Held Item: Soft Sand
Move 1: Hidden Power / Protect
Move 2: Seismic Toss / Brick Break
Move 3: Body Slam
Move 4: Earthquake
Sandslash looks like it would be a fun Pokémon to add to a team, but in practice its fair Attack stat, solid physical bulk, and pure Ground typing are undermined by a horrible levelup movepool reliant on TMs and tutors, including its STAB Earthquake. Because of this, Donphan ends up being both a more practical and a stronger Ground-type to utilize. Just about the only edges Sandslash does have over Donphan are a slightly better Speed stat and Sand Veil, but neither of these justifies its use over Donphan, let alone other Ground-types available.
Gligar
Obtained as: Gligar at LV. 10 to LV. 25
Location: Rock Poké Spot
Evolution Requirements: None
Stats: 65 HP / 75 ATK / 105 DEF / 35 SPA / 65 SPD / 85 SPE
Ability: Hyper Cutter / Sand Veil
Notable Moves:
Quick Attack (LV. 20)
Faint Attack (LV. 28)
Slash (LV. 36)
Guillotine (LV. 52)
Hidden Power (TM10)
Sunny Day (TM11)
Protect (TM17)
Rain Dance (TM18)
Iron Tail (TM23)
Earthquake (TM26)
Sandstorm (TM37)
Rock Tomb (TM39)
Substitute (Tutor)
Dream Eater (Tutor)
Double-Edge (Tutor)
% of Game Remaining After Being Obtained: 80.80%
% of Game Remaining After Being Evolved: 80.80%
Offensive Efficiency: 0.6266
Potential in an All Shadow Pokémon Playthrough: Low
Potential in the Orre Colosseum: Moderate
Set for All Shadow Pokémon Playthrough
Held Item: Soft Sand
Move 1: Hidden Power / Protect
Move 2: Hidden Power / Rock Tomb
Move 3: Double-Edge / Iron Tail
Move 4: Earthquake
Gligar's excellent typing and defensive utility are undermined by a weak Attack stat and vulnerability to Ice- and Water-type attacks. Its potential saving grace of being an Earthquake user that is also immune to Earthquake is also lost by being reliant on the Earthquake TM to get its only decent STAB attack. Overall Gligar's moveset is awkward to piece together, and it lacks the moves to provide support in any meaningful capacity. This is a Pokémon very few teams should bother to consider.
Flygon
Obtained as: Trapinch at LV. 10 to LV. 25
Location: Rock Poké Spot
Evolution Requirements: LV. 45
Stats: 80 HP / 100 ATK / 80 DEF / 80 SPA / 80 SPD / 100 SPE
Ability: Levitate
Notable Moves:
Bite (Starting)
Faint Attack (Starting)
Crunch (LV. 33)
Dragonbreath (LV. 35)
Hidden Power (TM10)
Sunny Day (TM11)
Hyper Beam (TM15)
Protect (TM17)
Giga Drain (TM19)
Solarbeam (TM22)
Iron Tail (TM23)
Earthquake (TM26)
Flamethrower (TM35)
Fire Blast (TM38)
Rock Tomb (TM39)
Substitue (Tutor)
Body Slam (Tutor)
Double-Edge (Tutor)
% of Game Remaining After Being Obtained: 80.80%
% of Game Remaining After Being Evolved: 22.13%
Offensive Efficiency: 0.6291
Potential in an All Shadow Pokémon Playthrough: High
Potential in the Orre Colosseum: High
Set for All Shadow Pokémon Playthrough
Held Item: Leftovers / Soft Sand
Move 1: Crunch / Hidden Power / Rock Tomb
Move 2: Flamethrower / Fire Blast
Move 3: Dragonbreath / Body Slam
Move 4: Earthquake
With good base 100 Speed, solid base 100 / 80 mixed offenses, an expansive movepool, unique Dragon / Ground typing, and even Levitate, Flygon is a unique and effective Pokémon to utilize in a playthrough. Between Dragon Breath and Body Slam, Flygon has ways to chip and paralyze Shadow Pokémon while also remaining a threat with STAB Earthquake and Fire-type coverage moves. Flygon's biggest weakness is that it can be difficult to encounter as Trapinch at the Rock Poké Spot, so the moment it's obtained is out of the hands of the player. Aside from this, vulnerability to Ice-type attacks and requiring the use of the Earthquake TM are also annoyances, but overall Flygon remains a strong and unique team choice that synergizes well with sun, sand, and Earthquake users alike.
Set for Orre Colosseum
Held Item: Soft Sand
EVs: 4 HP / 252 Atk / 252 Spe
Nature: Naive
Move 1: Protect / Sunny Day
Move 2: Flamethrower / Fire Blast
Move 3: Double-Edge / Rock Tomb / Solarbeam
Move 4: Earthquake
Flygon has just enough Speed along with the typing, STAB Earthquake, and invaluable Levitate to be worthwhile in the Orre Colosseum. Although Ice-type attacks are somewhat common and Flygon is highly vulnerable to them, it can otherwise be somewhat difficult for the AI to get quick KOs against. STAB Earthquake is the biggest offensive draw here, as is the Fire-type coverage when boosted in sun. Beyond these, Flygon's less-than-fantastic mixed offenses can certainly be felt in the Colosseum as compared to the main game. Overall Flygon is a good match for a sun team that needs some defensive and offensive variety, or even just to help round out a squad of fast attackers.
Jumpluff
Obtained as: Hoppip at LV. 10 to LV. 25
Location: Oasis Poké Spot
Evolution Requirements: LV. 27
Stats: 75 HP / 55 ATK / 70 DEF / 55 SPA / 95 SPD / 110 SPE
Ability: Chorophyll
Notable Moves:
Synthesis (Startinig)
Stun Spore (LV. 15)
Sleep Powder (LV. 17)
Leech Seed (LV. 25)
Mega Drain (LV. 44)
Hidden Power (TM10)
Sunny Day (TM11)
Protect (TM17)
Giga Drain (TM19)
Solarbeam (TM22)
Substitute (Tutor)
Double-Edge (Tutor)
% of Game Remaining After Being Obtained: 80.80%
% of Game Remaining After Being Evolved: 60.43%
Offensive Efficiency: 0.5340
Potential in an All Shadow Pokémon Playthrough: Very High
Potential in the Orre Colosseum: High
Set for All Shadow Pokémon Playthrough
Held Item: Miracle Seed / Leftovers
Move 1: Sunny Day / Synthesis / Protect
Move 2: Sleep Powder / Stun Spore
Move 3: Solarbeam / Hidden Power
Move 4: Giga Drain
The combination of high Speed, Chorophyll, and Sleep Powder surprisingly manages to make Jumpluff one of the best Pokémon available in Pokémon XD. In nearly all situations Jumpluff is capable of outspeeding and incapacitating any Pokémon that lacks a sleep immunity. Beyond this Jumpluff can also set sun for itself and teammates, recover health, or blast opponents with solid Grass-type STAB attacks. Jumpluff can even be used to spread paralysis instead of sleep if a more permanent status on Shadow Pokémon is desired. Jumpluff also pairs extremely well with one of the many powerful Fire-types available such as Houndoom, Flareon, and Arcanine.
Set for Orre Colosseum
Held Item: Leftovers
EVs: 4 HP / 252 SpA / 252 Spe
Nature: Timid
Move 1: Sunny Day / Substitute
Move 2: Sleep Powder
Move 3: Hidden Power / Leech Seed
Move 4: Solarbeam
In the Orre Colosseum Jumpluff functions fairly similarly, but with even more emphasis on utilizing its high Speed and Chorophyll. Solarbeam is needed to deal respectable damage to typical Water-, Ground-, and Rock-type targets. Hidden Power Fire pairs best with sun support and gives good complementary coverage, but other types such as Ice also have their uses in quickly picking off weakened targets. In the Orre Colosseum Jumpluff doesn't have much of a window to utilize Synthesis for recovery, but it can instead use Leftovers with Substitute and Leech Seed to increase longevity and capitalize on Sleep Powder. Because of these traits Jumpluff makes for a good Pokémon, just one reliant on sun support.
Donphan
Obtained as: Phanpy at LV. 10 to LV. 25
Location: Oasis Poké Spot
Evolution Requirements: LV. 25
Stats: 90 HP / 120 ATK / 120 DEF / 60 SPA / 60 SPD / 50 SPE
Ability: Sturdy
Notable Moves:
Defense Curl (Startnig)
Flail (LV. 17)
Rollout (LV. 33)
Earthquake (LV. 49 or TM26)
Hidden Power (TM10)
Sunny Day (TM11)
Hyper Beam (TM15)
Protect (TM17)
Iron Tail (TM23)
Rock Tomb (M39)
Body Slam (Tutor)
Double-Edge (Tutor)
% of Game Remaining After Being Obtained: 80.80%
% of Game Remaining After Being Evolved: 80.80%
Offensive Efficiency: 0.6992
Potential in an All Shadow Pokémon Playthrough: Moderate
Potential in the Orre Colosseum: Moderate
Set for All Shadow Pokémon Playthrough
Held Item: Leftovers / Soft Sand
Move 1: Protect / Hidden Power
Move 2: Body Slam / Double-Edge
Move 3: Rock Tomb / Hidden Power
Move 4: Earthquake
Donphan is a notable although fairly slow Ground-type. It has a strong base 120 Attack coupled with great base 90 HP and 120 Defense, but it finds itself threatened by fast special attackers. Donphan is one of only a few Ground-types to actually learn Earthquake without TM26, although unfortunately not until LV. 49. Most of its moveset isn't acquired until later in the game, which is also when Speed becomes a much more important stat. Regardless, Donphan is a fair Pokémon to utilize and offers any team a strong Earthquake user.
Masquerain
Obtained as: Surskit at LV. 10 to LV. 25
Location: Oasis Poké Spot
Evolution Requirements: LV. 22
Stats: 70 HP / 60 ATK / 62 DEF / 100 SPA / 82 SPD / 80 SPE
Ability: Intimidate
Notable Moves:
Bubblebeam (LV. 25 as Surskit)
Agility (LV. 31 as Surskit)
Haze (LV. 37 as Surskit)
Stun Spore (LV. 40)
Silverwind (LV. 47)
Whirlwind (LV. 53)
Water Pulse (TM03)
Hidden Power (TM10)
Sunny Day (TM11)
Ice Beam (TM13)
Blizzard (TM14)
Hyper Beam (TM15)
Protect (TM17)
Rain Dance (TM18)
Giga Drain (TM19)
Solarbeam (TM22)
Shadow Ball (TM30)
Icy Wind (Tutor)
Double-Edge (Tutor)
% of Game Remaining After Being Obtained: 80.80%
% of Game Remaining After Being Evolved: 80.80%
Offensive Efficiency: 0.5192
Potential in an All Shadow Pokémon Playthrough: Low
Potential in the Orre Colosseum: Low
Set for All Shadow Pokémon Playthrough
Held Item: Silverpowder
Move 1: Stun Spore / Shadow Ball
Move 2: Ice Beam / Icy Wind
Move 3: Hidden Power / Water Pulse / Giga Drain
Move 4: Silverwind
Masquerain has several unique quirks going for it, including the incredibly useful Intimidate, a Ground immunity, base 100 Special Attack and base 80 Speed, and several interesting coverage moves such as Ice Beam, Giga Drain, Shadow Ball, and Water Pulse. But even with all these traits going for it, Masquerain is undermined by its STAB attacks coming off a weak base 60 Attack stat, a 60 Base Power Bug-type STAB in Silverwind, no useable Flying-type STAB whatsoever, and a defensive typing with many common weaknesses. Also to consider is that Surskit can be a difficult Pokémon to obtain, as it's the rare encounter at Oasis Poké Spot.
Crobat
Obtained as: Zubat at LV. 10 to LV. 25
Location: Rock Poké Spot
Evolution Requirements: Friendship After LV. 22
Stats: 85 HP / 90 ATK / 80 DEF / 70 SPA / 80 SPD / 130 SPE
Ability: Inner Focus
Notable Moves:
Bite (LV. 16)
Wing Attack (LV. 21)
Air Cutter (LV. 35)
Poison Fang (LV. 49)
Haze (LV. 56)
Hidden Power (TM10)
Sunny Day (TM11)
Taunt (TM12)
Hyper Beam (TM15)
Protect (TM17)
Rain Dance (TM18)
Shadow Ball (TM30)
Double-Edge (Tutor)
% of Game Remaining After Being Obtained: 80.80%
% of Game Remaining After Being Evolved: 34.10%
Offensive Efficiency: 0.6509
Potential in an All Shadow Pokémon Playthrough: Moderate
Potential in the Orre Colosseum: High
Set for All Shadow Pokémon Playthrough
Held Item: Poison Barb / Sharp Beak
Move 1: Hidden Power / Double-Edge
Move 2: Shadow Ball
Move 3: Wing Attack / Air Cutter
Move 4: Poison Fang
With base 130 Speed Crobat is among the fastest Pokémon available in XD, and it even comes with a Ground-type immunity. Its base 90 Attack is solid, although it can sometimes feel underwhelming owing to its low-Base Power STAB moves in Poison Fang and Wing Attack. One of the larger hurdles to utilizing Crobat, however, is the friendship requirement for evolution, meaning that without substantial investment early on it can take as far as Citadark Isle before it evolves. Overall Crobat is an extremely fast, somewhat threatening physical attacker that otherwise lacks utility for snagging Shadow Pokémon.
Set for Orre Colosseum
Held Item: Poison Barb
EVs: 4 HP / 252 Atk / 252 Spe
Nature: Jolly
Move 1: Protect / Hyper Beam
Move 2: Shadow Ball
Move 3: Hidden Power / Aerial Ace
Move 4: Sludge Bomb
Crobat's absurd Speed allows it to find a niche in the Orre Colosseum as a fast physical attacker. Because of its poor STAB prospects from its levelup movepool, Crobat has to rely on the difficult-to-obtain TMs for Sludge Bomb and Aerial Ace or get lucky with a strong Hidden Power Flying. Shadow Ball makes for some lackluster coverage, and Hyper Beam is an option to try and boost up Crobat's ability to secure KOs against slower targets. Crobat functions well with other fast, albeit stronger attackers or as a support Pokémon to pick off weakened threats.
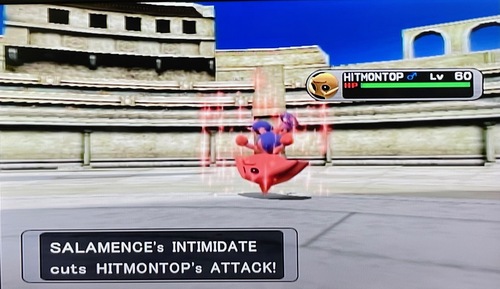
Aggron
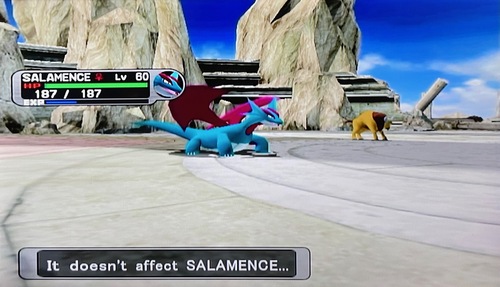
Obtained as: Aron at LV. 10 to LV. 25
Location: Rock Poké Spot
Evolution Requirements: LV. 42
Stats: 70 HP / 110 ATK / 180 DEF / 60 SPA / 60 SPD / 50 SPE
Ability: Sturdy / Rock Head
Notable Moves:
Headbutt (Starting)
Metal Claw (Starting)
Iron Defense (LV. 17)
Take Down (LV. 25)
Iron Tail (LV. 29 or TM23)
Protect (LV. 37 or TM17)
Focus Punch (TM01)
Hidden Power (TM10)
Sunny Day (TM11)
Ice Beam (TM13)
Blizzard (TM14)
Hyper Beam (TM15)
Rain Dance (TM18)
Solarbeam (TM22)
Thunderbolt (TM24)
Thunder (TM25)
Earthquake (TM26)
Brick Break (TM31)
Flamethrower (TM35)
Fire Blast (TM38)
Rock Tomb (TM39)
Thunder Wave (Tutor)
Seismic Toss (Tutor)
Icy Wind (Tutor)
Body Slam (Tutor)
Double-Edge (Tutor)
% of Game Remaining After Being Obtained: 80.80%
% of Game Remaining After Being Evolved: 25.96%
Offensive Efficiency: 0.5317
Potential in an All Shadow Pokémon Playthrough: High
Potential in the Orre Colosseum: Moderate
Set for All Shadow Pokémon Playthrough
Held Item: Leftovers / Metal Coat / Quick Claw
Move 1: Potect / Hidden Power / Thunder Wave
Move 2: Earthquake / Rock Tomb / Seismic Toss
Move 3: Body Slam / Double-Edge
Move 4: Iron Tail
With its big appearance, unique typing, and access to fun damaging and support moves like Earthquake, Iron Tail, Body Slam, Double-Edge, Seismic Toss, and Thunder Wave, Aggron is a slow but highly enjoyable Pokémon to add to a team that is able to get good KOs and effectively support snags. It has a great base 110 Attack with bulletproof physical bulk that is somewhat undermined by its 4x weaknesses to Fighting- and Ground-type attacks. Aggron has an expansive special movepool as well including Ice Beam, Solarbeam, Thunderbolt, and even Flamethrower, but without STAB and with only a base 60 Special Attack, they unfortunately aren't very practical to use. Aggron evolves at a fairly high level, but it still can be managed before the end of Cipher Key lair without extensive grinding.
Quagsire
Obtained as: Wooper at LV. 10 to LV. 25
Location: Rock Poké Spot
Evolution Requirements: LV. 20
Stats: 95 HP / 85 ATK / 85 DEF / 65 SPA / 65 SPD / 35 SPE
Ability: Damp / Water Absorb
Notable Moves:
Water Gun (Starting)
Mud Shot (LV. 16)
Amnesia (LV. 23)
Yawn (LV. 35)
Earthquake (LV. 42 or TM26)
Rain Dance (LV. 49 or TM18)
Haze (LV. 51 as Wooper)
Focus Punch (TM01)
Water Pulse (TM03)
Hidden Power (TM10)
Ice Beam (Tm 13)
Blizzard (TM14)
Hyper Beam (TM15)
Protect (TM17)
Iron Tail (TM23)
Brick Break (TM31)
Rock Tomb (TM39)
Seismic Toss (Tutor)
Body Slam (Tutor)
Double-Edge (Tutor)
% of Game Remaining After Being Obtained: 80.80%
% of Game Remaining After Being Evolved: 80.80%
Offensive Efficiency: 0.6120
Potential in an All Shadow Pokémon Playthrough: Moderate
Potential in the Orre Colosseum: Moderate
Set for All Shadow Pokémon Playthrough
Held Item: Leftovers / Soft Sand / Mystic Water
Move 1: Protect / Seismic Toss
Move 2: Ice Beam / Yawn
Move 3: Ice Beam / Water Pulse
Move 4: Earthquake
Quagsire has a fantastic defensive typing, but unfortunately it lacks the Special Attack and Water-type movepool to pose much of a threat as a Water-type. Instead Quagsire must largely rely on its base 85 Attack and STAB Earthquake learned at LV. 42, and Ice Beam to KO Ground-immune Pokémon. Quagsire does have good utility for snagging Shadow Pokémon thanks to Yawn and Seismic Toss, and it can also be fairly difficult for the AI to KO if they lack Grass-type attacks. Quagsire is also the last of the rare Pokémon encountered at Poké Spots, so it can be difficult to consistently obtain one.
Shuckle
Obtained as: Shuckle at LV. 20
Location: Pyrite Town
Evolution Requirements: None
Stats: 20 HP / 10 ATK / 230 DEF / 10 SPA / 230 SPD / 5 SPE
Ability: Sturdy
Notable Moves:
Toxic (Starting)
Substitute (Starting)
Sludge Bomb (Starting)
Encore (Starting)
Wrap (Starting)
Rest (LV. 37)
Sunny Day (TM11)
Protect (TM17)
Sandstorm (TM37)
Body Slam (Tutor)
% of Game Remaining After Being Obtained: 80.80%
% of Game Remaining After Being Evolved: 80.80%
Offensive Efficiency: 0.3550
Potential in an All Shadow Pokémon Playthrough: Low
Potential in the Orre Colosseum: Low
Set for All Shadow Pokémon Playthrough
Held Item: Leftovers
Move 1: Protect / Body Slam
Move 2: Toxic / Body Slam
Move 3: Rest
Move 4: Wrap
Shuckle's abysmal offensive stats make it completely impractical to use in a playthrough. Since it cannot KO anything without relying on the residual damage of Toxic, Wrap, or sand, it is absurdly slow at KOing the opposing Pokémon. It could potentially be used as an Exp sink to then wall strong Shadow Pokémon later, but it ends up being far less effective at this than bulky Shadow Pokémon, which resist Shadow moves rather than being weak to them. Shuckle should not be used on any serious team and is an intentional choice to make gameplay substantially slower.
Tyranitar
Obtained as: Larvitar at LV. 20
Location: Pyrite Town
Evolution Requirements: LV. 55
Stats: 100 HP / 134 ATK / 110 DEF / 95 SPA / 100 SPD / 61 SPE
Ability: Sand Stream
Notable Moves:
Dragon Dance (Starting)
Outrage (Starting)
Bite (Starting)
Rock Slide (LV. 22)
Crunch (LV. 47)
Earthquake (LV. 56 as Pupitar or TM26)
Focus Punch (TM01)
Hidden Power (TM10)
Ice Beam (TM13)
Blizzard (TM14)
Hyper Beam (TM15)
Protect (TM17)
Iron Tail (TM23)
Thunderbolt (TM24)
Thunder (TM25)
Brick Break (TM31)
Flamethrower (TM35)
Fire Blast (TM38)
Rock Tomb (TM39)
Thunder Wave (Tutor)
Seismic Toss (Tutor)
Body Slam (Tutor)
Double-Edge (Tutor)
% of Game Remaining After Being Obtained: 80.80%
% of Game Remaining After Being Evolved: 0.64%
Offensive Efficiency: 0.7636
Potential in an All Shadow Pokémon Playthrough: High
Potential in the Orre Colosseum: Very High
Set for All Shadow Pokémon Playthrough
Held Item: Leftovers / Shell Bell / Hard Stone
Move 1: Protect / Dragon Dance
Move 2: Crunch / Ice Beam
Move 3: Rock Slide
Move 4: Earthquake
Tyranitar is the most offensively potent team choice available in the entirety of Pokémon XD. It has a mighty base 134 Attack stat with a respectable base 95 Special Attack that allows it to function as the premier mixed attacker. Its movepool is expansive, encompassing the coveted Earthquake via levelup, STAB Rock Slide and Crunch, elemental special attacks such as Ice Beam, Thunderbolt, and Flamethrower, big-damage moves like Focus Punch, Hyper Beam, Iron Tail, and Double-Edge, and even a boosting move in Dragon Dance. Tyranitar is so lethal and effective at getting AI KOs that it can actually be too effective at threatening the late-game Shadow Pokémon, mostly owing to the residual damaged summoned by Sand Stream. The LV. 55 evolution requirement is the most daunting in the game and the main limitation on its use in a playthrough, requiring Tyranitar to surpass the levels of even the final boss; however, it can be reasonably accomplished prior to the start of the final gauntlet without extensive grinding. Tyranitar is as big and bad as Pokémon choices get in Pokémon XD and is an essential choice for sand teams, Earthquake teams, or those that just want to KO everything in their path.
Set for Orre Colosseum
Held Item: Leftovers / Shell Bell
EVs: 4 HP / 252 Atk / 252 Spe
Nature: Jolly
Move 1: Protect / Dragon Dance
Move 2: Double-Edge / Ice Beam
Move 3: Rock Slide
Move 4: Earthquake
Tyranitar's combination of powerful offenses, high bulk, and Sand Stream find it a valuable place in the Orre Colosseum. It has enough bulk to function as a viable Dragon Dance sweeper and can also be utilized with Protect to function as a more general sand setter and Earthquake user. With its powerful spread moves, Tyranitar functions fairly well with Shell Bell, allowing another Pokémon on the team to utilize Leftovers instead. Tyranitar's greatest weakness is its lacking immediate Speed, coupled with a high vulnerability to Fighting- and Ground-type attacks that invalidates its bulk. Because of this, Tyranitar needs to be paired with a Pokémon capable of quickly KOing Fighting- and Ground-types such as Starmie and generally appreciates any fast Pokémon that can draw the AI's attention.
Medicham
Obtained as: Meditite
Location: Pyrite Town
Evolution Requirements: LV. 37
Stats: 60 HP / 60 ATK / 75 DEF / 60 SPA / 75 SPD / 80 SPE
Ability: Pure Power
Notable Moves:
Dynamicpunch (Starting)
Shadow Ball (Starting)
Detect (Starting)
Hidden Power (Starting)
Fire Punch (Starting)
Ice Punch (Starting)
Thunderpunch (Starting)
Mind Reader (LV. 22)
Calm Mind (LV. 28)
Hi Jump Kick (LV. 32)
Reversal (LV. 46)
Recover (LV. 54)
Focus Punch (TM01)
Bulk Up (TM08)
Hyper Beam (TM15)
Protect (TM17)
Psychic (TM29)
Brick Break (TM31)
Rock Tomb (TM39)
Seismic Toss (Tutor)
Dream Eater (Tutor)
Body Slam (Tutor)
Double-Edge (Tutor)
% of Game Remaining After Being Obtained: 80.80%
% of Game Remaining After Being Evolved: 37.13%
Offensive Efficiency: 0.6778
Potential in an All Shadow Pokémon Playthrough: High
Potential in the Orre Colosseum: Moderate
Set for All Shadow Pokémon Playthrough
Held Item: Black Belt
Move 1: Detect / Hidden Power
Move 2: Psychic / Seismic Toss / Body Slam
Move 3: Shadow Ball
Move 4: Brick Break
Medicham is a fairly interesting mixed attacker with lackluster base offensive stats that are propped up by Pure Power. Most of its diverse movepool includes attacks such as Dynamic Punch, Fire Punch, Thunder Punch, Ice Punch, and Dream Eater that seem glamorous but in practice are done much better by other Pokémon and aren't much use on Medicham. STAB Brick Break with Shadow Ball on an effective base 120 Attack is notable, and Psychic and Hidden Power are used to round out its damage output further. Base 80 Speed is just enough to not feel too slow. Medicham can use snagging support moves like Seismic Toss and Body Slam as well.
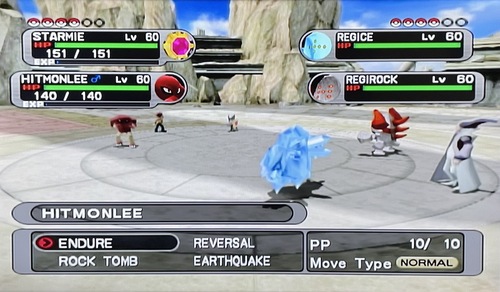
Hariyama
Obtained as: Makuhita at LV. 18
Location: Pyrite Town
Evolution Requirements: LV. 24
Stats: 144 HP / 120 ATK / 60 DEF / 40 SPA / 60 SPD / 50 SPE
Ability: Thick Fat / Guts
Notable Moves:
Brick Break (Starting)
Rock Tomb (Starting)
Fake Out (Starting)
Whirlwind (Starting)
Knock Off (LV. 29)
Belly Drum (LV. 40)
Endure (LV. 44)
Seismic Toss (LV. 51 or Tutor)
Reversal (LV. 55)
Focus Punch (TM01)
Bulk Up (TM08)
Hidden Power (TM10)
Hyper Beam (TM15)
Protect (TM17)
Earthquake (TM26)
Body Slam (Tutor)
Double-Edge (Tutor)
% of Game Remaining After Being Obtained: 79.68%
% of Game Remaining After Being Evolved: 79.68%
Offensive Efficiency: 0.6331
Potential in an All Shadow Pokémon Playthrough: High
Potential in the Orre Colosseum: Moderate
Set for All Shadow Pokémon Playthrough
Held Item: Black Belt
Move 1: Fake Out / Protect / Seismic Toss
Move 2: Hidden Power / Rock Tomb / Seismic Toss
Move 3: Earthquake / Body Slam
Move 4: Brick Break
Hariyama has the power, bulk, and movepool to function as a team's Fighting-type for an all Shadow Pokémon playthrough. Brick Break and Fake Out are available immediately upon purification, and evolution occurs only a few levels afterward, granting quick functionality. Rock Tomb and Earthquake are notable coverage moves, but Earthquake requires the TM. Seismic Toss and Body Slam are also options to give Hariyama snagging support. Additional TMs such as Focus Punch and Hyper Beam may also be used to boost Hariyama's knockout potential.
Ninetales
Obtained as: Vulpix at LV. 18
Location: Pyrite Town
Evolution Requirements: Fire Stone
Stats: 73 HP / 81 ATK / 75 DEF / 76 SPA / 100 SPD / 100 SPE
Ability: Flash Fire
Notable Moves:
Heat Wave (Starting)
Will-O-Wisp (Starting)
Confuse Ray (LV. 21 as Vulpix)
Flamethrower (LV. 29 as Vulpix or TM35)
Hidden Power (TM10)
Sunny Day (TM11)
Protect (TM17)
Fire Blast (TM38)
Overheat (TM50)
Substitute (Tutor)
Body Slam (Tutor)
% of Game Remaining After Being Obtained: 78.56%
% of Game Remaining After Being Evolved: 57.87%
Offensive Efficiency: 0.7046
Potential in an All Shadow Pokémon Playthrough: Moderate
Potential in the Orre Colosseum: Moderate
Set for All Shadow Pokémon Playthrough
Held Item: Charcoal
Move 1: Protect / Sunny Day
Move 2: Hidden Power / Body Slam
Move 3: Heat Wave / Fire Blast
Move 4: Flamethrower
Ninetales is an alluring choice as a team's Fire-type Pokémon, but despite being a solid Pokémon on its own, it is unfortunately outclassed by other Fire-types that are available. Flareon is available earlier and is overall a better mixed attacker, Houndoom is faster and more powerful, Camerupt has a notable offensive edge with its Ground typing, and Arcanine has rare utility with Intimidate and Extremespeed. Nevertheless, Ninetales is still a solid Fire-type that has good Speed and offenses, along with access to Heat Wave upon purification and fairly early access to Flamethrower. Unfortunately, it has to rely on Hidden Power or Body Slam as coverage.
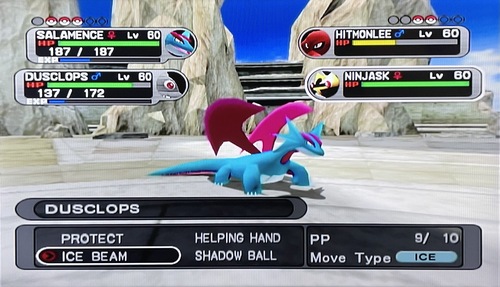
Dusclops
Obtained as: Duskull at LV. 19
Location: Pyrite Town
Evolution Requirements: LV. 37
Stats: 40 HP / 70 ATK / 130 DEF / 60 SPA / 130 SPD / 25 SPE
Ability: Pressure
Notable Moves:
Shadow Ball (Starting)
Helping Hand (Starting)
Confuse Ray (Starting)
Night Shade (Starting)
Shadow Punch (LV. 37)
Will-O-Wisp (LV. 41)
Focus Punch (TM01)
Hidden Power (TM10)
Sunny Day (TM11)
Ice Beam (TM13)
Protect (TM17
Rain Dance (TM18)
Earthquake (TM26)
Rock Tomb (TM39)
Icy Wind (Tutor)
Body Slam (Tutor)
% of Game Remaining After Being Obtained: 77.45%
% of Game Remaining After Being Evolved: 37.13%
Offensive Efficiency: 0.5246
Potential in an All Shadow Pokémon Playthrough: Moderate
Potential in the Orre Colosseum: High
Set for All Shadow Pokémon Playthrough
Held Item: Leftovers / Spell Tag
Move 1: Helping Hand / Protect
Move 2: Hidden Power / Body Slam
Move 3: Ice Beam / Focus Punch
Move 4: Shadow Ball
Dusclops is unique as a Ghost-type, but it lacks the Speed and offensive stats to be efficient for use in an all Shadow Pokémon playthrough. It has the bulk and defensive typing to function as a solid damage sponge and can be difficult for the AI's non-Shadow Pokémon to KO. It thankfully has access to Shadow Ball and a well-suited Helping Hand immediately upon purification, with further snagging support options via Body Slam and Night Shade. Ice Beam and Focus Punch are also powerful and notable coverage moves. Dusclops unfortunately does not evolve until level 37, which further complicates use in an efficient playthrough.
Set for Orre Colosseum
Held Item: Leftovers
EVs: 252 HP / 4 Def / 252 SpD
Nature: Careful
Move 1: Helping Hand
Move 2: Icy Wind / Protect
Move 3: Focus Punch
Move 4: Shadow Ball
Dusclops is a surprisingly effective support Pokémon in the Orre Colosseum, where it has the unique niche of being able to provide Helping Hand to users of Selfdestruct or Explosion, thus typically ensuring double KOs when the move is used successfully. Icy Wind provides further support options by using Dusclops's ability to tank attacks in order to reduce the AI's speed advantage. Shadow Ball deals enough chip damage to finish off weakened targets or to threaten frail Psychic- and Ghost-types. Focus Punch rounds out Dusclops's coverage and deals strong damage against Normal-types.
Gardevoir
Obtained as: Ralts at LV. 20
Location: Pyrite Town
Evolution Requirements: LV. 30
Stats: 68 HP / 65 ATK / 65 DEF / 125 SPA / 115 SPD / 80 SPE
Ability: Synchronize / Trace
Notable Moves:
Shock Wave (Starting)
Sing (Starting)
Reflect (Starting)
Confusion (Starting)
Calm Mind LV. 21)
Psychic (LV. 26 or TM29)
Hypnosis (LV. 51)
Dream Eater (LV. 60 or Tutor)
Hidden Power (TM10)
Sunny Day (TM11)
Light Screen (TM16)
Protect (TM17)
Rain Dance (TM18)
Thunderbolt (TM24)
Thunder Wave (Tutor)
Icy Wind (Tutor)
Substitute (Tutor)
% of Game Remaining After Being Obtained: 77.07%
% of Game Remaining After Being Evolved: 60.00%
Offensive Efficiency: 0.6833
Potential in an All Shadow Pokémon Playthrough: Very High
Potential in the Orre Colosseum: High
Set for All Shadow Pokémon Playthrough
Held Item: Twistedspoon
Move 1: Calm Mind / Protect
Move 2: Hypnosis
Move 3: Thunderbolt
Move 4: Psychic
With a powerful Special Attack, solid Speed, Thunderbolt as coverage, and access to Calm Mind and Hypnosis, Gardevoir is one of the best Pokémon available in Pokémon XD. Psychic is obtained quickly at level 26, and it can be evolved at level 30 prior to the battle with Cipher Admin Snattle. There are few AI Pokémon Gardevoir is not capable of 2HKOing and few that it's not capable of OHKOing after using Calm Mind. Hypnosis adds strong snagging utility to Gardevoir's arsenal. Espeon, with its earlier availability and higher Speed, is Gardevoir's only real competition for a team slot, but this is often overcome through the allure of Hypnosis, Thunderbolt as coverage, or using another Eeveelution instead.
Set for Orre Colosseum
Held Item: Twistedspoon
EVs: 4 HP / 252 SpA / 252 Spe
Nature: Timid
Move 1: Protect / Substitute
Move 2: Icy Wind / Hypnosis / Calm Mind
Move 3: Thunderbolt
Move 4: Psychic
Gardevoir doesn't fare in the Orre Colosseum quite as well it does in the main game, though it still has the power and movepool to be a notable choice. Icy Wind offsets Gardevoir's greatest weakness in its Speed while forming excellent coverage with Thunderbolt and Psychic. Hypnosis's use speaks to the effectiveness of sleep. Calm Mind can be used with Substitute to be a powerful setup sweeper against the AI's more passive Pokémon. Due to its comparatively low Speed and poor physical bulk, Gardevoir needs faster Pokémon or methods of reducing or redirecting enemy attacks as support to function.
Mawile
Obtained as: Mawile at LV. 22
Location: Pyrite Town
Evolution Requirements: None
Stats: 50 HP / 85 ATK / 85 DEF / 55 SPA / 55 SPD / 50 SPE
Ability: Hyper Cutter / Intimidate
Notable Moves:
False Swipe (Starting)
Sing (Starting)
Faint Attack (LV. 26)
Crunch (LV. 36)
Stockpile (LV. 46)
Swallow (LV. 46)
Spit Up (LV. 46)
Focus Punch (TM01)
Hidden Power (TM10)
Ice Beam (TM13)
Hyper Beam (TM15)
Protect (TM17)
Rain Dance (TM18)
Brick Break (TM31)
Flamethrower (TM35)
Fire Blast (TM38)
Rock Tomb (TM39)
Seismic Toss (Tutor)
Icy Wind (Tutor)
Body Slam (Tutor)
Double-Edge (Tutor)
% of Game Remaining After Being Obtained: 76.70%
% of Game Remaining After Being Evolved: 76.70%
Offensive Efficiency: 0.5265
Potential in an All Shadow Pokémon Playthrough: Low
Potential in the Orre Colosseum: Low
Set for All Shadow Pokémon Playthrough
Held Item: Leftovers / Silk Scarf
Move 1: Protect / Seismic Toss
Move 2: Sing
Move 3: False Swipe
Move 4: Body Slam / Hyper Beam
Mawile continues the trend of boss snags being horrible Pokémon; it is slow and frail, has poor offensive typing, and has an awful movepool. Mawile is blessed with the incredible ability Intimidate, but it is unfortunately so bad it cannot make effective use of it. What Mawile can do is function as snagging support with moves such as Sing, Seismic Toss, False Swipe, and Body Slam, although some of these moves require the tutor, and Mawile is outclassed by other snagging support. Only consider Mawile for challenge runs.
Glalie
Obtained as: Snorunt at LV. 20
Location: Phenac City
Evolution Requirements: LV. 42
Stats: 80 HP / 80 ATK / 80 DEF / 80 SPA / 80 SPD / 80 SPE
Ability: Inner Focus
Notable Moves:
Water Pulse (Starting)
Sing (Starting)
Bite (Starting)
Icy Wind (Starting)
Headbutt (Starting)
Protect (LV. 25)
Crunch (LV. 28)
Ice Beam (LV. 34 or TM13)
Hail (LV. 37)
Blizzard (LV. 53 or LV. 42 as Snorunt or TM14)
Sheer Cold (LV. 61)
Hidden Power (TM10)
Protect (TM17)
Earthquake (TM26)
Shadow Ball (TM30)
Body Slam (Tutor)
Double-Edge (Tutor)
Selfdestruct (Tutor)
% of Game Remaining After Being Obtained: 68.94%
% of Game Remaining After Being Evolved: 25.96
Offensive Efficiency: 0.5791
Potential in an All Shadow Pokémon Playthrough: Moderate
Potential in the Orre Colosseum: Moderate
Set for All Shadow Pokémon Playthrough
Held Item: Nevermeltice
Move 1: Protect / Icy Wind
Move 2: Hidden Power / Water Pulse / Sing
Move 3: Crunch
Move 4: Ice Beam
Glalie can be a fun addition to an all Shadow Pokémon playthrough, but it is mostly a mediocre choice. Glalie is notable as an Ice Beam user with decent power and speed that also has Crunch as coverage. Icy Wind and Sing are available upon purification and offer unique support moves for teams. Hidden Power and Water Pulse are options for additional coverage. Unfortunately, Glalie is a pain to evolve at level 42, and there are many better Ice-type attackers available to teams such as Walrein, Vaporeon, and Electabuzz.
Forretress
Obtained as: Pineco at LV. 20
Location: Phenac City
Evolution Requirements: LV. 31
Stats: 75 HP / 90 ATK / 140 DEF / 60 SPA / 60 SPD / 40 SPE
Ability: Sturdy
Notable Moves:
Pin Missile (Starting)
Spikes (Starting)
Counter (Starting)
Selfdestruct (Starting)
Protect (Starting)
Explosion (LV. 39)
Double-Edge (LV. 59 or Tutor)
Hidden Power (TM10)
Hyper Beam (Tm 15)
Earthquake (TM26)
Body Slam (Tutor)
% of Game Remaining After Being Obtained: 68.51%
% of Game Remaining After Being Evolved: 60.00%
Offensive Efficiency: 0.5084
Potential in an All Shadow Pokémon Playthrough: Low
Potential in the Orre Colosseum: Moderate
Set for All Shadow Pokémon Playthrough
Held Item: Leftovers / Silk Scarf
Move 1: Protect
Move 2: Hidden Power / Pin Missile
Move 3: Earthquake / Hyper Beam
Move 4: Body Slam / Double-Edge
Despite being an incredible Pokémon in competitive singles, Forretress is unfortunately not a very notable team addition in Pokémon XD. With low Speed and effectively unusable STAB types, it's entirely reliant on non-STAB Earthquake or Explosion to do good damage, thus making it not efficient for a playthrough. Most of its merits in competitive play aren't very relevant in Pokémon XD due to the reduced emphasis on hazards, increased opportunity cost of passive Pokémon, effective unavailability of Rapid Spin and Hidden Power types, and opportunity cost of running its best moves in Earthquake or Body Slam. Nevertheless Forretress can function as a physical wall that can be difficult for the AI to KO, but it still struggles to deal with Shadow Pokémon.
Xatu
Obtained as: Natu at LV. 22
Location: Phenac City
Evolution Requirements: LV. 25
Stats: 65 HP / 75 ATK / 70 DEF / 95 SPA / 70 SPD / 95 SPE
Ability: Synchronize / Early Bird
Notable Moves:
Baton Pass (Starting)
Night Shade (Starting)
Aerial Ace (Starting)
Wish (LV. 35)
Calm Mind (TM04)
Hidden Power (TM10)
Sunny Day (TM11)
Light Screen (TM16)
Protect (TM17)
Rain Dance (TM18)
Giga Drain (TM19)
Solarbeam (TM22)
Psychic (TM29)
Shadow Ball (TM30)
Reflect (TM33)
Thunder Wave (Tutor)
Dream Eater (Tutor)
Sky Attack (Tutor)
% of Game Remaining After Being Obtained: 68.09%
% of Game Remaining After Being Evolved: 68.09%
Offensive Efficiency: 0.6749
Potential in an All Shadow Pokémon Playthrough: High
Potential in the Orre Colosseum: Moderate
Set for All Shadow Pokémon Playthrough
Held Item: Twistedspoon
Move 1: Protect / Thunder Wave
Move 2: Hidden Power / Giga Drain / Night Shade
Move 3: Aerial Ace
Move 4: Psychic
Xatu is a good Pokémon that is overshadowed as a Psychic-type by Espeon and Gardevoir. It's set apart by its Ground immunity, ability to play as a soft mixed attacker with Aerial Ace, and access to Giga Drain and Night Shade. It remains fairly strong and fast and can be easily evolved and have its moveset filled out. Despite the highly useful Ground immunity, the Flying typing unfortunately opens up Xatu to several more weaknesses compared to Espeon or Gardevoir. Unfortunately neither the power nor the speed nor the movepool are quite good enough to make Xatu very notable in the Orre Colosseum.
Roselia
Obtained as: Roselia at LV. 22
Location: Phenac City
Evolution Requirements: None
Stats: 50 HP / 60 ATK / 45 DEF / 100 SPA / 80 SPD / 65 SPE
Ability: Natural Cure / Poison Point
Notable Moves:
Magical Leaf (Starting)
Grasswhistle (Starting)
Leech Seed (Starting)
Stun Spore (Starting)
Giga Drain (LV. 33 or TM19)
Ingrain (LV. 41)
Toxic (LV. 45)
Aromatherapy (LV. 53)
Synthesis (LV. 57)
Hidden Power (TM10)
Sunny Day (TM11)
Protect (TM17)
Solarbeam (TM22)
Shadow Ball (TM30)
Body Slam (Tutor)
Double-Edge (Tutor)
% of Game Remaining After Being Obtained: 67.66%
% of Game Remaining After Being Evolved: 67.66%
Offensive Efficiency: 0.5624
Potential in an All Shadow Pokémon Playthrough: Moderate
Potential in the Orre Colosseum: Low
Set for All Shadow Pokémon Playthrough
Held Item: Miracle Seed / Leftovers
Move 1: Grasswhistle / Protect
Move 2: Stun Spore / Sunny Day
Move 3: Hidden Power / Body Slam
Move 4: Giga Drain / Solarbeam
Roselia is a usable Pokémon as a Grass-type with snagging support and / or on a sun team, but it isn't capable of much else. Base 100 Special Attack is enough to make use of STAB Giga Drain and makes Solarbeam a strong option. Grasswhistle and/or Stun Spore offer snagging support to give Roselia a niche as a Grass-type. It can struggle with Speed at times and has poor bulk, and it also doesn't have any coverage options outside of Hidden Power. Other Grass-types such as Shiftry, Breloom, and Jumpluff should be considered first.
Persian
Obtained as: Meowth at LV. 22
Location: Phenac City
Evolution Requirements: LV. 28
Stats: 65 HP / 70 ATK / 60 DEF / 65 SPA / 65 SPD / 115 SPE
Ability: Limber
Notable Moves:
Slash (Starting)
Sing (Starting)
Bite (Starting)
Faint Attack (LV. 28)
Fake Out (LV. 59)
Hidden Power (TM10)
Sunny Day (TM11)
Hyper Beam (TM15)
Protect (TM17)
Rain Dance (TM18)
Iron Tail (TM23)
Thunderbolt (TM24)
Thunder (TM25)
Shadow Ball (TM30)
Icy Wind (Tutor)
Substitute (Tutor)
Dream Eater (Tutor)
Body Slam (Tutor)
Double-Edge (Tutor)
% of Game Remaining After Being Obtained: 67.23%
% of Game Remaining After Being Evolved: 60.43%
Offensive Efficiency: 0.6114
Potential in an All Shadow Pokémon Playthrough: Moderate
Potential in the Orre Colosseum: Moderate
Set for All Shadow Pokémon Playthrough
Held Item: Silk Scarf
Move 1: Fake Out
Move 2: Sing / Protect / Hidden Power
Move 3: Hidden Power / Shadow Ball / Hyper Beam
Move 4: Slash / Body Slam / Hyper Beam
High Speed, workable Attack, and a surprisingly diverse movepool make Persian an interesting team choice, though one with not much of a niche. Fake Out and a fast Sing help the most to set it apart, while Normal-type STAB and Shadow Ball do okay damage. Hidden Power can be used for additional coverage, as can moves such as Thunderbolt and Iron Tail, though such TMs are usually better saved for other Pokémon. This Pokémon is difficult to justify on a team, and other fast Pokémon or Normal-type attackers should be considered first.
Piloswine
Obtained as: Swinub at LV. 22
Location: Phenac City
Evolution Requirements: LV. 33
Stats: 100 HP / 100 ATK / 80 DEF / 60 SPA / 60 SPD / 50 SPE
Ability: Oblivious
Notable Moves:
Ancientpower (Starting)
Mud Shot (Starting)
Blizzard (LV. 56 or TM14)
Hidden Power (TM10)
Ice Beam (TM13)
Hyper Beam (TM15)
Protect (TM17)
Earthquake (TM26)
Rock Tomb (TM39)
Icy Wind (Tutor)
Body Slam (Tutor)
Double-Edge (Tutor)
% of Game Remaining After Being Obtained: 66.81%
% of Game Remaining After Being Evolved: 52.77%
Offensive Efficiency: 0.5764
Potential in an All Shadow Pokémon Playthrough: Moderate
Potential in the Orre Colosseum: Low
Set for All Shadow Pokémon Playthrough
Held Item: Nevermeltice / Soft Sand
Move 1: Protect / Hidden Power / Hyper Beam
Move 2: Ancient Power
Move 3: Ice Beam / Blizzard
Move 4: Earthquake / Mud Shot
STAB Earthquake off base 100 Attack is mostly where Piloswine's advantages end, especially when it needs the TM to even learn the move. Ice / Ground is a great offensive typing, but its mediocre base 60 Special Attack makes Ice-type attacks less than stellar for a Pokémon this slow, and its typing is horrible defensively. Ancientpower does at least pair well with Ground-type STAB. Most of the time, Piloswine is simply too vulnerable and slow to be worth using, especially when there are many better Ice-type attackers and better Earthquake users.
Fearow
Obtained as: Spearow at LV. 22
Location: Phenac City
Evolution Requirements: Lv. 20
Stats: 65 HP / 90 ATK / 65 DEF / 61 SPA / 61 SPD / 100 SPE
Ability: Keen Eye
Notable Moves:
False Swipe (Starting)
Baton Pass (Starting)
Aerial Ace (Starting)
Mirror Move (LV. 32)
Drill Peck (LV. 40)
Agility (LV. 47)
Hidden Power (TM10)
Sunny Day (TM11)
Hyper Beam (TM15)
Protect (TM17)
Rain Dance (TM18)
Sky Attack (Tutor)
Double-Edge (Tutor)
% of Game Remaining After Being Obtained: 61.28%
% of Game Remaining After Being Evolved: 61.28%
Offensive Efficiency: 0.6211
Potential in an All Shadow Pokémon Playthrough: High
Potential in the Orre Colosseum: Moderate
Set for All Shadow Pokémon Playthrough
Held Item: Silk Scarf/ Sharp Beak
Move 1: False Swipe / Protect / Agility
Move 2: Body Slam
Move 3: Drill Peck
Move 4: Hyper Beam
Fearow is likely not a first choice for most teams but is a fairly notable pick thanks to its good Speed, solid Attack, effective STAB moves, Ground immunity, and access to False Swipe. It evolves upon purification, and its moveset is easy to fill out. Hyper Beam is capable of OHKOing a good chunk of AI Pokémon, and Body Slam and False Swipe are great for snagging support. Fearow can pair well with Ground-types thanks to the offensive synergy against Rock- and Steel-types as well as its immunity to ally Earthquake. Fearow should be considered for teams that want to utilize a Flying-type attacker with False Swipe for snagging support.
Muk
Obtained as: Grimer at LV. 23
Location: Phenac City
Evolution Requirements: LV. 38
Stats: 105 HP / 105 ATK / 75 DEF / 65 SPA / 100 SPD / 50 SPE
Ability: Stench / Sticky Hold
Notable Moves:
Sludge Bomb (Starting)
Helping Hand (Starting)
Shadow Punch (Starting)
Minimize (Starting)
Acid Armor (LV. 34)
Focus Punch (TM01)
Hidden Power (TM10)
Hyper Beam (TM15)
Protect (TM17)
Giga Drain (TM19)
Thunderbolt (TM24)
Thunder (TM25)
Brick Break (TM31)
Flamethrower (TM35)
Fire Blast (TM38)
Rock Tomb (TM39)
Body Slam (Tutor)
Selfdestruct (Tutor)
% of Game Remaining After Being Obtained: 60.85%
% of Game Remaining After Being Evolved: 37.13%
Offensive Efficiency: 0.6015
Potential in an All Shadow Pokémon Playthrough: Moderate
Potential in the Orre Colosseum: Moderate
Set for All Shadow Pokémon Playthrough
Held Item: Poison Barb / Leftovers
Move 1: Helping Hand / Protect
Move 2: Shadow Punch / Hidden Power / Protect
Move 3: Brick Break / Focus Punch
Move 4: Sludge Bomb
Poison-types simply aren't very notable for use in Pokémon XD, though Muk is at least a decent one. It has good offenses paired with good bulk, but it does feel its low Speed. It gets great starting moves with Sludge Bomb, Helping Hand, and Shadow Punch, though it is a pain to evolve at level 38. Access to Fighting-type coverage in Brick Break or Focus Punch allows it to deal with Steel- and Rock-types. Poison is a poor offensive type, and the weakness to Earthquake is a pain. Most teams will want to consider using Swalot or Crobat instead if looking for a Poison-type.
Dewgong
Obtained as: Seel at LV. 23
Location: Phenac City
Evolution Requirements: LV. 34
Stats: 90 HP / 70 ATK / 80 DEF / 70 SPA / 95 SPD / 70 SPE
Ability: Thick Fat
Notable Moves:
Surf (Starting)
Helping Hand (Starting)
Ice Beam (Starting)
Icy Wind (Starting or Tutor)
Sheer Cold (LV. 34)
Water Pulse (TM03)
Hidden Power (TM10)
Blizzard (TM14)
Hyper Beam (TM15)
Protect (TM17)
Rain Dance (TM18)
Body Slam (Tutor)
Double-Edge (Tutor)
% of Game Remaining After Being Obtained: 60.43%
% of Game Remaining After Being Evolved: 52.77%
Offensive Efficiency: 0.6067
Potential in an All Shadow Pokémon Playthrough: Moderate
Potential in the Orre Colosseum: Low
Set for All Shadow Pokémon Playthrough
Held Item: Nevermeltice / Mystic Water
Move 1: Helping Hand / Protect
Move 2: Sheer Cold / Icy Wind / Protect
Move 3: Surf / Water Pulse
Move 4: Ice Beam
Dewgong is an Ice-type with worse offensive stats than Glalie but better overall bulk aided by Thick Fat and a Water typing that further reduces its weakness to Fire-types. Ice Beam and Surf are easy moves to click, though they aren't especially powerful coming from Dewgong. Upon purification, it gets most of its best moves such as Ice Beam, Surf, Icy Wind, and Helping Hand, and it is much easier to evolve as compared to Glalie. Nevertheless, Dewgong remains a mediocre choice for an Ice-type attacker and faces worse competition as the game progresses.
Lunatone
Obtained as: Lunatone at LV. 25
Location: Phenac City
Evolution Requirements: None
Stats: 90 HP / 55 ATK / 65 DEF / 95 SPA / 85 SPD / 70 SPE
Ability: Levitate
Notable Moves:
Psychic (Starting)
Baton Pass (Starting)
Rain Dance (Starting)
Rock Tomb (Starting)
Hypnosis (Starting)
Cosmic Power (LV. 31)
Explosion (LV. 49)
Calm Mind (TM04)
Hidden Power (TM10)
Ice Beam (TM13)
Hyper Beam (TM15)
Light Screen (TM16)
Protect (TM17)
Earthquake (TM26)
Shadow Ball (TM30)
Reflect (TM33)
Dream Eater (Tutor)
Body Slam (Tutor)
Double-Edge (Tutor)
% of Game Remaining After Being Obtained: 60.00%
% of Game Remaining After Being Evolved: 60.00%
Offensive Efficiency: 0.6694
Potential in an All Shadow Pokémon Playthrough: Moderate
Potential in the Orre Colosseum: Moderate
Set for All Shadow Pokémon Playthrough
Held Item: Twistedspoon / Hard Stone
Move 1: Hypnosis / Protect / Explosion
Move 2: Earthquake / Shadow Ball
Move 3: Rock Tomb
Move 4: Psychic
Lunatone is in competition with several other Psychic-types for a team slot and doesn't have much to set itself apart from Claydol, which also has a Ground immunity and similar typing. Hypnosis and a better Special Attack provide some difference, though Lunatone remains a similarly mediocre choice with a worse physical attack and no Ice Beam. Overall, Lunatone is simply too lackluster across the board to be worth using most of the time.
Zangoose
Obtained as: Zangoose at LV. 28
Location: Cipher Key Lair
Evolution Requirements: None
Stats: 73 HP / 115 ATK / 60 DEF / 60 SPA / 60 SPD / 90 SPE
Ability: Immunity
Notable Moves:
Brick Break (Starting)
Counter (Starting)
Crush Claw (Starting)
Quick Attack (Starting)
Swords Dance (Starting)
Detect (LV. 46)
False Swipe (LV. 55)
Focus Punch (TM01)
Hidden Power (TM10)
Protect (TM17)
Iron Tail (TM23)
Shadow Ball (TM30)
Thunder Wave (Tutor)
Seismic Toss (Tutor)
Icy Wind (Tutor)
Substitute (Tutor)
Body Slam (Tutor)
Double-Edge (Tutor)
% of Game Remaining After Being Obtained: 42.87%
% of Game Remaining After Being Evolved: 42.87%
Offensive Efficiency: 0.6778
Potential in an All Shadow Pokémon Playthrough: High
Potential in the Orre Colosseum: High
Set for All Shadow Pokémon Playthrough
Held Item: Silk Scarf
Move 1: Protect / False Swipe
Move 2: Shadow Ball / Thunder Wave
Move 3: Brick Break
Move 4: Body Slam / Crush Claw
Zangoose is one of the better physical attackers available in Pokémon XD thanks to its high Attack, solid Speed, and good physical attacks in Body Slam, Crush Claw, Brick Break, and Shadow Ball. It can do well at snagging Shadow Pokémon as well with False Swipe and Thunder Wave. It has further depth in its movepool with options for Swords Dance, Quick Attack, Focus Punch, and even STAB Double-Edge. Its bulk is poor, but Zangoose remains one of the better candidates for a physical attacker.
Set for Orre Colosseum
Held Item: Liechi Berry / Salac Berry
EVs: 4 HP / 252 Atk / 252 Spe
Nature: Jolly
Move 1: Substitute / Swords Dance
Move 2: Shadow Ball
Move 3: Brick Break / Focus Punch
Move 4: Return / Body Slam
Substitute with a Liechi Berry gives Zangoose the ability to boost its already high Attack to threatening levels. Swords Dance can be used instead, but Zangoose struggles to find opportunities to set up. Return is Zangoose's best STAB attack, but Body Slam works for when the TM is not yet available. Brick Break or Focus Punch and Shadow Ball round out Zangoose's coverage well. Unfortunately, Zangoose still struggles with Speed. A Salac Berry can be used, but Zangoose doesn't have quite enough power without Liechi, unless it runs Swords Dance.
Nosepass
Obtained as: Nosepass at LV. 26
Location: Various (Wanderer Miror B.)
Evolution Requirements: None
Stats: 30 HP / 45 ATK / 135 DEF / 45 SPA / 90 SPD / 30 SPE
Ability: Sturdy / Magnet Pull
Notable Moves:
Thunder Wave (Starting)
Thunderbolt (Starting)
Helping Hand (Starting)
Rock Slide (Starting)
Zap Cannon (LV. 46)
Hidden Power (TM10)
Protect (TM17)
Thunder (TM25)
Earthquake (TM26)
Rock Tomb (TM39)
Body Slam (Tutor)
Double-Edge (Tutor)
Selfdestruct (Tutor)
% of Game Remaining After Being Obtained: 43.35%
% of Game Remaining After Being Evolved: 43.35%
Offensive Efficiency: 0.6778
Potential in an All Shadow Pokémon Playthrough: Low
Potential in the Orre Colosseum: Low
Set for All Shadow Pokémon Playthrough
Held Item: Hard Stone / Quick Claw
Move 1: Protect / Thunderbolt
Move 2: Thunder Wave
Move 3: Helping Hand
Move 4: Rock Slide
Nosepass is an awful Pokémon with low Speed and offenses that make it impractical for use in a playthrough. It also doesn't have particularly good bulk, and its viable support options are limited to Thunder Wave and Helping Hand. Rock Slide is its best attack, but due to its spread power and coming off a weak base 45 Attack it will rarely be doing much damage. Nosepass should only be used on challenge runs.
Togetic
Obtained as: Togepi at LV. 25
Location: Outskirt Stand
Evolution Requirements: Friendship
Stats: 55 HP / 40 ATK / 85 DEF / 80 SPA / 105 SPD / 40 SPE
Ability: Hustle / Serene Grace
Notable Moves:
Follow Me (Starting)
Tri Attack (Starting)
Ancient Power (Starting)
Helping Hand (Starting)
Yawn (Starting)
Encore (Starting)
Wish (LV. 31)
Focus Punch (TM01)
Hidden Power (TM10)
Sunny Day (TM11)
Light Screen (TM16)
Protect (TM17)
Rain Dance (TM18)
Solarbeam (TM22)
Psychic (TM29)
Shadow Ball (TM30)
Brick Break (TM31)
Reflect (TM33)
Flamethrower (TM35)
Fire Blast (TM38)
Thunder Wave (Tutor)
Seismic Toss (Tutor)
Substitute (Tutor)
Dream Eater (Tutor)
Body Slam (Tutor)
Sky Attack (Tutor)
% of Game Remaining After Being Obtained: 43.35%
% of Game Remaining After Being Evolved: 43.35%
Offensive Efficiency: 0.6778
Potential in an All Shadow Pokémon Playthrough: Moderate
Potential in the Orre Colosseum: High
Set for All Shadow Pokémon Playthrough
Held Item: Leftovers
Move 1: Follow Me / Protect / Yawn
Move 2: Helping Hand
Move 3: Thunder Wave
Move 4: Seismic Toss
With mostly unusable STAB types coupled with low offensive stats, Togetic is a bad offensive Pokémon. Togetic does, however, get a decent support movepool with the highly coveted Follow Me in addition to Helping Hand, Thunder Wave, Seismic Toss, and Yawn, allowing it to function as a damage sponge for supporting snags. Immunities to Ground- and Ghost-type attacks are also notable. Togetic's deep movepool includes many other options, allowing teams to customize its set for their needs. Nevertheless, Togetic remains inefficient for running the game and sinks Exp.
Set for Orre Colosseum
Held Item: Leftovers / Sitrus Berry
EVs: 252 HP / 252 Def / 4 SpD
Nature: Bold
Move 1: Protect / Encore
Move 2: Follow Me
Move 3: Helping Hand
Move 4: Seismic Toss
Togetic is more notable in the Orre Colosseum, where it's able to supplement several unorthodox but effective strategies with Follow Me. The AI is often unable to adapt to repeated use of Follow Me or Encore, further increasing Togetic's effectiveness. Helping Hand works in a pinch to boost an Earthquake user or a fast and powerful attacker that can eliminate a key threat to Togetic. Seismic Toss gives Togetic a way of chipping at the opponent Pokémon despite its lack of STAB and poor offenses.
Parasect
Obtained as: Paras at LV. 28
Location: Cipher Key Lair
Evolution Requirements: LV. 24
Stats: 60 HP / 95 ATK / 80 DEF / 60 SPA / 80 SPD / 30 SPE
Ability: Effect Spore
Notable Moves:
Spore (Starting)
Slash (Starting)
False Swipe (Starting)
Stun Spore (Starting)
Giga Drain (LV. 51 or TM19)
Aromatherapy (LV. 59)
Hidden Power (TM10)
Sunny Day (TM11)
Hyper Beam (TM15)
Protect (TM17)
Solarbeam (TM22)
Body Slam (Tutor)
Double-Edge (Tutor)
% of Game Remaining After Being Obtained: 41.91%
% of Game Remaining After Being Evolved: 41.91%
Offensive Efficiency: 0.6778
Potential in an All Shadow Pokémon Playthrough: High
Potential in the Orre Colosseum: Low
Set for All Shadow Pokémon Playthrough
Held Item: Leftovers / Miracle Seed
Move 1: Spore
Move 2: False Swipe
Move 3: Hidden Power / Sunny Day
Move 4: Giga Drain / Solarbeam
Despite its low Speed and numerous weaknesses, Parasect is notable for being one of the best Pokémon to support snags thanks to being the only available Pokémon with Spore. False Swipe further complements this role, and Grass STAB via Giga Drain or Solarbeam is enough to further chip Pokémon into range or pick off non-Shadow Pokémon. Unfortunately, Parasect's poor Special Attack prevents it from ever being truly threatening offensively, and it also has no way to utilize its Bug-type STAB. All in all, Parasect is a great Pokémon for helping with the game's most difficult snags but doesn't accomplish much outside this role.
Arcanine
Obtained as: Growlithe
Location: Cipher Key Lair
Evolution Requirements: Fire Stone
Stats: 90 HP / 110 ATK / 80 DEF / 100 SPA / 80 SPD / 95 SPE
Ability: Intimidate / Flash Fire
Notable Moves:
Flamethrower (Starting)
Bite (Starting)
Take Down (Starting)
Helping Hand (LV. 37 as Growlithe)
Agility (LV. 43 as Growllithe)
Extremespeed (LV. 49 as Arcanine)
Hidden Power (TM10)
Sunny Day (TM11)
Hyper Beam (TM15)
Protect (TM17)
Iron Tail (TM23)
Fire Blast (TM38)
Overheat (TM50)
Substitute (Tutor)
Body Slam (Tutor)
Double-Edge (Tutor)
% of Game Remaining After Being Obtained: 41.91%
% of Game Remaining After Being Evolved: 41.91%
Offensive Efficiency: 0.6778
Potential in an All Shadow Pokémon Playthrough: High
Potential in the Orre Colosseum: High
Set for All Shadow Pokémon Playthrough
Held Item: Charcoal
Move 1: Protect / Helping Hand
Move 2: Hidden Power / Bite / Fire Blast
Move 3: Extremespeed / Body Slam
Move 4: Flamethrower / Fire Blast
With its good mixed offenses, good Speed, coveted Intimidate ability, and priority with Extremespeed, Arcanine is the last Pokémon available that has good offensive efficiency. While some great Pokémon can still be snagged later in the game, these come so late that it's mostly no longer efficient to put resources into them for an all Shadow Pokémon run. Despite Arcanine's strengths, it's in competition with Flareon, Houndoom, or Camerupt as a team's Fire-type but is able to set itself apart with Intimidate and Extremespeed. Unfortunately, like many other Fire-types, Arcanine has a lackluster movepool and must rely on Hidden Power or Bite as coverage.
Set for Orre Colosseum
Held Item: White Herb
EVs: 4 HP / 252 SpA / 252 Spe
Nature: Timid
Move 1: Protect
Move 2: Helping Hand
Move 3: Hidden Power / Sunny Day
Move 4: Overheat
Arcanine's Intimidate sets it apart from its competition in the Orre Colosseum, where it functions as an Overheat user. Thanks to the combination of Intimidate, solid bulk, and mono-Fire typing Arcanine is usually capable of taking two hits. Hidden Power is the only notable coverage available to Arcanine, while Helping Hand or Extremespeed provide utility beyond Overheat use. Protect is essential for blocking Earthquake, Explosion, or Water-type attacks, which are just about the only moves that can take it down in a single attack. A White Herb gives Arcanine up to two chances to use Overheat, which is plenty in the fast-paced Colosseum.
Cloyster
Obtained as: Shellder at LV. 29
Location: Cipher Key Lair
Evolution Requirements: Water Stone
Stats: 50 HP / 95 ATK / 180 DEF / 85 SPA / 45 SPD / 70 SPE
Ability: Shell Armor
Notable Moves:
Take Down (Starting)
Surf (Starting)
Aurora Beam (Starting)
Protect (Starting)
Ice Beam (LV. 49 as Shellder or TM13)
Spikes (LV. 33)
Water Pulse (TM03)
Hidden Power (TM10)
Blizzard (TM14)
Hyper Beam (TM15)
Protect (TM17)
Rain Dance (TM18)
Icy Wind (Tutor)
Double-Edge (Tutor)
Selfdestruct (Tutor)
% of Game Remaining After Being Obtained: 40.48%
% of Game Remaining After Being Evolved: 40.48%
Offensive Efficiency: 0.6778
Potential in an All Shadow Pokémon Playthrough: Moderate
Potential in the Orre Colosseum: Low
Set for All Shadow Pokémon Playthrough
Held Item: Nevermeltice
Move 1: Protect / Rain Dance
Move 2: Icy Wind / Hidden Power
Move 3: Surf / Water Pulse
Move 4: Ice Beam
At first glance it may seem that Cloyster could be a great addition to a team in Pokémon XD, but unfortunately, its unusable Attack stat, mediocre Speed, and poor special bulk fail to distinguish it from other Ice Beam users that are available much earlier in the game. Surf and Water Pulse are functional as Water-type STAB attacks, but no additional coverage is available apart from Hidden Power. Icy Wind helps Cloyster offset its poor Speed against the more threatening attackers late in the game and can help support slow teammates. Spikes and Selfdestruct are good moves, but they are generally not efficient for an all Shadow Pokémon playthrough.
Beedrill
Obtained as: Beedrill at LV. 30
Location: Citadark Isle
Evolution Requirements: None
Stats: 65 HP / 90 ATK / 40 DEF / 45 SPA / 80 SPD / 75 SPE
Ability: Swarm
Notable Moves:
Sludge Bomb (Starting)
Baton Pass (Starting)
Twineedle (Starting)
Swords Dane (Starting)
Pin Missile (LV. 35)
Agility (LV. 40)
Endeavor (LV. 45)
Hidden Power (TM10)
Sunny Day (TM11)
Hyper Beam (TM15)
Protect (TM17)
Giga Drain (TM19)
Solarbeam (TM22)
Brick Break (TM31)
Double-Edge (Tutor)
% of Game Remaining After Being Obtained: 39.52%
% of Game Remaining After Being Evolved: 39.52%
Offensive Efficiency: 0.6778
Potential in an All Shadow Pokémon Playthrough: Moderate
Potential in the Orre Colosseum: Low
Set for All Shadow Pokémon Playthrough
Held Item: Poison Barb
Move 1: Swords Dance
Move 2: Brick Break / Agility
Move 3: Pin Missile / Baton Pass
Move 4: Sludge Bomb
Like many of the Pokémon that are caught in the Cipher Key Lair and onward, Beedrill has some appealing attributes but is simply acquired too late for them to be highly appealing. Beedrill does at least have some unique flair with its access to Swords Dance and Agility, as well as the potential to pass its boosts via Baton Pass. Sludge Bomb is a good STAB attack, with Pin Missile as a usable secondary STAB move and Brick Break as coverage for Steel- and Rock-types. There are better offensive Poison-types to choose from, though Beedrill is the only one with Swords Dance.
Pidgeot
Obtained as: Pidgeotto at LV. 30
Location: Cipher Key Lair
Evolution Requirements: LV. 36
Stats: 83 HP / 80 ATK / 75 DEF / 70 SPA / 70 SPD / 101 SPE
Ability: Keen Eye
Notable Moves:
Wing Attack (Starting)
Steel Wing (Starting)
Featherdance (Starting)
Agility (LV. 48)
Hidden Power (TM10)
Hyper Beam (TM15)
Protect (TM17)
Sky Attack (Tutor)
Double-Edge (Tutor)
% of Game Remaining After Being Obtained: 39.52%
% of Game Remaining After Being Evolved: 39.52%
Offensive Efficiency: 0.6778
Potential in an All Shadow Pokémon Playthrough: Low
Potential in the Orre Colosseum: Low
Set for All Shadow Pokémon Playthrough
Held Item: Sharp Beak
Move 1: Hidden Power / Protect
Move 2: Steel Wing
Move 3: Double-Edge / Hyper Beam
Move 4: Wing Attack
Pidgeot isn't a horrible Pokémon but is unfortunately outclassed by Fearow, which is acquired earlier, is stronger, and has False Swipe to support snags. Featherdance is the only move that Pidgeot has over Fearow, and offensive stat dropping moves are notoriously inefficient for casual playthroughs. Consider using a different Flying-type or Normal-type instead.
Potential in an All Shadow Pokémon Playthrough: Low
Potential in the Orre Colosseum: Low
Set for All Shadow Pokémon Playthrough
Held Item: Leftovers / Miracle Seed
Move 1: Sleep Powder
Move 2: Hidden Power / Sunny Day
Move 3: Morning Sun
Move 4: Giga Drain / Solarbeam
With mediocre stats, a late acquisition, and no characteristics to set it apart from other Grass-types, Tangela is a pointless Pokémon. Chlorophyll with Sleep Powder is better done by Jumpluff, and Chlorophyll offense is better accomplished by Shiftry or Victreebel. Perhaps Tangela's only unique trait is a high Defense stat for a Grass-type, though it doesn't have the HP stat or special bulk to use this in a meaningful way. Consider using other Grass-type Pokémon instead.
Butterfree
Obtained as: Butterfree at LV. 30
Location: Cipher Key Lair
Evolution Requirements: None
Stats: 60 HP / 45 ATK / 50 DEF / 90 SPA / 80 SPD / 70 SPE
Ability: Compoundeyes
Notable Moves:
Psychic (Starting)
Morning Sun (Starting)
Sleep Powder (Starting)
Aerial Ace (Starting)
Stun Spore (Starting)
Silver Wind (LV. 47)
Hidden Power (TM10)
Sunny Day (TM11)
Hyper Beam (TM15)
Protect (TM17)
Giga Drain (TM19)
Solarbeam (TM22)
Shadow Ball (TM30)
Dream Eater (Tutor)
Double-Edge (Tutor)
% of Game Remaining After Being Obtained: 38.09%
% of Game Remaining After Being Evolved: 38.09%
Offensive Efficiency: 0.6778
Potential in an All Shadow Pokémon Playthrough: Low
Potential in the Orre Colosseum: Low
Set for All Shadow Pokémon Playthrough
Held Item: Leftovers
Move 1: Sleep Powder
Move 2: Shadow Ball / Sunny Day
Move 3: Silver Wind / Solarbeam
Move 4: Aerial Ace / Solarbeam
Butterfree has two solid STAB attacks in Silver Wind and Aerial Ace, but unfortunately they are undermined by a pathetic base 45 Attack stat. Butterfree notably has Sleep Powder and is also capable of running Shadow Ball with its STAB moves. It could also potentially function as a sun supporter that can also use Solarbeam. Nevertheless, this Pokémon has poor stats and a vulnerable typing and is outclassed by other Flying-types and sun supporters. Consider using other Pokémon instead.
Magneton
Obtained as: Magneton at LV. 30
Location: Cipher Key Lair
Evolution Requirements: None
Stats: 50 HP / 60 ATK / 95 DEF / 120 SPA / 70 SPD / 70 SPE
Ability: Magnet Pull / Sturdy
Notable Moves:
Rain Dance (Starting)
Thunder (Starting)
Thunder Wave (Starting)
Hidden Power (TM10)
Protect (TM17)
Rain Dance (TM18)
Thunderbolt (TM24)
% of Game Remaining After Being Obtained: 37.13%
% of Game Remaining After Being Evolved: 37.13%
Offensive Efficiency: 0.6778
Potential in an All Shadow Pokémon Playthrough: Moderate
Potential in the Orre Colosseum: Moderate
Set for All Shadow Pokémon Playthrough
Held Item: Magnet
Move 1: Protect / Rain Dance
Move 2: Thunder Wave
Move 3: Hidden Power / Thunder
Move 4: Thunderbolt / Thunder
Despite being a metagame-defining Pokémon in competitive play, Magneton is a bit underwhelming in Pokémon XD due to the irrelevancy of Magnet Pull in casual play, its late acquisition, and the availability of more offensively efficient Electric-types such as Jolteon and Electabuzz. Magneton does still posses a powerful Special Attack stat with workable Speed, as well as Thunder Wave and the ability to be both a rain supporter and rain attacker. As a result Magneton can be a notable addition to rain teams for an all Shadow Pokémon playthrough but isn't worthwhile otherwise.
Venomoth
Obtained as: Venomoth at LV. 32
Location: Cipher Key Lair
Evolution Requirements: None
Stats: 70 HP / 65 ATK / 60 DEF / 90 SPA / 75 SPD / 90 SPE
Ability: Shield Dust
Notable Moves:
Silver Wind (Starting)
Substutiute (Starting)
Psychic (Starting)
Stun Spore (Starting)
Sleep Powder (LV. 42)
Hidden Power (TM10)
Hyper Beam (TM15)
Protect (TM17)
Giga Drain (TM19)
Solarbeam (TM22)
Double-Edge (Tutor)
% of Game Remaining After Being Obtained: 36.17%
% of Game Remaining After Being Evolved: 36.17%
Offensive Efficiency: 0.6778
Potential in an All Shadow Pokémon Playthrough: Low
Potential in the Orre Colosseum: Low
Set for All Shadow Pokémon Playthrough
Held Item: Silver Powder
Move 1: Sleep Powder
Move 2: Hidden Power / Giga Drain
Move 3: Psychic
Move 4: Silver Wind
Venomoth is yet another underwhelming Bug-type Pokémon that is effectively a worse Beedrill that gets Sleep Powder. It has good Special Attack and Speed, but its Bug-type STAB is physical, and it has no way of utilizing its physical Poison-type STAB outside a lucky Hidden Power. Instead, Venomoth must attempt to use TMs like Psychic and Giga Drain, which run off its Special Attack stat, in conjunction with Silver Wind to deal damage any damage to opposing targets. Only consider this Pokémon for challenge runs, as there are much better sleep inducers available.
Victreebel
Obtained as: Weepinbell at LV. 32
Location: Cipher Key Lair
Evolution Requirements: Leaf Stone
Stats: 80 HP / 105 ATK / 65 DEF / 100 SPA / 70 SPD / 70 SPE
Ability: Chlorophyll
Notable Moves:
Magical Leaf (Starting)
Morning Sun (Starting)
Sludge Bomb (Starting)
Sleep Powder (Starting)
Stun Spore (Starting)
Razor Leaf (Starting)
Hidden Power (TM10)
Sunny Day (TM11)
Hyper Beam (TM15)
Protect (TM17)
Giga Drain (TM19)
Solarbeam (TM22)
Body Slam (Tutor)
Double-Edge (Tutor)
% of Game Remaining After Being Obtained: 36.17%
% of Game Remaining After Being Evolved: 36.17%
Offensive Efficiency: 0.6778
Potential in an All Shadow Pokémon Playthrough: Moderate
Potential in the Orre Colosseum: High
Set for All Shadow Pokémon Playthrough
Held Item: Miracle Seed
Move 1: Protect / Sunny Day
Move 2: Sleep Powder
Move 3: Giga Drain / Solarbeam
Move 4: Sludge Bomb
Victreebel is notable as a Chlorophyll sweeper on a sun team that has a strong Sludge Bomb and strong Grass-type STAB in conjunction to Sleep Powder. It's Grass-type STAB options include Giga Drain and Solarbeam, but unfortunately both require the TM, and otherwise it's stuck with Magical Leaf. Outside of this role, Victreebel's late acquisition doesn't justify it's use over other earlier Grass- or Poison-type options, which have better stats, better moves, or other unique edges. This Pokémon should only be considered for sun teams.
Set for Orre Colosseum
Held Item: Miracle Seed
EVs: 4 HP / 252 SpA / 252 Spe
Nature: Naive
Move 1: Protect / Sunny Day
Move 2: Sleep Powder
Move 3: Sludge Bomb
Move 4: Solarbeam
Thanks to Chlorophyll Victreebel is a relevant choice for use in the Orre Colosseum, where it can fire off fast Sleep Powders or powerful Sludge Bombs and Solarbeams. Due to its low Speed and numerous weaknesses, Victreebel is dependent on team support for setting sun or aiding it in setting sun. Notable partners include other Chlorophyll users to maximize sun use; Overheat users, which have good offensive synergy and sun benefit; and bulky or fast support Pokémon that can set sun or draw attacks away from Victreebel.
Arbok
Obtained as: Arbok at LV. 33
Location: Cipher Key Lair
Evolution Requirements: None
Stats: 60 HP / 95 ATK / 69 DEF / 65 SPA / 79 SPD / 80 SPE
Ability: Intimidate / Shed Skin
Notable Moves:
Sludge Bomb (Starting)
Glare (Starting)
Bite (Starting)
Haze (LV. 56)
Hidden Power (TM10)
Hyper Beam (TM15)
Protect (TM17)
Giga Drain (TM19)
Iron Tail (TM23)
Earthquake (TM26)
Body Slam (Tutor)
Double-Edge (Tutor)
% of Game Remaining After Being Obtained: 35.21%
% of Game Remaining After Being Evolved: 35.21%
Offensive Efficiency: 0.6778
Potential in an All Shadow Pokémon Playthrough: Moderate
Potential in the Orre Colosseum: Moderate
Set for All Shadow Pokémon Playthrough
Held Item: Poison Barb
Move 1: Protect
Move 2: Glare / Body Slam
Move 3: Earthquake / Iron Tail
Move 4: Sludge Bomb
Arbok is yet another mediocre Poison-type with a late acquisition. Its stats aren't notable, but it does get the coveted Intimidate ability as well as the rare move Glare for snagging support. Sludge Bomb remains a good STAB move, and Arbok can run Earthquake or Iron Tail as coverage. These unique traits aren't really worth the late acquisition and mediocre stats, but this Pokémon is at least worth considering, unlike many others in the Cipher Key Lair.
Primeape
Obtained as: Primeape at LV. 34
Location: Cipher Key Lair
Evolution Requirements: None
Stats: 65 HP / 105 ATK / 60 DEF / 60 SPA / 70 SPD / 95 SPE
Ability: Vital Spirit
Notable Moves:
Cross Chop (Starting)
Helping Hand (Starting)
Reversal (Starting)
Seismic Toss (LV. 36)
Focus Punch (TM01)
Bulk Up (TM08)
Hidden Power (TM10)
Hyper Beam (TM15)
Protect (TM17)
Iron Tail (TM23)
Thunderbolt (TM24)
Thunder (TM25)
Earthquake (TM26)
Brick Break (TM31)
Rock Tomb (TM39)
Overheat (TM50)
Body Slam (Tutor)
Double-Edge (Tutor)
% of Game Remaining After Being Obtained: 34.57%
% of Game Remaining After Being Evolved: 34.57%
Offensive Efficiency: 0.6778
Potential in an All Shadow Pokémon Playthrough: Moderate
Potential in the Orre Colosseum: Moderate
Set for All Shadow Pokémon Playthrough
Held Item: Black Belt
Move 1: Protect / Helping Hand
Move 2: Hidden Power / Iron Tail / Rock Tomb
Move 3: Earthquake / Body Slam
Move 4: Cross Chop
Primeape has solid offensive stats with STAB Cross Chop, several physical coverage options, Vital Spirit, and access to Helping Hand. This combination of traits is just enough to make it worth considering for a team despite its late acquisition. Earthquake is the best coverage move for Primeape, but it requires use of TM26. Body Slam is okay coverage and mainly functions as snag support. Hidden Power, Iron Tail, and Rock Tomb are all options for dealing damage to Psychic- and Flying-types. Although Cross Chop is strong, the poor accuracy reduces offensive efficiency in a playthrough, and the alternative of Brick Break will often feel too weak compared to other Fighting-types that are available earlier than Primeape.
Hypno
Obtained as: Hypno at LV. 34
Location: Cipher Key Lair
Evolution Requirements: None
Stats: 85 HP / 73 ATK / 70 DEF / 73 SPA / 115 SPD / 67 SPE
Ability: Insomnia
Notable Moves:
Psychic (Starting)
Baton Pass (Starting)
Shadow Ball (Starting)
Hypnosis (Starting)
Focus Punch (TM01)
Calm Mind (TM04)
Hidden Power (TM10)
Sunny Day (TM11)
Hyper Beam (TM15)
Light Screen (TM16)
Protect (TM17)
Rain Dance (TM18)
Brick Break (TM31)
Reflect (TM33)
Thunder Wave (Tutor)
Seismic Toss (Tutor)
Dream Eater (Tutor)
Body Slam (Tutor)
Double-Edge (Tutor)
% of Game Remaining After Being Obtained: 34.57%
% of Game Remaining After Being Evolved: 34.57%
Offensive Efficiency: 0.6778
Potential in an All Shadow Pokémon Playthrough: Moderate
Potential in the Orre Colosseum: Moderate
Set for All Shadow Pokémon Playthrough
Held Item: Twistedspoon
Move 1: Hypnosis
Move 2: Seismic Toss
Move 3: Brick Break / Hidden Power
Move 4: Psychic
Hypno is worth considering as a team addition due to its role as a bulky Hypnosis user that offers strong snag support. It has solid defensive stats with workable Speed and just enough offenses to deal solid chip damage or secure KOs with super effective attacks. Psychic is a good STAB attack, and Brick Break allows it to hit Dark-types better than most other Psychic-types are capable of. Seismic Toss deals reliable chip against all targets and further supplements its role as a snag supporter. Insomnia has situational use for its sleep immunity. Hypno also has some other notable moves such as weather support, Dream Eater, Thunder Wave, and screens.
Raticate
Obtained as: Raticate at LV. 34
Location: Citadark Isle
Evolution Requirements: None
Stats: 55 HP / 81 ATK / 60 DEF / 50 SPA / 70 SPD / 97 SPE
Ability: Run Away / Guts
Notable Moves:
Super Fang (Starting)
Hyper Fang (Starting)
Quick Attack (Starting)
Endeavor (LV. 50)
Hidden Power (TM10)
Sunny Day (TM11)
Ice Beam (TM13)
Blizzard (TM14)
Hyper Beam (TM15)
Protect (TM17)
Rain Dance (TM18)
Iron Tail (TM23)
Thunder Bolt (TM24)
Thunder (TM25)
Shadow Ball (TM30)
Facade (TM42)
Thunder Wave (Tutor)
Icy Wind (Tutor)
Body Slam (Tutor)
Double-Edge (Tutor)
% of Game Remaining After Being Obtained: 32.18%
% of Game Remaining After Being Evolved: 32.18%
Offensive Efficiency: 0.5128
Potential in an All Shadow Pokémon Playthrough: Moderate
Potential in the Orre Colosseum: Low
Set for All Shadow Pokémon Playthrough
Held Item: Silk Scarf
Move 1: Protect / Sunny Day / Rain Dance
Move 2: Super Fang / Endeavor
Move 3: Thunder Wave / Shadow Ball
Move 4: Body Slam / Hyper Beam
Raticate is one of many Pokémon caught on Citadark Isle that lack the standout traits required to make it worth utilizing in a playthrough. Since it has poor stats in conjunction with lackluster typing, it's only set apart by its movepool that can support snagging thanks to Super Fang, Body Slam, and Thunder Wave. Unfortunately, both Body Slam and Thunder Wave require the move tutor, thus further detracting from Raticate's appeal. It's an okay Pokémon for being a relatively fast snag supporter but isn't really worth utilizing in a playthrough.
Golduck
Obtained as: Golduck at LV. 33
Location: Citadark Isle
Evolution Requirements: None
Stats: 80 HP / 82 ATK / 78 DEF / 95 SPA / 80 SPD / 85 SPE
Ability: Damp / Could Nine
Notable Moves:
Waterfall (Starting)
Brick Break (Starting)
Hydro Pump (LV. 58)
Focus Punch (TM01)
Calm Mind (TM03)
Hidden Power (TM10)
Ice Beam (TM13)
Blizzard (TM14)
Hyper Beam (TM15)
Protect (TM17)
Rain Dance (TM18)
Seismic Toss (Tutor)
Icy Wind (Tutor)
Body Slam (Tutor)
Double-Edge (Tutor)
% of Game Remaining After Being Obtained: 33.14%
% of Game Remaining After Being Evolved: 33.14%
Offensive Efficiency: 0.5875
Potential in an All Shadow Pokémon Playthrough: Low
Potential in the Orre Colosseum: Low
Set for All Shadow Pokémon Playthrough
Held Item: Mystic Water
Move 1: Protect / Rain Dance
Move 2: Body Slam / Seismic Toss / Hidden Power
Move 3: Ice Beam / Blizzard
Move 4: Hydro Pump / Waterfall
Golduck is a Pokémon caught on Citadark Isle that lacks the standout traits needed to make it worth considering as an addition to a team. Its only edge is as a Pokémon on a rain team, and even then it requires the TM to ever learn Rain Dance. Other Water-types such as Vaporeon, Walrein, and Quagsire should be considered instead.
Sableye
Obtained as: Sableye LV. 33
Location: Citadark Isle
Evolution Requirements: None
Stats: 50 HP / 75 ATK / 75 DEF / 65 SPA / 65 SPD / 50 SPE
Ability: Keen Eye
Notable Moves:
Shadow Ball (Starting)
Helping Hand (Starting)
Faint Attack (Starting)
Recover (Starting)
Night Shade (Starting)
Fake Out (Starting)
Detect (Starting)
Knock Off (Starting)
Focus Punch (TM01)
Hidden Power (TM10)
Psychic (TM29)
Brick Break (TM31)
Dream Eater (Tutor)
Body Slam (Tutor)
Double-Edge (Tutor)
% of Game Remaining After Being Obtained: 33.14%
% of Game Remaining After Being Evolved: 33.14%
Offensive Efficiency: 0.4632
Potential in an All Shadow Pokémon Playthrough: Low
Potential in the Orre Colosseum: Low
Set for All Shadow Pokémon Playthrough
Held Item: Spell Tag
Move 1: Fake Out / Protect
Move 2: Night Shade / Helping Hand
Move 3: Recover / Brick Break / Focus Punch
Move 4: Shadow Ball
Sableye is a slow, weak, and fragile Pokémon that is not worth adding to a team. Notable moves such as Fake Out, Recover, and Night Shade are overshadowed by its pathetic stats and late acquisition. Consider using a better Pokémon for snag support such as Breloom, Jumpluff, Gardevoir, Jolteon, Ampharos, Electabuzz, Fearow, and Parasect.
Dodrio
Obtained as: Dodrio at LV. 34
Location: Citadark Isle
Evolution Requirements: None
Stats: 60 HP / 110 ATK / 70 DEF / 60 SPA / 60 SPD / 110 SPE
Ability: Run Away / Early Bird
Notable Moves:
Drill Peck (Starting)
Tri Attack (Starting)
Hidden Power (TM10)
Hyper Beam (TM15)
Protect (TM17)
Substitute (Tutor)
Body Slam (Tutor)
Sky Attack (Tutor)
Double-Edge (Tutor)
% of Game Remaining After Being Obtained: 32.18%
% of Game Remaining After Being Evolved: 32.18%
Offensive Efficiency: 0.6288
Potential in an All Shadow Pokémon Playthrough: High
Potential in the Orre Colosseum: High
Set for All Shadow Pokémon Playthrough
Held Item: Silk Scarf / Sharp Beak / Choice Band
Move 1: Hidden Power / Protect
Move 2: Drill Peck
Move 3: Body Slam / Tri Attack
Move 4: Hyper Beam / Double-Edge
Dodrio is one of the few Pokémon on Citadark Isle that are worth adding to a team thanks to its offensive stats and powerful moves. Drill Peck and Tri Attack are great STAB attacks. Body Slam can be used to offer some snag support, and Hyper Beam and Double-Edge are strong enough to OHKO most targets. Dodrio's movepool is shallow beyond this, but it does offer a fast and strong physical attacker that can be added to a team as a late-game pickup.
Set for Orre Colosseum
Held Item: Choice Band
EVs: 4 HP / 252 Atk / 252 Spe
Nature: Jolly
Move 1: Hidden Power / Double-Edge
Move 2: Body Slam
Move 3: Drill Peck
Move 4: Hyper Beam
Dodrio has just enough speed to function as a Choice Band attacker in the Orre Colosseum. A boosted super effective Drill Peck has enough power to OHKO most targets, as does a neutral Hyper Beam. Body Slam is also an easy move to click with a high chance of paralyzing foes. Dodrio needs teammates with greater offensive depth that can aid it in KOing bulkier targets and Rock- or Steel-types, and it pairs particularly well with Earthquake users.
Farfetch'd
Obtained as: Farfetch'd at LV. 36
Location: Citadark Isle
Evolution Requirements: None
Stats: 52 HP / 90 ATK / 55 DEF / 58 SPA / 62 SPD / 60 SPE
Ability: Keen Eye / Inner Focus
Notable Moves:
Swords Dance (Starting)
Baton Pass (Starting)
Aerial Ace (Starting)
Slash (Starting)
Knock Off (Starting)
Agility (Starting)
False Swipe (LV. 46)
Hidden Power (TM10)
Protect (TM17)
Iron Tail (TM23)
Substitute (Tutor)
Body Slam (Tutor)
Double-Edge (Tutor)
% of Game Remaining After Being Obtained: 30.74%
% of Game Remaining After Being Evolved: 30.74%
Offensive Efficiency: 0.4910
Potential in an All Shadow Pokémon Playthrough: Moderate
Potential in the Orre Colosseum: Low
Set for All Shadow Pokémon Playthrough
Held Item: Stick
Move 1: False Swipe / Baton Pass
Move 2: Swords Dance
Move 3: Aerial Ace / Agility
Move 4: Body Slam / Double-Edge
Farfetch'd is a worse Dodrio in almost all ways, with its only edge being that it gets False Swipe, Swords Dance, Agility, and Baton Pass, allowing it to function as snag support or pass boosts. Although situationally powerful, passing boosts with Baton Pass is inefficient for a playthrough. Farfetch'd is barely worth consideration, and there are other Normal / Flying type physical attackers like Fearow and Dodrio that are more noteworthy.
Altaria
Obtained as: Altaria at LV. 36
Location: Citadark Isle
Evolution Requirements: None
Stats: 75 HP / 70 ATK / 90 DEF / 70 SPA / 105 SPD / 80 SPE
Ability: Natural Cure
Notable Moves:
Dragonbreath (Starting)
Heal Bell (Starting)
Solarbeam (Starting)
Aerial Ace (Starting)
Sing (Starting)
Dragon Dance (LV. 40)
Perish Song (LV. 54)
Sky Attack (LV. 59 or Tutor)
Hidden Power (TM10)
Sunny Day (TM11)
Ice Beam (TM13)
Hyper Beam (TM15)
Protect (TM17)
Rain Dance (TM18)
Iron Tail (TM23)
Earthquake (TM26)
Flamethrower (TM35)
Fire Blast (TM36)
Dream Eater (Tutor)
Body Slam (Tutor)
Double-Edge (Tutor)
% of Game Remaining After Being Obtained: 30.74%
% of Game Remaining After Being Evolved: 30.74%
Offensive Efficiency: 0.5414
Potential in an All Shadow Pokémon Playthrough: Moderate
Potential in the Orre Colosseum: Moderate
Set for All Shadow Pokémon Playthrough
Held Item: Leftovers / Dragon Fang / Sharp Beak
Move 1: Sing / Sunny Day / Dragon Dance
Move 2: Fire Blast / Flamethrower / Earthquake
Move 3: Aerial Ace / Solarbeam
Move 4: Dragonbreath / Ice Beam / Double-Edge
Good typing, solid defensive stats, and a wide movepool make Altaria a potentially notable team addition, but unfortunately these are undermined by its mediocre offensive stats, lack of powerful STAB attacks, and late acquisition. Altaria nevertheless provides a Ground immunity and can support and function well on a sun team, offset its offensive stats with Dragon Dance, or provide snag support with Sing. Altaria is worth considering for a few teams that can make use of this unique combination of attributes but isn't worth the slot for most.
Kangaskhan
Obtained as: Kangaskhan at LV. 35
Location: Citadark Isle
Evolution Requirements: None
Stats: 105 HP / 95 ATK / 80 DEF / 40 SPA / 80 SPD / 90 SPE
Ability: Early Bird
Notable Moves:
Earthquake (Starting)
Sing (Starting)
Dizzy Punch (Starting)
Fake Out (Starting)
Endure (Starting)
Reversal (LV. 49)
Focus Punch (TM01)
Hidden Power (TM10)
Hyper Beam (TM15)
Protect (TM17)
Iron Tail (TM23)
Shadow Ball (TM30
Brick Break (TM31)
Rock Tomb (TM39)
Seismic Toss (Tutor)
Icy Wind (Tutor)
Substitute (Tutor)
Body Slam (Tutor)
Double-Edge (Tutor)
% of Game Remaining After Being Obtained: 29.79%
% of Game Remaining After Being Evolved: 29.79%
Offensive Efficiency: 0.5737
Potential in an All Shadow Pokémon Playthrough: High
Potential in the Orre Colosseum: High
Set for All Shadow Pokémon Playthrough
Held Item: Silk Scarf
Move 1: Fake Out / Protect / Hyper Beam
Move 2: Shadow Ball / Brick Break
Move 3: Earthquake
Move 4: Body Slam / Dizzy Punch
Kangaskhan is one of the most notable physical attackers in the game thanks to possessing the coveted Earthquake without requiring TM26 in addition to Fake Out and Body Slam combined with Shadow Ball or Brick Break. Its Speed is just high enough to move before nearly all enemies throughout the remainder of the game, and its Attack is just good enough to threaten targets with STAB Normal-type moves and super effective coverage. The late addition to a team nevertheless remains a hurdle, since there aren't too many battles left for it to shine, but it's worth consideration for teams that begin Citadark Isle with fewer than six Pokémon.
Set for Orre Colosseum
Held Item: Silk Scarf / Salac Berry
EVs: 4 HP / 252 Atk / 252 Spe
Nature: Jolly
Move 1: Fake Out / Endure
Move 2: Shadow Ball
Move 3: Earthquake / Reversal
Move 4: Body Slam / Return
Fake Out, Shadow Ball and Earthquake coverage, and the potential to run an Endure + Reversal + Salac Berry set makes Kangaskhan worthwhile in the Orre Colosseum. Although it isn't quite fast enough to outspeed many threats in the Colosseum, Kangaskhan has a way to deal with this thanks to decent bulk and Normal typing that mean it will usually only ever succumb in a single hit to Fighting-type attacks. The Endure + Reversal + Salac set is especially notable for its synergy with Explosion and Earthquake users and functions very similarly to Hitmonlee.
Banette
Obtained as: Banette at LV. 37
Location: Citadark Isle
Evolution Requirements: None
Stats: 64 HP / 115 ATK / 65 DEF / 83 SPA / 63 SPD / 65 SPE
Ability: Insomnia
Notable Moves:
Helping Hand (Starting)
Shadow Ball (Starting)
Knock Off (Starting)
Night Shade (Starting)
Will-O-Wisp (Starting)
Hidden Power (TM10)
Hyper Beam (TM15)
Protect (TM17)
Thunder Wave (Tutor)
Icy Wind (Tutor)
Body Slam (Tutor)
Double-Edge (Tutor)
% of Game Remaining After Being Obtained: 29.79%
% of Game Remaining After Being Evolved: 29.79%
Offensive Efficiency: 0.5864
Potential in an All Shadow Pokémon Playthrough: Moderate
Potential in the Orre Colosseum: Moderate
Set for All Shadow Pokémon Playthrough
Held Item: Spell Tag
Move 1: Helping Hand / Night Shade
Move 2: Hidden Power / Thunder Wave
Move 3: Body Slam / Double-Edge
Move 4: Shadow Ball
Banette is a strong Ghost-type with just enough tricks to make it worth considering. It has the strongest Shadow Ball in the game and can hit Normal-types with Body Slam, Double-Edge, or Hidden Power instead. Night Shade and Thunder Wave are excellent moves for snag support, and Helping Hand gives it something to do that ignores its poor Speed. Banette is an often-overlooked pick for teams that want to utilize a Ghost-type or pick up some additional late-game snag support, though it isn't particularly offensively efficient.
Magmar
Obtained as: Magmar at LV. 36
Location: Citadark Isle
Evolution Requirements: None
Stats: 65 HP / 95 ATK / 57 DEF / 100 SPA / 85 SPD / 93 SPE
Ability: Flame Body
Notable Moves:
Fire Blast (Starting)
Follow Me (Starting)
Cross Chop (Starting)
Thunderpunch (Starting)
Sunny Day (Starting)
Flamethrower (LV. 41)
Confuse Ray (LV. 49)
Focus Punch (TM01)
Hidden Power (TM10)
Protect (TM17)
Psychic (TM29)
Brick Break (TM31)
Seismic Toss (Tutor)
Substitute (Tutor)
Body Slam (Tutor)
% of Game Remaining After Being Obtained: 28.83%
% of Game Remaining After Being Evolved: 28.83%
Offensive Efficiency: 0.6280
Potential in an All Shadow Pokémon Playthrough: Moderate
Potential in the Orre Colosseum: Moderate
Set for All Shadow Pokémon Playthrough
Held Item: Charcoal
Move 1: Protect / Hidden Power / Body Slam
Move 2: Thunderpunch
Move 3: Flamethrower
Move 4: Fire Blast / Seismic Toss
Magmar is a great Pokémon in its own right, but it must grapple with the fact that it's rarely worth adding to a team that already has a Fire-type and is acquired too late to make sense as a team's first Fire-type. It's further overshadowed by the myriad of good Fire-types that are available much earlier in the game such as Flareon, Houndoom, and Camerupt. Apart from those weaknesses, Magmar has good offensive stats and worthwhile coverage moves in Thunder Punch and Cross Chop, with further techniques such as Body Slam and Seismic Toss for aiding in snag support. Magmar is likely only worth considering for teams that can stack multiple Fire-types.
Pinsir
Obtained as: Pinsir at LV. 35
Location: Citadark Isle
Evolution Requirements: None
Stats: 65 HP / 125 ATK / 100 DEF / 55 DEF / 70 SPD / 85 SPE
Ability: Hyper Cutter
Notable Moves:
Guillotine (Starting)
Helping Hand (Starting)
False Swipe (Starting)
Seismic Toss (Starting)
Brick Break (Starting)
Swords Dance (LV. 49)
Focus Punch (TM01)
Bulk Up (TM08)
Hidden Power (TM10)
Hyper Beam (TM15)
Protect (TM17)
Earthquake (TM26)
Rock Tomb (TM39)
Body Slam (Tutor)
Double-Edge (Tutor)
% of Game Remaining After Being Obtained: 28.83%
% of Game Remaining After Being Evolved: 28.83%
Offensive Efficiency: 0.5347
Potential in an All Shadow Pokémon Playthrough: Moderate
Potential in the Orre Colosseum: Low
Set for All Shadow Pokémon Playthrough
Held Item: X
Move 1: False Swipe
Move 2: Swords Dance / Helping Hand / Hidden Power
Move 3: Brick Break / Earthquake
Move 4: Double-Edge / Body Slam
Pinsir's excellent base 125 Attack and access to Swords Dance are ruined by lack of a usable Bug-type STAB attack and a shallow movepool reliant on TMs. False Swipe and Swords Dance remain the few traits that set Pinsir apart, and it can learn some strong moves such as Earthquake, Brick Break, and Double-Edge, but even these mostly aren't enough to make it worth considering this late in the game. It is difficult to consider Pinsir over other physical attackers with False Swipe.
Magcargo
Obtained as: Magcargo at LV. 38
Location: Citadark Isle
Evolution Requirements: None
Stats: 60 HP / 50 ATK / 120 DEF / 90 SPA / 80 SPD / 30 SPE
Ability: Magma Armor / Flame Body
Notable Moves:
Heat Wave (Starting)
Earthquake (Starting)
Flamethrower (Starting)
Yawn (Starting)
Rock Slide (LV. 48)
Body Slam (LV. 60 or Tutor)
Hidden Power (TM10)
Hyper Beam (TM15)
Protect (TM17)
Fire Blast (TM38)
Rock Tomb (TM39)
Overheat (TM50)
Selfdestruct (Tutor)
% of Game Remaining After Being Obtained: 25.96%
% of Game Remaining After Being Evolved: 25.96%
Offensive Efficiency: 0.5155
Potential in an All Shadow Pokémon Playthrough: Low
Potential in the Orre Colosseum: Low
Set for All Shadow Pokémon Playthrough
Held Item: Charcoal / Quick Claw
Move 1: Protect / Hidden Power
Move 2: Yawn / Rock Slide
Move 3: Flamethrower / Heat Wave
Move 4: Fire Blast / Overheat
Magcargo is one of the most pointless Pokémon in the entire game. It's an awful Fire-type with crippling Speed and common weaknesses that is entirely outclassed by far better and earlier acquired Pokémon such as Flareon, Houndoom, and Camerupt. Its one edge as a Fire-type with STAB Rock Slide is ruined by its pathetic base 50 Attack. This Pokémon should not be used outside of challenge runs.
Rapidash
Obtained as: Rapidash at LV. 40
Location: Citadark Isle
Evolution Requirements: None
Stats: 65 HP / 100 ATK / 70 DEF / 80 SPA / 80 SPD / 105 SPE
Ability: Run Away / Flash Fire
Notable Moves:
Solarbeam (Starting)
Sunny Day (Starting)
Flamethrower (Starting)
Baton Pass (Starting)
Agility (Starting)
Hidden Power (TM10)
Hyper Beam (TM15)
Protect (TM17)
Iron Tail (TM23)
Fire Blast (TM36)
Overheat (TM50)
Substitute (Tutor)
Body Slam (Tutor)
Double-Edge (Tutor)
% of Game Remaining After Being Obtained: 25.96%
% of Game Remaining After Being Evolved: 25.96%
Offensive Efficiency: 0.6021
Potential in an All Shadow Pokémon Playthrough: Moderate
Potential in the Orre Colosseum: Moderate
Set for All Shadow Pokémon Playthrough
Held Item: Charcoal
Move 1: Protect / Sunny Day
Move 2: Hidden Power / Solarbeam / Body Slam
Move 3: Flamethrower
Move 4: Fire Blast / Overheat
Rapidash is a similar Pokémon to Ninetales and is good in its own right, but it is outclassed by at least half a dozen other Fire-types that are acquired before it. Rapidash is thus most notable for learning Sunny Day and Solarbeam without the TM, making it worth considering as a late-game sun team pickup. Outside of this niche Rapidash is outclassed in a playthrough by other Fire-types.
Hitmonchan
Obtained as: Hitmonchan at LV. 38
Location: Citadark Isle
Evolution Requirements: None
Stats: 50 HP / 105 ATK / 79 DEF / 35 SPA / 110 SPD / 76 SPE
Ability: Keen Eye
Notable Moves:
Helping Hand (Starting)
Sky Uppercut (Starting)
Agility (Starting)
Detect (LV. 44)
Focus Punch (TM01)
Bulk Up (TM08)
Hidden Power (TM10)
Protect (TM17)
Earthquake (TM26)
Brick Break (TM31)
Rock Tomb (TM39)
Seismic Toss (Tutor)
Body Slam (Tutor)
Double-Edge (Tutor)
% of Game Remaining After Being Obtained: 25.00%
% of Game Remaining After Being Evolved: 25.00%
Offensive Efficiency: 0.5233
Potential in an All Shadow Pokémon Playthrough: Moderate
Potential in the Orre Colosseum: Low
Set for All Shadow Pokémon Playthrough
Held Item: Black Belt
Move 1: Protect / Detect / Agility
Move 2: Seismic Toss / Helping Hand / Earthquake
Move 3: Hidden Power / Body Slam
Move 4: Sky Uppercut
Hitmonchan is a solid Fighting-type Pokémon that doesn't have much to set itself apart from its competition. Agility is the most unique attribute it has, but it isn't worth using in most battles. Seismic Toss and Body Slam offer solid snagging support, and Hitmonchan can add Earthquake or Helping Hand to its arsenal. Nevertheless, earlier Fighting-types such as Breloom or Hariyama are almost always better for a team.
Hitmonlee
Obtained as: Hitmonlee at LV. 38
Location: Citadark Isle
Evolution Requirements: None
Stats: 50 HP / 120 ATK / 53 DEF / 35 SPA / 110 SPD / 87 SPE
Ability: Limber
Notable Moves:
High Jump Kick (Starting)
Mega Kick (Starting)
Double Kick (Starting)
Brick Break (Starting)
Endure (LV. 46)
Reversal (LV. 51)
Focus Punch (TM01)
Bulk Up (TM08)
Hidden Power (TM10)
Protect (TM17)
Earthquake (TM26)
Rock Tomb (TM39)
Seismic Toss (Tutor)
Substitute (Tutor)
Body Slam (Tutor)
Double-Edge (Tutor)
% of Game Remaining After Being Obtained: 24.52%
% of Game Remaining After Being Evolved: 24.52%
Offensive Efficiency: 0.5541
Potential in an All Shadow Pokémon Playthrough: Moderate
Potential in the Orre Colosseum: High
Set for All Shadow Pokémon Playthrough
Held Item: Black Belt
Move 1: Protect / Hidden Power
Move 2: Seismic Toss / Focus Punch
Move 3: Body Slam / Earthquake / Double-Edge
Move 4: Brick Break / High Jump Kick
Hitmonlee suffers from the same problems as Hitmonchan in a playthrough in that there are many Fighting-types that come before it that are worth utilizing over it. Hitmonlee does remain a fast and powerful Fighting-type with Seismic Toss and Body Slam as snag support and Earthquake and Double-Edge as coverage. Despite these strengths, it is difficult to justify this Pokémon over other, earlier Fighting-types.
Set for Orre Colosseum
Held Item: Salac Berry / Liechi Berry
EVs: 4 HP / 252 Atk / 252 Spe
Nature: Jolly
Move 1: Endure
Move 2: Rock Tomb / Body Slam
Move 3: Earthquake
Move 4: Reversal
In the Orre Colosseum Hitmonlee is an exceptional choice thanks to the combination of Endure, Reversal, and a pinch Berry, which brings its offensive presence to insane levels. A Salac Berry is typically the best option, as it offsets Hitmonlee's mediocre Speed to turn it into a powerful sweeper, though Liechi remains notable for allowing it to OHKO virtually anything. This combination pairs well with Earthquake and Explosion users and makes it a flexible sweeper to add to a team.
Lickitung
Obtained as: Lickitung at LV. 38
Location: Citadark Isle
Evolution Requirements: None
Stats: 90 HP / 55 ATK / 75 DEF / 60 SPA / 75 SPD / 30 SPE
Ability: Own Tempo / Oblivious
Notable Moves:
Double-Edge (Starting)
Helping Hand (Starting)
Rollout (Starting)
Lick (Starting)
Knock Off (Starting)
Focus Punch (TM01)
Hidden Power (TM10)
Ice Beam (TM13)
Blizzard (TM14)
Hyper Beam (TM15)
Protect (TM17)
Solarbeam (TM22)
Iron Tail (TM23)
Thunderbolt (TM24)
Thunder (TM25)
Earthquake (TM26)
Shadow Ball (TM30)
Brick Break (TM31)
Flamethrower (TM35)
Fire Blast (TM38)
Rock Tomb (TM39)
Seismic Toss (Tutor)
Icy Wind (Tutor)
Dream Eater (Tutor)
Body Slam (Tutor)
% of Game Remaining After Being Obtained: 23.09%
% of Game Remaining After Being Evolved: 23.09%
Offensive Efficiency: 0.4405
Potential in an All Shadow Pokémon Playthrough: Low
Potential in the Orre Colosseum: Low
Set for All Shadow Pokémon Playthrough
Held Item: Silk Scarf
Move 1: Helping Hand / Protect
Move 2: Seismic Toss / Icy Wind
Move 3: Shadow Ball / Lick
Move 4: Body Slam / Double-Edge
Despite an impressive movepool Lickitung is ruined by awful offensive stats and a pathetic base 30 Speed. The only worthwhile moves it ends up having are support in the form of Helping Hand and Seismic Toss. This Pokémon should only be considered for challenge runs.
Scyther
Obtained as: Scyther at LV. 40
Location: Citadark Isle
Evolution Requirements: Unavailable
Stats: 70 HP / 110 ATK / 80 DEF / 55 SPA / 80 SPD / 105 SPE
Ability: Swarm
Notable Moves:
Morning Sun (Starting)
Silver Wind (Starting)
Slash (Starting)
False Swipe (Starting)
Wing Attack (Starting)
Swords Dance (Starting)
Fury Cutter (LV. 46)
Hidden Power (TM10)
Hyper Beam (TM15)
Protect (TM17)
Double-Edge (Tutor)
% of Game Remaining After Being Obtained: 22.61%
% of Game Remaining After Being Evolved: 22.61%
Offensive Efficiency: 0.5333
Potential in an All Shadow Pokémon Playthrough: Low
Potential in the Orre Colosseum: Low
Set for All Shadow Pokémon Playthrough
Held Item: Silverpowder
Move 1: False Swipe
Move 2: Swords Dance / Double-Edge
Move 3: Wing Attack
Move 4: Silver Wind
Scyther is similar to Pinsir except for the fact that it actually gets a Bug-type STAB attack and comes with the added sting that it can't be evolved until after the final boss on account of requiring trading with a Game Boy Advance. There is no reason to consider this Pokémon over other physical attackers or even Pokémon with False Swipe. Scizor is a notable Pokémon for use in the Orre Colosseum, but Scyther is not.
Blissey
Obtained as: Chansey at LV. 39
Location: Citadark Isle
Evolution Requirements: Friendship
Stats: 255 HP / 10 ATK / 10 DEF / 75 SPA / 135 SPD / 55 SPE
Ability: Natural Cure / Serene Grace
Notable Moves:
Thunderbolt (Starting)
Softboiled (Starting)
Skill Swap (Starting)
Minimize (Starting)
Sing (Starting)
Light Screen (LV. 40 or TM16)
Calm Mind (TM03)
Sunny Day (TM10)
Ice Beam (TM13)
Protect (TM17)
Rain Dance (TM18)
Safeguard (TM20)
Double Team (TM32)
Flamethrower (TM35)
Thunder Wave (Tutor)
Seismic Toss (Tutor)
Icy Wind (Tutor)
Substitute (Tutor)
% of Game Remaining After Being Obtained: 22.61%
% of Game Remaining After Being Evolved: 22.61%
Offensive Efficiency: 0.5312
Potential in an All Shadow Pokémon Playthrough: Moderate
Potential in the Orre Colosseum: High
Set for All Shadow Pokémon Playthrough
Held Item: Leftovers
Move 1: Sing / Minimize
Move 2: Thunder Wave / Minimize
Move 3: Seismic Toss
Move 4: Softboiled
Blissey has exceptional traits, but defensive Pokémon are not efficient for use in playthroughs. This is further complicated by the lengthy friendship evolution requirement, the acquisition literally one battle before the final boss gauntlet, and the fact that bulky Shadow Pokémon are more useful as damage sponges anyway. Nevertheless, Blissey is not just the premier special wall of Pokémon XD, but the premier special wall of competitive play, sporting immense special bulk that no special attacker in the game can overcome. Sing, Thunder Wave, and Seismic Toss give Blissey excellent snagging support.
Set for Orre Colosseum
Held Item: Leftovers
EVs: 4 HP / 252 Def / 252 SpD
Nature: Calm
Move 1: Toxic / Safeguard / Calm Mind
Move 2: Softboiled
Move 3: Minimize / Thunderbolt
Move 4: Seismic Toss / Ice Beam
Blissey's exceptional special bulk is appreciated more in the Orre Colosseum, where it can wall most special attackers and chip them down with Toxic or Seismic Toss. It can also exploit special attackers and passive Pokémon alike by boosting with Calm Mind to obtain an offensive presence with BoltBeam. Blissey does not handle strong physical attackers well and is demolished by the common powerful Earthquakes and Explosions in the Colosseum. Nevertheless, Blissey has exceptional use in several battles throughout the challenge.
Solrock
Obtained as: Solrock at LV. 41
Location: Citadark Isle
Evolution Requirements: None
Stats: 90 HP / 95 ATK / 85 DEF / 55 SPA / 65 SPD / 70 SPE
Ability: Levitate
Notable Moves:
Psychic (Starting)
Baton Pass (Starting)
Sunny Day (Starting)
Cosmic Power (Starting)
Rock Slide (Starting)
Solarbeam (LV. 43)
Explosion (LV. 49)
Hidden Power (TM10)
Hyper Beam (TM15)
Protect (TM17)
Earthquake (TM26)
Shadow Ball (TM30)
Flamethrower (TM35)
Fire Blast (TM38)
Rock Tomb (TM39)
Overheat (TM50)
Dream Eater (Tutor)
Body Slam (Tutor)
Double-Edge (Tutor)
% of Game Remaining After Being Obtained: 22.13%
% of Game Remaining After Being Evolved: 22.13%
Offensive Efficiency: 0.5017
Potential in an All Shadow Pokémon Playthrough: Low
Potential in the Orre Colosseum: Moderate
Set for All Shadow Pokémon Playthrough
Held Item: Hard Stone
Move 1: Hidden Power / Explosion
Move 2: Shadow Ball / Earthquake
Move 3: Psychic
Move 4: Rock Slide / Rock Tomb
Solrock is not a bad Pokémon, but it is acquired during the final boss gauntlet and is outclassed by so many other Pokémon that it isn't worth using. Levitate with Rock Slide and Explosion is notable, but even for sand- and Earthquake-oriented teams, this Pokémon is hardly worth considering.
Starmie
Obtained as: Starmie at LV. 41
Location: Citadark Isle
Evolution Requirements: None
Stats: 60 HP / 75 ATK / 85 DEF / 100 SPA / 85 SPD / 115 SPE
Ability: Illuminate / Natural Cure
Notable Moves:
Waterfall (Starting)
Ice Beam (Starting)
Recover (Starting)
Hidden Power (TM10)
Blizzard (TM14)
Protect (TM17)
Rain Dance (TM18)
Thunderbolt (TM24)
Thunder (TM25)
Psychic (TM29)
Thunder Wave (Tutor)
Icy Wind (Tutor)
Substitute (Tutor)
Dream Eater (Tutor)
% of Game Remaining After Being Obtained: 22.13%
% of Game Remaining After Being Evolved: 22.13%
Offensive Efficiency: 0.5828
Potential in an All Shadow Pokémon Playthrough: High
Potential in the Orre Colosseum: Very High
Set for All Shadow Pokémon Playthrough
Held Item: Mystic Water / Twistedspoon
Move 1: Protect / Thunderbolt
Move 2: Ice Beam
Move 3: Waterfall
Move 4: Psychic
Starmie is one of the best special attackers in Pokémon XD and is the best Water-type in the game. Its only weakness is the obvious boss gauntlet acquisition, which makes its inclusion onto a team this late rather questionable. For teams that approach the final bosses with fewer than six Pokémon, Starmie is worth considering as one of the fastest Pokémon in the game with a solid base 100 Special Attack and incredible STAB and coverage moves in Waterfall, Psychic, Ice Beam, and Thunderbolt. Starmie works best for teams that elect to complete Realgam Tower Colosseum and Mt. Battle Zones to 60 prior to the battle with Cipher Admin Ardos.
Set for Orre Colosseum
Held Item: Mystic Water / Twistedspoon
EVs: 4 HP / 252 SpA / 252 Spe
Nature: Timid
Move 1: Protect / Thunderbolt
Move 2: Ice Beam
Move 3: Waterfall
Move 4: Psychic
Starmie is such a good Pokémon in the Orre Colosseum that it's practically essential. It's one of very few Pokémon that can actually outspeed many of the Colosseum's threats and actually has deep coverage to match. Waterfall is one of the few attacks that can OHKO Fire-types without relying upon Earthquake, while Ice Beam and Thunderbolt are both capable of getting OHKOs on several otherwise hard-to-hit bulky Pokémon. Starmie is also highly self reliant and teams well with just about any partner Pokémon. This should be one of the first Pokémon considered for any Orre Colosseum team.
Electabuzz
Obtained as: Elekid at LV. 20 or Electabuzz at LV. 43
Location: Outskirt Stand or Citadark Isle
Evolution Requirements: LV. 30
Stats: 65 HP / 83 ATK / 57 DEF / 95 SPA / 85 SPD / 105 SPE
Ability: Static
Notable Moves:
Ice Punch (Starting as Elekid)
Fire Punch (Starting as Elekid)
Thunderpunch (Starting as Elekid)
Cross Chop (Starting)
Follow Me (Starting as Electabuzz)
Thunder Wave (Starting as Electabuzz or Tutor)
Thunderbolt (Starting as Electabuzz or LV. 47 or TM24)
Thunder (LV. 58 or TM25)
Hidden Power (TM10)
Protect (TM17)
Rain Dance (TM18)
Psychic (TM29)
Seismic Toss (Tutor)
Substitute (Tutor)
% of Game Remaining After Being Obtained: 43.35% or 4.84%
% of Game Remaining After Being Evolved: 45.35% or 4.84%
Offensive Efficiency: 0.8533 or 0.5467
Potential in an All Shadow Pokémon Playthrough: Very High
Potential in the Orre Colosseum: High
Set for All Shadow Pokémon Playthrough
Held Item: Magnet
Move 1: Protect / Thunder Wave / Psychic
Move 2: Fire Punch
Move 3: Ice Punch
Move 4: Thunderbolt
It may be surprising that Hordel's Elekid aka Zaprong is one of the best Pokémon in the entire game for utilizing on a playthrough. Zaprong has a good base 105 Speed, solid base 95 Special Attack, and an fantastic special movepool that contains STAB Thunderbolt with Ice Punch and Fire Punch, allowing it to always hit something for good damage. It has further utility in a fast Thunder Wave, which has incredible use for snag support, or can go all-out attacking and run Psychic to capture KOs on Poison- and Fighting-type Pokémon too. Zaprong also has a unique trainer ID, meaning it gets boosted Exp from battle, effectively giving it a constant level buff. Zaprong should be one of the first considerations for a team's Electric-type, despite being acquired after Phenac City. Ardos's Electabuzz is not worth considering, as it's outclassed by Zaprong and obtained at the very end of the game.
Set for Orre Colosseum
Held Item: Magnet
EVs: 4 HP / 252 SpA / 252 Spe
Nature: Timid
Move 1: Protect / Rain Dance
Move 2: Fire Punch / Protect
Move 3: Ice Punch
Move 4: Thunderbolt / Thunder
Electabuzz has just enough Speed to be a viable pick for the Orre Colosseum, though it struggles with its damage output. It's notable as a fast Electric-type that actually has good coverage in Fire Punch and Ice Punch. Electabuzz can also support rain partners by setting Rain Dance, and using Thunder actually brings it some power. Nevertheless Electabuzz struggles with damage output and will still move after some of the Colosseum's faster threats, requiring stronger or faster teammates to help back it up.
Swellow
Obtained as: Swellow at LV. 43
Location: Citadark Isle
Evolution Requirements: None
Stats: 60 HP / 85 ATK / 60 DEF / 75 SPA / 50 SPD / 125 SPE
Ability: Guts
Notable Moves:
Sky Attack (Starting)
Baton Pass (Starting)
Agility (Starting)
Facade (Starting)
Wing Attack (Starting)
Endeavor (Starting)
Aerial Ace (Starting)
Hidden Power (TM10)
Sunny Day (TM11)
Hyper Beam (TMM 15)
Protect (TM17)
Rain Dance (TM18)
Substitute (Tutor)
Double-Edge (Tutor)
% of Game Remaining After Being Obtained: 4.84%
% of Game Remaining After Being Evolved: 4.84%
Offensive Efficiency: 0.4641
Potential in an All Shadow Pokémon Playthrough: Moderate
Potential in the Orre Colosseum: High
Set for All Shadow Pokémon Playthrough
Held Item: Sharp Beak / Silk Scarf
Move 1: Protect / Sky Attack
Move 2: Hidden Power / Hyper Beam
Move 3: Aerial Ace
Move 4: Facade / Double-Edge / Hyper Beam
Swellow has high Speed, a workable Attack stat, and good STAB attacks, but because it's acquired during the final boss gauntlet, it isn't really worth incorporating in a playthrough. There are other physical attackers that are better and get to see much more than 5% of the entire game.
Set for Orre Colosseum
Held Item: Choice Band
EVs: 4 HP / 252 Atk / 252 Spe
Nature: Adamant / Jolly
Move 1: Hidden Power / Steel Wing
Move 2: Aerial Ace
Move 3: Facade / Double-Edge
Move 4: Hyper Beam
Swellow's base 125 Speed makes it viable in the Orre Colosseum, where it can compensate its mediocre Attack stat with a Choice Band. In this role Swellow functions nearly identical to Dodrio but trades power for increased Speed. As a result, Swellow is even more reliant on partners with increased attacking power and greater attack depth so that it can focus on picking off chipped targets.
Snorlax
Obtained as: Snorlax at LV. 43
Location: Citadark Isle
Evolution Requirements: None
Stats: 160 HP / 110 ATK / 65 DEF / 65 SPA / 110 SPD / 30 SPE
Ability: Thick Fat / Immunity
Notable Moves:
Fissure (Starting)
Curse (Starting)
Body Slam (Starting)
Amnesia (Starting)
Belly Drum (Starting)
Yawn (Starting)
Rest (Starting)
Rollout (LV. 46)
Hyper Beam (LV. 51 or TM15)
Focus Punch (TM01)
Hidden Power (TM10)
Portect (TM17)
Earthquake (TM26)
Shadow Ball (TM30)
Brick Break (TM31)
Fire Blast (TM38)
Rock Tomb (TM39)
Seismic Toss (Tutor)
Icy Wind (Tutor)
Double-Edge (Tutor)
Selfdestruct (Tutor)
% of Game Remaining After Being Obtained: 4.84%
% of Game Remaining After Being Evolved: 4.84%
Offensive Efficiency: 0.4611
Potential in an All Shadow Pokémon Playthrough: High
Potential in the Orre Colosseum: Very High
Set for All Shadow Pokémon Playthrough
Held Item: Leftovers
Move 1: Yawn
Move 2: Seismic Toss
Move 3: Shadow Ball / Amnesia
Move 4: Body Slam
Due to Snorlax's immense bulk, it has notable use in the final few battles of the game as a Shadow Pokémon that resists all attacks wielded by the other powerful Shadow Pokémon. Snorlax can alternatively be used as snag support in the final battles with Yawn, Seismic Toss, and Body Slam, with its bulk still making it difficult for the AI to KO. Snorlax is such an exceptional Pokémon in this capacity that it is often worth even dropping a Pokémon or two for the final few battles to instead integrate one or two powerful Shadow Pokémon onto.
Set for Orre Colosseum
Held Item: Choice Band
EVs: 4 HP / 252 Atk / 252 Def
Nature: Adamant
Move 1: Return / Body Slam
Move 2: Shadow Ball
Move 3: Earthquake
Move 4: Selfdestruct
Snorlax is arguably the best Pokémon available for use in the Orre Colosseum. It has the strongest boom in the entire game, capable of KOing even targets that resist it; exceptional mixed bulk; and great coverage moves in Shadow Ball and Earthquake. Selfdestruct and Earthquake not only spread powerful ruin upon the AI but can even be used to set up teammates such as Hitmonlee for pinch Berry sweeping. Snorlax's potency is so great that it can win multiple battles within the Colosseum with only a single partner. Snorlax should be one of the first Pokémon considered for any Orre Colosseum team, and the first Pokémon for consideration as a boomer or offensive tank.
Poliwrath
Obtained as: Poliwrath at LV. 42
Location: Citadark Isle
Evolution Requirements: None
Stats: 90 HP / 95 ATK / 95 DEF / 70 SPA / 90 SPD / 70 SPE
Ability: Water Absorb / Damp
Notable Moves:
Hydro Pump (Starting)
Helping Hand (Starting)
Rain Dance (Starting)
Brick Break (Starting)
Hypnosis (Starting)
Focus Punch (TM01)
Bulk Up (TM08)
Hidden Power (TM10)
Ice Beam (TM13)
Blizzard (TM14)
Hyper Beam (TM15)
Protect (TM17)
Earthquake (TM26)
Psychic (TM29)
Rock Tomb (TM39)
Seismic Toss (Tutor)
Icy Wind (Tutor)
Body Slam (Tutor)
Double-Edge (Tutor)
% of Game Remaining After Being Obtained: 4.20%
% of Game Remaining After Being Evolved: 4.20%
Offensive Efficiency: 0.4592
Potential in an All Shadow Pokémon Playthrough: Moderate
Potential in the Orre Colosseum: Moderate
Set for All Shadow Pokémon Playthrough
Held Item: Mystic Water / Black Belt
Move 1: Hypnosis / Helping Hand
Move 2: Ice Beam
Move 3: Brick Break
Move 4: Hydro Pump
Poliwrath is a solid Pokémon with unique Water / Fighting typing that is unfortunately not quite notable enough to be worth consideration. Its Speed is a bit too low compared to its competition, its offenses are not quite good enough to make its strong STAB attacks hit truly hard, and it doesn't have quite enough utility despite access to Hypnosis and Helping Hand.
Mr. Mime
Obtained as: Mr. Mime at LV. 42
Location: Citadark Isle
Evolution Requirements: None
Stats: 40 HP / 45 ATK / 65 DEF / 100 SPA / 120 SPD / 90 SPE
Ability: Soundproof
Notable Moves:
Psychic (Starting)
Follow Me (Starting)
Thunderpunch (Starting)
Substitute (Starting)
Light Screen (Starting)
Reflect (Starting)
Baton Pass (LV. 49)
Calm Mind (TM03)
Hidden Power (TM10)
Sunny Day (TM11)
Protect (TM17)
Rain Dance (TM18)
Solarbeam (TM22)
Thunderbolt (TM24)
Thunder (TM24)
Thunder Wave (Tutor)
Seismic Toss (Tutor)
Dream Eater (Tutor)
% of Game Remaining After Being Obtained: 4.20%
% of Game Remaining After Being Evolved: 4.20%
Offensive Efficiency: 0.5105
Potential in an All Shadow Pokémon Playthrough: Moderate
Potential in the Orre Colosseum: Moderate
Set for All Shadow Pokémon Playthrough
Held Item: Twistedspoon
Move 1: Thunder Wave / Rain Dance / Sunny Day
Move 2: Seismic Toss / Hidden Power / Solarbeam
Move 3: Thunderbolt / Thunder
Move 4: Psychic
Mr. Mime is similar to Poliwrath in that it's a solid Pokémon with some unique quirks, yet none of them are quite notable enough to justify its acquisition at the end of the game or stand above its competitors. Thunder Wave and Seismic Toss are great for snagging support, but there are only a few Pokémon left to snag. Thunderbolt plus STAB Psychic is great, but it's better done by Gardevoir.
Dugtrio
Obtained as: Dugtrio at LV. 40
Location: Citadark Isle
Evolution Requirements: None
Stats: 35 HP / 80 ATK / 50 DEF / 50 SPA / 70 SPD / 120 SPE
Ability: Sand Veil / Arena Trap
Notable Moves:
Earthquake (Starting)
Tri Attack (Starting)
Magnitude (Starting)
Hidden Power (TM10)
Hyper Beam (TM15)
Protect (TM17)
Double Team (TM32)
Rock Tomb (TM39)
Substitute (Tutor)
Body Slam (Tutor)
Double-Edge (Tutor)
% of Game Remaining After Being Obtained: 3.67%
% of Game Remaining After Being Evolved: 3.67%
Offensive Efficiency: 0.5319
Potential in an All Shadow Pokémon Playthrough: Moderate
Potential in the Orre Colosseum: High
Set for All Shadow Pokémon Playthrough
Held Item: Soft Sand
Move 1: Protect / Hidden Power
Move 2: Rock Tomb / Hidden Power / Hyper Beam
Move 3: Body Slam / Tri Attack
Move 4: Earthquake
Dugtrio has fantastic base 120 Speed with solid base 80 Attack and excellent Ground typing with access to the sought-after Earthquake without TM26. Unfortunately, Dugtrio only has 3% of the game remaining to shine in use and isn't worth waiting for or substituting over another Pokémon. Dugtrio also lacks the bulk to make it notable as a Shadow Pokémon damage sponge.
Set for Orre Colosseum
Held Item: Leftovers / Shell Bell
EVs: 4 HP / 252 Atk / 252 Spe
Nature: Jolly
Move 1: Substitute
Move 2: Double Team / Body Slam / Sludge Bomb
Move 3: Rock Tomb
Move 4: Earthquake
Dugtrio's good stats, Ground typing, and solid movepool make it notable for use in the Orre Colosseum. Sand Veil with Substitute is notable on a sand team, and Dugtrio has general use for firing off the fastest Earthquakes in the game. Rock Tomb is the only coverage move available for Ground-immune Pokémon. Double Team makes Dugtrio in sand an even greater nuisance, while Body Slam and Sludge Bomb function as okay coverage options.
Manectric
Obtained as: Manectric at LV. 44
Location: Citadark Isle
Evolution Requirements: None
Stats: 70 HP / 75 ATK / 60 DEF / 105 SPA / 60 SPD / 105 SPE
Ability: Static / Lightningrod
Notable Moves:
Thunder (Starting)
Rain Dance (Starting)
Bite (Starting)
Thunder Wave (Starting)
Quick Attack (Starting)
Hidden Power (TM10)
Protect (TM17)
Thunderbolt (TM24)
Substitute (Tutor)
% of Game Remaining After Being Obtained: 3.03%
% of Game Remaining After Being Evolved: 3.03%
Offensive Efficiency: 0.5314
Potential in an All Shadow Pokémon Playthrough: Low
Potential in the Orre Colosseum: High
Set for All Shadow Pokémon Playthrough
Held Item: Magnet
Move 1: Protect / Rain Dance
Move 2: Thunder Wave
Move 3: Hidden Power / Bite
Move 4: Thunderbolt / Thunder
Manectric is a good Pokémon, but it is entirely outclassed by Electric-types that are available earlier and has no distinct qualities for a playthrough; consider a different Electric-type instead.
Set for Orre Colosseum
Held Item: Magnet
EVs: 4 HP / 252 SpA / 252 Spe
Nature: Timid
Move 1: Protect
Move 2: Rain Dance / Thunder
Move 3: Hidden Power / Bite
Move 4: Thunderbolt / Thunder
With good offensive stats and a workable movepool, Manectric is notable in the Orre Colosseum as a Lightningrod supporter that fits well on a rain team. Protect is essential for blocking Earthquake and Explosion use from allies and enemies alike while still functioning as a Lightningrod presence. Thunder should be run with Rain Dance or with Thunderbolt in order to have an option for better damage output. Manectric lacks good coverage moves, but it can rely on fast Bite or a good Hidden Power type such as Ice, Fire, Water, or Grass.
Salamence
Obtained as: Salamence at LV. 50
Location: Citadark Isle
Evolution Requirements: None
Stats: 95 HP / 135 ATK / 80 DEF / 110 SPA / 80 SPD / 100 SPE
Ability: Intimidate
Notable Moves:
Dragon Claw (Starting)
Dragon Dance (Starting)
Aerial Ace (Starting)
Bite (Starting)
Protect (Starting)
Hidden Power (TM10)
Sunny Day (TM11)
Hyper Beam (TM15)
Rain Dance (TM18)
Iron Tail (TM23)
Earthquake (TM26)
Brick Break (TM31)
Flamethrower (TM35)
Fire Blast (TM38)
Substitute (Tutor)
Body Slam (Tutor)
Double-Edge (Tutor)
% of Game Remaining After Being Obtained: 3.03%
% of Game Remaining After Being Evolved: 3.03%
Offensive Efficiency: 0.5148
Potential in an All Shadow Pokémon Playthrough: Very High
Potential in the Orre Colosseum: Very High
Set for All Shadow Pokémon Playthrough
Held Item: Leftovers
Move 1: Shadow Rush
Move 2: Shadow Hold
Move 3: -----
Move 4: -----
Due to its high level and good bulk, Salamence is one of the best Shadow Pokémon to utilize against Greevil and Miror B. The opportunity cost to not utilizing one or two powerful Shadow Pokémon in the final battles is immense, as they outclass all purified Pokémon competition in their abilities to wall other Shadow Pokémon, make for a safe method of chipping them down to low health outside False Swipe, and act as team medics. Salamence is most notable, as against Greevil it can be given Leftovers to hold, unlike Shadow Lugia, making it nearly impossible to KO. Against Miror B., Salamence has little to fear except for the one Ludicolo that knows Ice Punch. For an all Shadow Pokémon playthrough, Shadow Salamence will be a top contender for being a team's final Pokémon or replacing its weakest Pokémon.
Set for Orre Colosseum
Held Item: Leftovers / Silk Scarf
EVs: 4 HP / 252 Atk / 252 Spe
Nature: Jolly
Move 1: Dragon Dance
Move 2: Hiddden Power / Aerial Ace
Move 3: Earthquake
Move 4: Double-Edge
With a hard-to-hit defensive typing coupled with a Ground immunity, Intimidate, high offensive stats, and a good movepool, Salamence is one of the best Pokémon to use in the Orre Colosseum. It functions best as a Dragon Dance user where a boost to its Attack and Speed make it a wickedly fast and powerful sweeper that can pick off targets with Flying-type STAB and Double-Edge or crush even burly Rock-, Steel-, Electric-, and Fire-types with Earthquake. Hidden Power Flying is ideal but unlikely to be obtained, so Aerial Ace provides a practical alternative. Due to Flying-type STAB attacks' low Base Power, Double-Edge is Salamence's best way of dealing high damage to a single target. Salamence pairs exceptionally well with fast and powerful Electric-types such as Zapdos that can take down bulky Water-types that threaten Salamence with Ice-type moves, as well as with Ground-immune allies, Earthquake users, and Endure + pinch Berry users.
Marowak
Obtained as: Marowak at LV. 44
Location: Citadark Isle
Evolution Requirements: None
Stats: 60 HP / 80 ATK / 110 DEF / 50 SPA / 80 SPD / 45 SPE
Ability: Rock Head / Lightningrod
Notable Moves:
Earthquake (Starting)
Sing (Starting)
Swords Dance (Starting)
Rock Slide (Starting)
False Swipe (Starting)
Focus Punch (TM01)
Hidden Power (TM10)
Hyper Beam (TM15)
Protect (TM17)
Iron Tail (TM23)
Brick Break (TM31)
Rock Tomb (TM39)
Seismic Toss (Tutor)
Icy Wind (Tutor)
Body Slam (Tutor)
Double-Edge (Tutor)
% of Game Remaining After Being Obtained: 3.03%
% of Game Remaining After Being Evolved: 3.03%
Offensive Efficiency: 0.4342
Potential in an All Shadow Pokémon Playthrough: Low
Potential in the Orre Colosseum: High
Set for All Shadow Pokémon Playthrough
Held Item: Thick Club
Move 1: Swords Dance / Sing
Move 2: False Swipe
Move 3: Rock Slide
Move 4: Earthquake
Despite having some useful snag support moves, Marowak is not worth using in the last few battles over fast Ground-types or bulkier Shadow Pokémon. Consider using one of those instead.
Set for Orre Colosseum
Held Item: Thick Bone
EVs: 252 HP / 252 Atk / 4 SpD
Nature: Adamant
Move 1: Protect
Move 2: Swords Dance
Move 3: Rock Slide
Move 4: Earthquake
Thick Club makes Marowak the most powerful Earthquake user in the game, and Lightningrod gives it a unique edge. Swords Dance boosts Marowak's Earthquakes to incredible power, enabling it to OHKO nearly all neutral targets. Rock Slide is excellent coverage with Earthquake, typically hitting Ground-immune foes for solid damage. Marowak synergizes best with fast offensive Flying-types and Water-types, which it provides Lightningrod support for while benefiting from their ability to take down opposing special attacking threats.
Lapras
Obtained as: Lapras at LV. 44
Location: Citadark Isle
Evolution Requirements: None
Stats: 130 HP / 85 ATK / 80 DEF / 85 SPA / 95 SPD / 60 SPE
Ability: Water Absorb / Shell Armor
Notable Moves:
Hydro Pump (Starting)
Heal Bell (Starting)
Rain Dance (Starting)
Blizzard (Starting)
Sing (Starting)
Body Slam (Starting)
Perish Song (Starting)
Ice Beam (Starting)
Sheer Cold (LV. 55)
Hidden Power (TM10)
Protect (TM17)
Thunderbolt (TM24)
Thunder (TM25)
Psychic (TM29)
Icy Wind (Tutor)
Dream Eater (Tutor)
% of Game Remaining After Being Obtained: 3.03%
% of Game Remaining After Being Evolved: 3.03%
Offensive Efficiency: 0.4802
Potential in an All Shadow Pokémon Playthrough: Low
Potential in the Orre Colosseum: Moderate
Set for All Shadow Pokémon Playthrough
Held Item: Leftovers
Move 1: Sing / Heal Bell
Move 2: Protect / Body Slam
Move 3: Ice Beam
Move 4: Hydro Pump
Despite being a good Pokémon, Lapras is not worth using in the last few battles over better-established Water-types or bulkier Shadow Pokémon. Use those instead.
Lugia
Obtained as: Lugia at LV. 50
Location: Citadark Isle
Evolution Requirements: None
Stats: 106 HP / 90 ATK / 130 DEF / 90 SPA / 154 SPD / 110 SPE
Ability: Pressure
Notable Moves:
Psycho Boost (Starting)
Featherdance (Starting)
Earthquake (Starting)
Hydro Pump (Starting)
Recover (Starting)
Rain Dance (LV. 55 or TM18)
Calm Mind (TM03)
Sunny Day (TM11)
Ice Beam (TM13)
Blizzard (TM14)
Light Screen (TM16)
Protect (TM17)
Thunderbolt (TM24)
Thunder (TM25)
Psychic (TM29)
Reflect (TM33)
Thunder Wave (Tutor)
Icy Wind (Tutor)
Dream Eater (Tutor)
% of Game Remaining After Being Obtained: 1.91%
% of Game Remaining After Being Evolved: 1.91%
Offensive Efficiency: 0.5398
Potential in an All Shadow Pokémon Playthrough: Very High
Potential in the Orre Colosseum: None
Set for All Shadow Pokémon Playthrough
Held Item: Leftovers
Move 1: Shadow Blast
Move 2: Shadow Shed
Move 3: Shadow Down
Move 4: Shadow Storm
Due to its high level and immense bulk, Lugia is one of the best Shadow Pokémon to utilize against Greevil and Miror B. The opportunity cost to not utilizing one or two powerful Shadow Pokémon in the final battles is immense, as they outclass all purified Pokémon competition in their abilities to wall other Shadow Pokémon, make for a safe source of chip damage outside False Swipe, and act as team medics. Lugia is a standout candidate for having the best bulk of any Pokémon in the entire game, to the point of being practically impossible for the AI to KO. All teams should at least consider battling Greevil with five Pokémon so that the snagged Shadow Lugia can be used against his remaining six. Against Miror B., Lugia takes even rain-boosted Hydro Pumps well and can wall Shadow Dragonite indefinitely.
Zapdos
Obtained as: Zapdos at LV. 50
Location: Citadark Isle
Evolution Requirements: None
Stats: 90 HP / 90 ATK / 85 DEF / 125 SPA / 90 SPD / 100 SPE
Ability: Pressure
Notable Moves:
Extrasensory (Starting)
Baton Pass (Starting)
Thunderbolt (Starting)
Thunder Wave (Starting)
Agility (Starting)
Detect (Starting)
Drill Peck (Starting)
Hidden Power (TM10)
Light Screen (TM16)
Rain Dance (TM18)
Thunder (TM25)
Substitute (Tutor)
% of Game Remaining After Being Obtained: 1.28%
% of Game Remaining After Being Evolved: 1.28%
Offensive Efficiency: 0.5675
Potential in an All Shadow Pokémon Playthrough: Moderate
Potential in the Orre Colosseum: Very High
Set for All Shadow Pokémon Playthrough
Held Item: Sharp Beak
Move 1: Thunder Wave
Move 2: Extrasensory / Detect
Move 3: Drill Peck
Move 4: Thunder
Zapdos is snagged against the final boss and can only be used against Miror B., in which it does an okay job thanks to its high Speed and STAB Drill Peck but requires purification. It usually makes more sense to use other Pokémon.
Set for Orre Colosseum
Held Item: Magnet
EVs: 4 HP / 252 SpA / 252 Spe
Nature: Timid
Move 1: Detect
Move 2: Hidden Power / Drill Peck
Move 3: Extrasensory / Rain Dance
Move 4: Thunderbolt / Thunder
Zapdos is one of the best special attackers in the entire game and thus is one of the best Pokémon to use in the Orre Colosseum. It combines a high Special Attack, high Speed, Ground immunity, and status as an offensive Electric-type that actually has solid coverage moves in STAB Drill Peck and Extrasensory. Zapdos is especially lethal if it's lucky enough to be caught with Hidden Power Ice, but it also does well with Hidden Power Grass and Hidden Power Water. Zapdos is exceptionally good at supporting other Pokémon in the Colosseum and works well on virtually any Orre Colosseum team. Unfortunately, Zapdos is one of Greevil's main six Pokémon, whose stats cannot be viewed prior to saving, thus making it impossible to reset for. Zapdos's Speed and Special Attack can be estimated in battle, though at great effort.
Moltres
Obtained as: Moltres at LV. 50
Location: Citadark Isle
Evolution Requirements: None
Stats: 90 HP / 100 ATK / 90 DEF / 125 SPA / 85 SPD / 90 SPE
Ability: Pressure
Notable Moves:
Extrasensory (Starting)
Morning Sun (Starting)
Will-O-wisp (Starting)
Flamethrower (Starting)
Agility (Starting)
Hidden Power (TM10)
Sunny Day (TM11)
Protect (TM17)
Fire Blast (TM38)
Overheat (TM50)
Substitute (Tutor)
% of Game Remaining After Being Obtained: 1.28%
% of Game Remaining After Being Evolved: 1.28%
Offensive Efficiency: 0.5753
Potential in an All Shadow Pokémon Playthrough: Low
Potential in the Orre Colosseum: High
Set for All Shadow Pokémon Playthrough
Held Item: Leftovers
Move 1: Shadow Fire
Move 2: Shadow Shed
Move 3: Shadow Hold
Move 4: Shadow Rush
Moltres is snagged against the final boss and can only be used against Miror B., in which it does poorly due to its Water-type weakness. It doesn't make sense to use this Pokémon.
Set for Orre Colosseum
Held Item: White Herb
EVs: 4 HP / 252 SpA / 252 Spe
Nature: Timid
Move 1: Protect / Sunny Day / Agility
Move 2: Hidden Power / Flamethrower
Move 3: Extrasensory
Move 4: Overheat
In the Orre Colosseum, Moltres is the most powerful Overheat user available and the scourge of Steel-types and Pokémon dependent on KOing Fire-types with Earthquake. Extrasensory provides a decent form of coverage, though lucky Hidden Power types such as Electric, Grass, Ice, and Water are preferred. Unfortunately Moltres's greatest weakness is its average Speed coupled with mediocre bulk that leaves it susceptible to fast attackers, especially those with Electric-type attacks or powerful physical attacks such as Return. Moltres pairs well with fast special attackers, especially Electric-types that can deal with bulky Water-types. Earthquake users also appreciate Moltres's ability to dismantle even the bulkiest Grass-types, and Moltres enjoys them eliminating Fire- and Electric-types in return.
Articuno
Obtained as: Articuno at LV. 50
Location: Citadark Isle
Evolution Requirements: None
Stats: 90 HP / 85 ATK / 100 DEF / 95 SPA / 125 SPD / 85 SPE
Ability: Pressure
Notable Moves:
Extrasensory (Starting)
Heal Bell (Starting)
Haze (Starting)
Ice Beam (Starting)
Agility (Starting)
Mind Reader (Starting)
Hidden Power (TM10)
Blizzard (TM14)
Protect (TM17)
Rain Dance (TM18)
Reflect (TM33)
Icy Wind (Tutor)
Substitute (Tutor)
% of Game Remaining After Being Obtained: 1.28%
% of Game Remaining After Being Evolved: 1.28%
Offensive Efficiency: 0.5116
Potential in an All Shadow Pokémon Playthrough: Low
Potential in the Orre Colosseum: Moderate
Set for All Shadow Pokémon Playthrough
Held Item: Nevermeltice
Move 1: Protect
Move 2: Hidden Power / Icy Wind
Move 3: Extrasensory
Move 4: Ice Beam
Articuno is snagged against the final boss and can only be used against Miror B., in which it is not notable due to its mediocre damage output against Ludicolo. It doesn't make sense to use this Pokémon. Unfortunately, its low Speed and common weaknesses don't make it especially notable for use in the Orre Colosseum either.
Rhydon
Obtained as: Rhydon at LV. 46
Location: Citadark Isle
Evolution Requirements: None
Stats: 105 HP / 130 ATK / 120 DEF / 45 SPA / 45 SPD / 40 SPE
Ability: Lightningrod / Rock Head
Notable Moves:
Megahorn (Starting)
Helping Hand (Starting)
Earthquake (Starting)
Rock Blast (Starting)
Horn Drill (Starting)
Focus Punch (TM01)
Hidden Power (TM10)
Sunny Day (TM11)
Hyper Beam (TM15)
Protect (TM17)
Rain Dance (TM18)
Iron Tail (TM23)
Brick Break (TM31)
Rock Tomb (TM39)
Seismic Toss (Tutor)
Icy WInd (Tutor)
Body Slam (Tutor)
Double-Edge (Tutor)
% of Game Remaining After Being Obtained: 1.28%
% of Game Remaining After Being Evolved: 1.28%
Offensive Efficiency: 0.4929
Potential in an All Shadow Pokémon Playthrough: Low
Potential in the Orre Colosseum: Moderate
Set for All Shadow Pokémon Playthrough
Held Item: Soft Sand / Quick Claw
Move 1: Protect
Move 2: Megahorn
Move 3: Rock Blast / Rock Tomb
Move 4: Earthquake
Rhydon is snagged against the final boss and can only be used against Miror B., in which it does horribly due to its Water- and Grass-type weakness. In the Orre Colosseum, it is outclassed as a Lightningrod supporter by Manectric and Marowak.
Exeggutor
Obtained as: Exeggutor at LV. 46
Location: Citadark Isle
Evolution Requirements: None
Stats: 95 HP / 95 ATK / 85 DEF / 125 SPA / 75 SPD / 55 SPE
Ability: Chlorophyll
Notable Moves:
Psychic (Starting)
Hypnosis (Starting)
Ancientpower (Starting)
Hidden POwer (TM10)
Sunny Day (TM11)
Protect (TM17)
Giga Drain (TM19)
Solarbeam (TM22)
Substitute (Tutor)
Dream Eater (Tutor)
Selfdestruct (Tutor)
% of Game Remaining After Being Obtained: 1.28%
% of Game Remaining After Being Evolved: 1.28%
Offensive Efficiency: 0.5096
Potential in an All Shadow Pokémon Playthrough: Moderate
Potential in the Orre Colosseum: High
Set for All Shadow Pokémon Playthrough
Held Item: Leftovers
Move 1: Sunny Day
Move 2: Hypnosis
Move 3: Psychic
Move 4: Solarbeam
Exeggutor is snagged against the final boss and can only be used against Miror B., in which it isn't a notable candidate due to its sun dependence while battling against a rain team.
Set for Orre Colosseum
Held Item: Miracle Seed
EVs: 4 HP / 252 SpA / 252 Spe
Nature: Timid / Niave
Move 1: Protect / Sunny Day
Move 2: Hidden Power / Hypnosis / Selfdestruct
Move 3: Psychic
Move 4: Solarbeam
Chlorophyll and a monstrous Special Attack stat make Exeggutor a notable candidate for the Orre Colosseum. Exeggutor has the strongest Solarbeam in the game, which can be fired off before most AI Pokémon can move when under sun. With no Sleep Clause in the Colosseum, Hypnosis is immensely powerful, albeit risky due to its poor accuracy. STAB Psychic provides unique coverage and further helps set apart Exeggutor from other Chlorophyll sweepers. Due to its low Speed and common weaknesses, Exeggutor is dependent on sun support to function, though, and can only fit well on specific teams.
Tauros
Obtained as: Tauros at LV. 46
Location: Citadark Isle
Evolution Requirements: None
Stats: 75 HP / 100 ATK /95 DEF / 40 SPA / 70 SPD / 110 SPE
Ability: Intimidate
Notable Moves:
Earthquake (Starting)
Body Slam (Starting)
Hidden Power (TM10)
Sunny Day (TM11)
Hyper Beam (TM15)
Protect (TM17)
Rain Dance (TM18)
Iron Tail (TM23)
Rock Tomb (TM39)
Icy Wind (Tutor)
Substitute (Tutor)
Double-Edge (Tutor)
% of Game Remaining After Being Obtained: 1.28%
% of Game Remaining After Being Evolved: 1.28%
Offensive Efficiency: 0.4925
Potential in an All Shadow Pokémon Playthrough: Moderate
Potential in the Orre Colosseum: Very High
Set for All Shadow Pokémon Playthrough
Held Item: Silk Scarf
Move 1: Sunny Day
Move 2: Hidden Power / Icy Wind
Move 3: Earthquake
Move 4: Body Slam
Tauros is snagged against the final boss and can only be used against Miror B., in which it doesn't have any standout traits over other Pokémon.
Set for Orre Colosseum
Held Item: Choice Band
EVs: 4 HP / 252 Atk / 252 Spe
Nature: Jolly
Move 1: Hidden Power / Iron Tail
Move 2: Earthquake
Move 3: Return / Body Slam
Move 4: Hyper Beam / Double-Edge
With great Speed, terrific Attack, a solid movepool, and the excellent ability Intimidate, Tauros is one of the best Pokémon to use in the Orre Colosseum. A Choice Band gives Tauros a powerful presence, allowing its Earthquakes to deal high damage even against bulky targets and boosting its Normal-type STABs to mighty levels. Although it isn't particularly bulky, the combination of Intimidate with Normal typing usually ensures that Tauros can take at least two strong attacks before going down, thereby often giving it two or more chances to quickly attack enemies. Much like Zapdos, Tauros is a fast attacker that works on most teams for the Orre Colosseum and requires little if any team support.
Dragonite
Obtained as: Dragonite at LV. 55
Location: Gateon Port
Evolution Requirements: None
Stats: 91 HP / 134 ATK / 95 DEF / 100 SPA / 100 SPD / 80 SPE
Ability: Inner Focus
Notable Moves:
Hyper Beam (Starting)
Heal Bell (Starting)
Dragon Dance (Starting)
Earthquake (Starting)
Thunder Wave (Starting)
Agility (Starting)
Wing Attack (Starting)
Focus Punch (TM01)
Hidden Power (TM10)
Protect (TM17)
Iron Tail (TM23)
Brick Break (TM31)
Substitute (Tutor)
Body Slam (Tutor)
Double-Edge (Tutor)
% of Game Remaining After Being Obtained: 0.00%
% of Game Remaining After Being Evolved: 0.00%
Offensive Efficiency: 0.4860
Potential in an All Shadow Pokémon Playthrough: None
Potential in the Orre Colosseum: High
Set for Orre Colosseum
Held Item: Leftovers / Shell Bell
EVs: 4 HP / 252 Atk / 252 Spe
Nature: Adamant
Move 1: Dragon Dance
Move 2: Hidden Power / Aerial Ace
Move 3: Earthquake
Move 4: Double-Edge
Dragonite has a mighty Attack stat coupled with solid bulk, hard-to-hit defensive typing, and access to Earthquake to supplement its Flying-type STAB and Double-Edge. Dragonite's mediocre Speed can fortunately be remedied by Dragon Dance, which typically ensures it can attack first with its powerful boosted attacks. Unfortunately, Dragonite is in steep competition with Salamence, as they function very similarly, except that Salamence has more immediate Speed as well as a better ability in Intimidate. Nevertheless, Dragonite remains a noteworthy Pokémon to utilize in the Orre Colosseum, and it is especially lethal against the Colosseum's more passive trainers.
Meganium
Obtained as: Chikorita at LV. 5
Location: Mt. Battle
Evolution Requirements: LV. 32
Stats: 80 HP / 82 ATK / 100 DEF / 83 SPA / 100 SPD / 80 SPE
Ability: Overgrow
Notable Moves:
Ancientpower (Starting)
Frenzy Plant (Starting)
Reflect (Starting)
Synthesis (LV. 23)
Body Slam (LV. 31)
Light Screen (LV. 41)
Hidden Power (TM10)
Sunny Day (TM11)
Protect (TM17)
Giga Drain (TM19)
Solarbeam (TM22)
Earthquake (TM26)
Substitute (Tutor)
% of Game Remaining After Being Obtained: 0.00%
% of Game Remaining After Being Evolved: 0.00%
Offensive Efficiency: 0.4150
Potential in an All Shadow Pokémon Playthrough: None
Potential in the Orre Colosseum: Moderate
Meganium is a reward for clearing Mt. Battle with the same team, likely requiring Pokémon of levels in excess of 65, thus making it effectively impossible to utilize on a playthrough. For the Orre Colosseum, Meganium is slow and lacks redeeming qualities to justify its Speed problems, making it a mediocre choice.
Typhlosion
Obtained as: Cyndaquil at LV. 5
Location: Mt. Battle
Evolution Requirements: LV. 36
Stats: 78 HP / 84 ATK / 78 DEF / 109 SPA / 95 SPD / 100 SPE
Ability: Blaze
Notable Moves:
Reversal (Starting)
Blast Burn (Starting)
Hidden Power (TM10)
Sunny Day (TM11)
Protect (TM17)
Flamethrower (TM35)
Fire Blast (TM38)
Overheat (TM50)
Substitute (Tutor)
% of Game Remaining After Being Obtained: 0.00%
% of Game Remaining After Being Evolved: 0.00%
Offensive Efficiency: 0.5673
Potential in an All Shadow Pokémon Playthrough: None
Potential in the Orre Colosseum: High
Set for Orre Colosseum
Held Item: White Herb
EVs: 4 HP / 252 SpA / 252 Spe
Nature: Timid
Move 1: Protect
Move 2: Hidden Power / Sunny Day
Move 3: Flamethrower
Move 4: Overheat
Typhlosion is a reward for clearing Mt. Battle with the same team, likely requiring Pokémon of levels in excess of 65, thus making it effectively impossible to utilize on a playthrough. In the Orre Colosseum, it has just enough Speed and Special Attack to justify use as an Overheat user, with the unique attribute of Blaze to bring its Fire-type attacks to nuclear levels when supported by sun. Much like other Overheat users, Typhlosion is somewhat shallow and needs support to function well, especially from fast attackers capable of dealing with bulky Water-types. Although a viable Pokémon in the Colosseum, due to the difficulty in obtaining Typhlosion and it being effectively impossible to reset for, it is often impractical to utilize Typhlosion.
Feraligatr
Obtained as: Totodile at LV. 5
Location: Mt. Battle
Evolution Requirements: LV. 30
Stats: 85 HP / 105 ATK / 100 DEF / 79 SPA / 83 SPD / 78 SPE
Ability: Torrent
Notable Moves:
Crunch (Starting)
Hydro Cannon (Starting)
Hydro Pump (LV. 52)
Focus Punch (TM01)
Hidden Power (TM10)
Ice Beam (TM13)
Blizzard (TM14)
Protect (TM17)
Rain Dance (TM18)
Iron Tail (TM23)
Brick Break (TM31)
Icy Wind (Tutor)
Body Slam (Tutor)
Double-Edge (Tutor)
% of Game Remaining After Being Obtained: 0.00%
% of Game Remaining After Being Evolved: 0.00%
Offensive Efficiency: 0.4865
Potential in an All Shadow Pokémon Playthrough: None
Potential in the Orre Colosseum: High
Set for Orre Colosseum
Held Item: Mystic Water
EVs: 4 ATK / 252 SpA / 252 Spe
Nature: Modest / Lonely
Move 1: Protect / Rain Dance
Move 2: Icy Wind / Brick Break / Crunch
Move 3: Ice Beam
Move 4: Hydro Pump
Feraligatr is a reward for clearing Mt. Battle with the same team, likely requiring Pokémon of levels in excess of 65, thus making it effectively impossible to utilize on a playthrough. In the Orre Colosseum, Feraligatr is a decent mixed attacker with solid bulk and unfortunate Speed. Its variety of coverage options usually allows it to hit most targets for respectable damage, though its low Speed makes it struggle against many matchups, which leaves it highly team dependent for functionality. Feraligatr therefore functions more like a cleanup for a team, and one that is more dependent on type matchups to secure wins.
Lovrina is the first Cipher Admin encountered, but she is typically only challenging for first-time players or those building teams around some of the weaker early-game Pokémon. Electric- and Fire-types such as Flareon, Jolteon, Houndour, Mareep, and Numel can outspeed and/or OHKO her first three Pokémon without much trouble. Delcatty's Shadow Rush is fairly strong, capable of 2HKOing or 3HKOing most of the player's Pokémon, so sleep- or paralysis-inducing moves such as Spheal's Body Slam, Mareep's Thunder Wave, Gulpin's Sing, or Shroomish's Stun Spore are especially helpful at ensuring a quick snag.
Exol is a deceptively challenging opponent who uses fairly fast and strong Pokémon that can also be difficult to KO with a single attack. Although slow, Mawile's Shadow Rush is fairly strong, allowing it to pick away remaining Pokémon when trying to snag it. Strong and fast Pokémon of your own are a simple and effective way to overcome this battle, especially Pokémon such as Jolteon, Espeon, Ursaring, Houndoom, and Breloom. Bulky strong attackers can work as well, but they are hard to come by this early in the game. A team structure of at least three solid Pokémon, especially ones with resistances to Psychic-, or Electric-type attacks, will prove more than adequate.
Snattle leads with two bulky Water-types that are difficult to KO without a Grass-type such as Shiftry, Breloom, or Jumpluff or very strong neutral attacker such as Espeon, Ursaring, or Gardevoir. If using a Grass-type, prioritize Quagsire due to its use of Ice Punch. Ground-types such as Camerupt and a Quagsire of your own are fairly effective too, and the only one of Snattle's Pokémon that isn't hit hard by Magnitude is one that you don't want to hit anyway. Camerupt is, however, highly threatened by Lanturn and Quagsire, so be sure to have a Speed stat of at least 48 to avoid being hit by a Water-type attack. Sleep-inducing moves are the only way to incapacitate Lunatone before it's able to use Shadow Sky, which is further exploited by Castform to make its Weather Ball a super effective attack against all non-Shadow Pokémon targets. Metang is high leveled and can be difficult to hit, but its Confusion and Thunderpunch aren't especially strong, and it gives a Fire-type in the back of your party a moment to shine.
Many of Gonzap's Pokémon utilize Hyper Beam, but this isn't especially threatening, since none of them have it as a STAB move or are particularly strong physical attackers. Several of his Pokémon have a defensive typing that makes them difficult to hit hard, making the best weapon against him dual-type attackers such as Houndoom, Shiftry, Camerupt, and Breloom. A mere combination of two specific attacking types works too, such as a Fighting-type to hit Nuzleaf paired with a Psychic-type to hit Vileplume or a Grass-type for Whiscash alongside a Fire-type for Skarmory. Note that, while the lead combination of Electrode and Nuzleaf could be dangerous due to the combo of Fake Out and Selfdestruct, Gonzap's Electrode does not know this move.
Gorigan is fond of using Earthquake in combination with Protect to deal major damage, but since his Pokémon aren't Ground-types, the greatest threat is often that it hits his own Shadow Pokémon. His first four Pokémon can be KOed quite easily if attacks are focused on the slow Earthquake user, which can be KOed before it has a chance to attack. Typically Gorigan Protects with Lairon first, and the only other Pokémon that knows Protect is Ursaring, which often makes his pattern easy to deduce. Be sure to KO any Earthquake users before the Shadow Pokémon hit the field, and note that Primeape and Hypno are immune to sleep-inducing moves. Strong Fighting- and Electric-type Pokémon, despite the use of Earthquake, are highly effective in this battle, especially ones with access to paralysis-inducing moves for Gorigan's Shadow Pokémon such as Breloom, Jolteon, Ampharos, and Electabuzz. Additionally, Pokémon with a resistance or immunity to Ground are generally helpful if they are capable of hitting Gorigan's Pokémon for good damage or inflicting status and are able to KO Sealeo before being hit by Aurora Beam.
Ardos is one of the most difficult trainers to defeat due to his half-normal half-Shadow Pokémon team of diverse fast and powerful attackers. Swellow and Electabuzz utilize a very unique move called Shadow Half, which deals damage equal to 50% of a Pokémon's remaining HP and hits all four Pokémon on the field. The greatest threat is posed when damaging Swellow or Electabuzz into snagging range, as a Pokémon slower than these two fast Pokémon can unintentionally KO them if Shadow Half was used. Snorlax also uses a move called Shadow End, which deals very high damage and causes recoil of 50% of the Pokémon's remaining HP. Alakazam runs Psychic with elemental punches, which combined with its high Special Attack and Speed makes it a threat to virtually any Pokémon. Kingdra is difficult to KO in a single move due to its defensive typing and the general lack of powerful Dragon-type attacks and utilizes a fairly strong Hydro Pump and Ice Beam. Heracross, despite not being especially fast or difficult to KO in a single move, does have very powerful attacks including Megahorn and Brick Break. Perhaps the most effective strategy against Ardos is to focus on KOing his non-Shadow Pokémon first while using paralysis or sleep on his Shadow Pokémon and allowing them to damage themselves into snagging range. Pokémon that are both strong attackers and status users such as Jolteon, Ampharos, Gardevoir, Electabuzz, and Kangaskhan are highly effective, as are those that can weather his Pokémon's attacks and hit back with status such as Quagsire and Hypno.
With an arsenal of four powerful Shadow Pokémon, Eldes can be an even greater challenge than Ardos. Manectric and Marowak utilize Shadow End, often requiring fast Pokémon to safely damage them closer to snagging range. Salamence is fast, powerful, and difficult to snag, further justifying the use of Pokémon that can paralyze or put it to sleep. One of the safest strategies is to utilize Pokémon that easily tank Ninjask's relatively weak Aerial Ace and Silver Wind, so that only one Shadow Pokémon is on the field at a time. Bulky Pokémon that tank Eldes's Pokémon's attacks well and also have status are highly effective, specifically Walrein, Ampharos, Flygon, Quagsire, Altaria, Kangaskhan, and Snorlax. A Pokémon with False Swipe can be extra helpful in capturing Salamence and Lapras, such as Breloom, Fearow, Zangoose, or Parasect, and even a Shadow Pokémon of your own can be good for weathering Lapras's Shadow Storms at the end of the battle.
Greevil is the only Trainer in the game with a team of effectively seven Pokémon, all of which are Shadow and each have four shadow moves. Although this makes snagging all of them difficult and places a large emphasis on the use of status, his all-Shadow Pokémon team can be walled with bulky Shadow Pokémon of your own. Pokémon such as Shadow Snorlax and Shadow Salamence, as well as Shadow Lugia if you begin the battle with five Pokémon, are nearly impossible for Greevil to KO and can be uses as damage sponges or medics for your team as you snag his remaining six. Fast or bulky status users are helpful as well, especially for the difficult to snag birds, as are users of False Swipe. Rhydon and Exeggutor both make use of Shadow End, and Rhydon may have the ability Lightningrod, which will prevent use of Thunder Wave until it is snagged.
In classic Miror B. style, his team features a squadron of Ludicolo. Naturally Pokémon with strong Flying-, Poison-, or Bug-type STAB attacks such as Swallot, Crobat, Fearow, Dodrio, Swellow, and Salamence prove effective, but since these aren't typically intuitive or first picks for teams in Pokémon XD, strong attackers that can weather Ludicolo attacks such as Jolteon, Espeon, Ampharos, Breloom, Hariyama, and Gardevoir work great as well. His Ludicolo quickly set rain before blasting the player's Pokémon with Waterfalls, Hydro Pumps, and Giga Drains. His fourth Ludicolo does, however, run the elemental punches, so be wary if using a Pokémon with a major weakness to Ice- or Electric-type attacks. Shadow Dragonite is fairly difficult to catch, so use of status and False Swipe is recommended.
Teambuilding for Orre Colosseum
(The intro screen for the first battle of many in Pokémon's most legendary Colosseum)
The Orre Colosseum is Pokémon's most difficult in-game battling challenge, featuring seven rounds of four trainers. Each trainer in the Orre Colosseum has some of the game's most powerful Pokémon, equipped with a wide variety of moves and items along with perfect EVs and nearly perfect IVs. The Colosseum is first available shortly after the completion of the main story, after defeating Eagun but prior to defeating Miror B. and snagging Shadow Dragonite. A team of up to six Pokémon may enter, which is locked for the entire round of four battles. At the start of each battle, you must select four of your six Pokémon to participate against the AI's selected four of six Pokémon. If any battle is lost, the entire round must be completed from the beginning. The AI's Pokémon are at LV. 60 or at a level equal to your team's highest-level Pokémon. Because it is unlikely for any Pokémon to exceed LV. 60 through the natural course of the game to this point, it is recommended to make challenges with all Pokémon leveled off at LV. 60. Several Pokémon are prohibited from being used in the Colosseum: Mew, Mewtwo, Ho-Oh, Lugia, Celebi, Groudon, Kyogre, Rayquaza, Jirachi, and Deoxys. Item clause is also in effect, meaning no Pokémon in your party may hold a duplicate of a held item already in your party. Use of healing items is disallowed, and you cannot call your Pokémon. Clearing a round of the Orre Colosseum grants the player a TM, a new Trainer title, and a quantity of PokéCoupons that is vastly disproportionate to the difficulty to clear the round. The completion of the first round of the Orre Colosseum also begins the Pokémon Voice sidequest, which ends with obtaining a Lucky Egg.
Overall, the following teambuilding principles and strategies are important in the Orre Colosseum:
Speed
Speed is by far the most important stat in the Orre Colosseum, and often the first indicator of the viability of a Pokémon. Although the AI utilizes Pokémon with a wide range of base Speed stats, due to their perfect EVs and nearly perfect IVs, a Pokémon of theirs with a comparable Pokémon to a base Speed of yours will almost always move first. This is a major problem because a majority of the Pokémon used by the AI are fairly powerful and have a diverse enough movepool to always have some way of smacking at least one of your Pokémon for a fair amount of damage. The issue is further compounded by the fast-paced nature of double battles and the fact that a new Pokémon must be sent in immediately once another Pokémon faints, thereby increasing the benefits of getting quick KOs. Unless your Pokémon has been reset for a very strong Speed IV and has been explicitly EV trained in Speed, it is not uncommon for a Pokémon even with a base Speed advantage of up to 35 points to move after the opponent's Pokémon. Typically, your Pokémon with a base Speed of 100 or more will be noteworthy in this category, and your Pokémon with a base Speed of 120 or more can typically be expected to move first, especially if they have a strong Speed IV and have been EVed in Speed.
(Fast Pokémon are often essential to KO the opponent's Pokémon before they KO yours)
Bulk
Unfortunately many Pokémon with noteworthy traits have a base Speed lower than 100, which is where bulk becomes extremely important. For slower Pokémon to have a good chance at making headway against fast opponents, it needs to have the bulk to weather at least two attacks from the AI's Pokémon. This typically requires some combination of high mixed bulk or very high bulk on one side of the split that is complemented by its defensive typing. The only slow Pokémon that will be viable in the Orre Colosseum are those that have sufficient bulk to weather AI attacks, and this is fairly well reflected among those Pokémon considered to have "High" or "Very High" potential in the Colosseum. However, bulk means very little if the Pokémon does not have lethal ways of hitting back or specific ways of supporting a teammate in a key way, several of which are highlighted below.
(A few select Pokémon such as Snorlax have the bulk to win matchups regardless of their low Speed)
Offensive Typing
Hitting the opposing Pokémon for very high damage in a short amount of time is often a requirement in the Orre Colosseum, which places a great amount of importance on offensive typing. Ice, Electric, Fighting, Ground, Fire, Psychic, and Water are some of the more important offensive typings to exploit in the Colosseum. Ice and Electric have a lot of inherent strength from how the type chart is laid out, synergize well with both each other and on most offensive special attackers, and even have strong, fairly distributed moves in Ice Beam and Thunderbolt. Fighting and Ground also have a strong number of trumps on the type chart and match up well against many of the AI's Pokémon; however, they do struggle with defensive typing immunities, and their higher-Base Power moves in Reversal, Focus Punch, and Earthquake require some forethought to use effectively. Fire hits a fair variety of targets in Grass and Steel-types, can be boosted by sun, and has major advantage in move accessibility between Flamethrower, Fire Blast, Heat Wave, and Overheat. Psychic doesn't hit much for super effective damage, but it does hit most targets neutrally and has fairly high move Base Power, making it a solid STAB attack that can be complemented by special coverage. Water isn't great on its own, but it does hit Fire-types without having to rely on Earthquake and is most notable for being especially lethal in rain due to hitting most targets for neutral damage, being exploitable by a high-Base Power move in Hydro Pump, and often being compatible with Ice-type attacks.
(This obvious offensive type advantage is the difference between two free KOs and a nasty battle against hard to hit Pokémon)
Defensive Typing
The AI's teams often have many ways of utilizing differently typed attacks, each with distinct Base Powers, making defensive typing an important factor in determining your Pokémon's viability in the Colosseum. Some Pokémon such as Quagsire have defensive typings that leave them only weak to a fairly uncommon attacking move type, in this case Grass, which is further exploited by a general lack of and/or distribution of strong Grass-type moves within the Colosseum. In this example, Giga Drain is largely the only relevant readily usable Grass-type attack to threaten a Pokémon with Water and Ground typing, and the few other notable Grass-type moves such as Solarbeam require sun support, or, in the case of attacks like Leaf Blade and Needle Arm, are only learned by a single Pokémon within the Colosseum. In contrast, a Pokémon like Salamence exploits defensive typing by requiring the AI to rely upon an Ice-type move to substantially threaten it, since it boasts numerous other resistances, and its other two type weaknesses in Dragon and Rock are mitigated by lack of move distribution and Intimidate. This effectively guarantees a Pokémon such as Salamence will net progression against the AI so long as they have no Ice-type attacks available. Even Electric-types, with their single weakness to Ground, are effectively impossible to OHKO unless an AI Pokémon with Earthquake, Explosion, or Choice Band-boosted attacks is on the field.
(A Pokémon such as Salamence may take the AI several turns to KO if they lack a Pokémon with Ice Beam)
Ground-immune Pokémon
Ground is one of the most lethal and offensively important types in the game. This is further compounded by its only effective use being through the move Earthquake, which has 100 Base Power and hits all Pokémon except the user. Ground-immune teammates are key not only for limiting the effectiveness of the AI's Earthquakes but also to offer immunity and additional strategical options when utilizing the move yourself. Several of the most viable Pokémon to use in the Orre Colosseum are ones that both are immune to Ground and learn Earthquake, or ones that have a Ground immunity and offensively coordinate well with an Earthquake user. For all these reasons, most teams should have at least one Ground-immune depending on the round, and in some cases or rounds you should use multiple.
(Ground-immune allies allow free use of Earthquake by a teammate while also defending against the AI)
Explosion / Selfdestruct Answers
Explosion and Selfdestruct are by far the most powerful moves in the game, capable of OHKOing Pokémon that do not resist them, and in some cases even OHKOing ones that do. Like with Earthquake, the move's lethality is compounded by the fact that the move hits all Pokémon other than user, which in this case it KOes. Ghost-types are immune to Explosion and Selfdestruct, which not only limits the impact the AI's Pokémon can have when using it but also allows a safer use of the move by your own Pokémon. Dusclops is especially notable in this case, as it is the only Pokémon that can safely use Helping Hand to boost an ally Explosion user. Rock- and Steel-types can also be very useful, as they tend to have high Defense stats, and their resistance makes it possible to weather even strong booms in some instances. Offensive use of the moves is highly effective against AI teams that lack resistances to Explosion or Selfdestruct because they almost always allow the user to trade one Pokémon for two against the AI.
(With support from Dusclops, Electrode gets a two-for-one trade on the first turn of the battle)
Protect / Detect / Endure
Protect is a ubiquitous and virtually essential move for double battles. It allows Pokémon to shield themselves from ally and opposing attacks alike, especially against the aforementioned Earthquake and Explosion, to effectively provide immunities to any Pokémon with the move for a single turn at the cost of their turn. Protect has many other uses as well, from protecting a slower Pokémon from a faster AI Pokémon for one turn, to stalling for residual damage or your own residual recovery, to scouting Choice Band users. Although not essential for all Pokémon, Protect has enough inherent strategic merit that it finds itself on most Pokémon's movesets. Endure serves a similar purpose, but it can also be used to maximize damage for Reversal / Flail or to activate Berries.
(In dangerous situations such as these, Protect and Endure are essential for maintaining an advantage)
Intimidate
Intimidate is a highly unique and potent ability in double battles that lowers both of the AI's Pokémon Attack stats by one stage. This effectively reduces the power of opposing physical attackers by 33% when using a Pokémon with Intimidate at no cost to the player. The effect can also be stacked by using two Intimidate users,or even by switching one in and out repeatedly. This has a major impact on AI teams that rely on physical attackers, and it even helps reduce the impact of the aforementioned Earthquake and Explosion. Several good Pokémon available in Pokémon XD also have access to Intimidate, such as Arcanine, Salamence, and Tauros, and should seriously be considered when entering rounds with heavy use of physical attackers by the AI trainers.
(Physical attackers that may OHKO or 2HKO your Pokémon are far less threatening after a 50% attack cut)
Misdirection / AI Exploitation
There are many additional strategies or overlap uses of the previously discussed strategies that can be used to misdirect or exploit the AI in the Orre Colosseum for major advantage. Pokémon which have access to Substitute can wreck AI teams that focus on status conditions such as those in the first round. Pokémon with setup moves such as Calm Mind, Dragon Dance, and Swords Dance can demolish several of the more passive AI teams. Pokémon that utilize Helping Hand or the ability Lightningrod can render an ally Pokémon effectively indestructible. A Pokémon with a highly exploitable weakness can be used a bait a particular AI Pokémon into performing a specific attack, which can be punished fairly consistently by an appropriate switch or ally attack. The AI can be baited into Earthquaking its own Pokémon or even Exploding one for no damage. Intimidate can be used repeatedly to exploit the AI's hesitance to switch out. All of these strategies along with several more illustrate that many of the tactics a human opponent would pick up on can be used to exploit the AI with a fair amount of consistency.
(The A Team, composed of only Pokémon XD resources, vs. Cipher Admin Snattle in the Final of Orre Colosseum)
Piecing together a winning combination of the above strategies is key to overcoming the challenges of the Colosseum, which is especially difficult when only focusing on the Pokémon, held items, and moves available in Pokémon XD itself. The actual Pokémon available is a major factor and already discussed at length with the Orre potential ratings and suggested movesets for the Colosseum. Held items are somewhat restricted as well, both by the Item Clause in the Colosseum as well as the total availabilities within the game. Each of the 1.1x type-boosting held items are held by Shadow Pokémon throughout the main story, Leftovers can be found on the S.S. Libra and is held by Shadow Snorlax, stat-boosting Berries are available for extreme prices at Mt. Battle or from certain Battle CDs, along with the Choice Band and several other miscellaneous luck-based held items like Brightpowder and Scope Lens.
Movesets can be extremely limited within the game due to a number of factors. First, the level rules at the Colosseum make it costly to access moves learned beyond LV. 60 on any Pokémon's moveset, requiring extensive grinding to cap the rest of the team to that same level. Second, several TMs are unavailable, effectively unavailable (due to being won from the Colosseum itself), or only available in a single copy, and this is broken down in the next section. This can make it more difficult to coordinate movesets between teams as some TMs in limited quantity such as Earthquake are extremely valuable and want to be on multiple Pokémon movesets. Third, breeding is not possible in Pokémon XD, which makes Egg moves that are not learned at purification completely unavailable, often leaving Pokémon with more shallow movesets than they are truly capable of. Fourth, several tutors that round out a Pokémon's Generation 3 learnset are in other games such as Pokémon Emerald and are therefore completely unavailable. It is important to remember when teambuilding that a Pokémon's learnset in Pokémon XD is less than its total Generation 3 learnset, which is where the previous "Notable Moves" section for each Pokémon becomes a very useful tool.
Another small, albeit important limitation to consider in teambuillding for the Orre Colosseum are EVs and the capacity to reset for IVs. There are two Pokémon that are impossible to preserve EV freedom on: Eevee and Teddiursa. These are the two first Pokémon obtained in the story mode and must be used in battle before obtaining another Pokémon to swap one out to prevent any additional unwanted EVs. Another is that Greevil's Pokémon, excluding Lugia, cannot be reset for IVs because the game forces a save before their stats can be viewed. This makes it impossible to reset for a Zapdos or Tauros with excellent IVs, which are unfortunately some of the best Pokémon to use in the Orre Colosseum. Greevil's Pokémon can, however, be reset for Speed, as they can be tested against the in-battle Speed of your own Pokémon; however, this is further complicated by the logistics of preparing a Pokémon with the exact Speed benchmarks for these Pokémon as well as the effect of Shadow Boost, which alters the opposing Pokémon's real Speed stat, but it is still possible.
There are generally two overall approaches to preparing a team for the Orre Colosseum. The first is to simply use the same team for the Colosseum that was used for the main story, making some simple planning considerations for the Colosseum accordingly, such as using only Orre-viable Pokémon and setting up Pokémon with Orre movesets. After the main story is competed and the Colosseum unlocked, it is a simple matter of leveling off the team at LV. 60. This is a very challenging approach when it comes to the Colosseum itself, because the Pokémon will have a mess of EVs, and you may only have six total Pokémon to challenge the entire Colosseum with. Another approach is to carefully set aside Pokémon that are intended to be used in the Orre Colosseum while clearing the story move with a throwaway team, or even one in which you can still utilize a couple mis-EVed Pokémon (mainly ones not very reliant on Speed). At the end of the game, Pokémon are then EV trained using repeatable challengable overworld trainers or at Mt. Battle, then leveled off at LV. 60 and given their movesets accordingly. This process is overall more time-intensive; however, it makes challenging the Colosseum itself much easier, since you have EVed Pokémon.
Overall, several of the Pokémon with Very High potential in the Orre Colosseum are difficult to not take advantage of in some way. Pokémon such as Snorlax, Starmie, and Salamence are so effective and carry or support so many of the previously discussed strategies that they should be among the first considerations on a team for the Orre Colosseum. Snorlax's high bulk, good movepool, and STAB Selfdestruct typically allow it to at least trade one for two against the AI team. Starmie is one of the very few fast and powerful attackers available, complemented by STAB Psychic and Waterfall and coverage with Ice Beam or Thunderbolt. Salamence combines Intimidate with a Ground immunity and good defensive typing and has the option of running a setup move in Dragon Dance, a Choice Band, or even going mixed, allowing a lot of flexibility in offensive needs. Zapdos and Tauros are also astounding Pokémon if they can be obtained with good offensive IVs; like Starmie, they have strong offensive stats, good movepools, and also a bonus in a Ground immunity and Intimidate, respectively.
Several other Pokémon like Kangaskhan, Dusclops, Togetic, and Electrode can be surprisingly effective due to their access to extremely rare and powerful support moves such as Helping Hand and Follow Me in conjunction with their other notable defensive traits, or simply due to their easy access to important moves such as Earthquake and Explosion. There are other Pokémon still that can excel given the proper specific support, such as Victreebel and Exeggutor on sun, Hitmonlee or Zangoose paired with Earthquake or Explosion, and Dugtrio in sand. Overheat users such as Houndoom, Arcanine, Moltres, and Typhlosion can run the move very effectively with a White Herb and synergize with a sun team or can be used to complement other fast attackers. Overall, there are about thirty Pokémon that really stand out with their performance in the Orre Colosseum, and these are visualized in the following teambuilding compendium.
(Cipher Admin Ardos defeated by Zapdos and Starmie, two of the best special attackers available in Pokémon XD)
TM List
TMs in Pokémon XD fall into one of three categories. TMs that are given as rewards for clearing a round of the Orre Colosseum are italicized, as they are rendered effectively unavailable:
Limited (only one per playthrough)
Unlimited (can be bought for an unlimited number of times)
Unavailable (absent from the game)
TM01: Focus Punch (Limited)
TM02: Dragon Claw (Limited)
TM03: Water Pulse (Limited)
TM04: Calm Mind (Limited)
TM05: Roar (Limited)
TM06: Toxic (Limited)
TM07: Hail (Unavailable)
TM08: Bulk Up (Limited)
TM09: Bullet Seed (Limited)
TM10: Hidden Power (Unlimited)
TM11: Sunny Day (Limited)
TM12: Taunt (Limited)
TM13: Ice Beam (Unlimited)
TM14: Blizzard (Unlimited)
TM15: Hyper Beam (Unlimited)
TM16: Light Screen (Unlimited)
TM17: Protect (Unlimited)
TM18: Rain Dance (Limited)
TM19: Giga Drain (Limited)
TM20: Safeguard (Unlimited)
TM21: Frustration (Unavailable)
TM22: Solarbeam (Limited)
TM23: Iron Tail (Limited)
TM24: Thunderbolt (Unlimited)
TM25: Thunder (Unlimited)
TM26: Earthquake (Limited)
TM27: Return (Limited)
TM28: Dig (Unavailable)
TM29: Psychic (Unlimited)
TM30: Shadow Ball (Unlimited)
TM31: Brick Break (Limited)
TM32: Double Team (Limited)
TM33: Reflect (Unlimited)
TM34: Shock Wave (Limited)
TM35: Flamethrower (Unlimited)
TM36: Sludge Bomb (Limited)
TM37: Sandstorm (Unavailable)
TM38: Fire Blast (Unlimited)
TM39: Rock Tomb (Limited)
TM40: Aerial Ace (Limited)
TM41: Torment (Limited)
TM42: Facade (Limited)
TM43: Secret Power (Unavailable)
TM44: Rest (Limited)
TM45: Attract (Limited)
TM46: Thief (Unavailable)
TM47: Steel Wing (Limited)
TM48: Skill Swap (Limited)
TM49: Snatch (Limited)
TM50: Overheat (Limited)
Held Item List
Because of Item Clause in the Orre Colosseum, it is effectively irrelevant if a held item is limited or unlimited.
Apicot Berry: 15,000 Poké Coupon (Mt. Battle)
Black Belt: Held by Shadow Hitmonlee (Citadark Isle)
Blackglasses: Held by Shadow Carvanha (Cipher Lab)
Brightpowder: 8,000 Poké Coupon (Mt. Battle)
Charcoal: Held by Shadow Numel (Cipher Lab)
Chesto Berry: Random Berry of the Day (Agate Village)
Choice Band: 8,000 Poké Coupon (Mt. Battle)
Dragon Fang: Held by Shadow Altaria (Citadark Isle)
Focus Band: Obtained in Overworld (Pyrite Town)
Ganlon Berry: 15,000 Poké Coupon (Mt. Battle)
Hard Stone: Held by Shadow Lunatone (Phenac City)
King's Rock: 8,000 Poké Coupon (Mt. Battle)
Leftovers: Obtained in Overworld (S.S. Libra) or held by Shadow Snorlax (Citadark Isle)
Lucky Punch: Held by Shadow Chansey (Citadark Isle)
Lum Berry: Random Berry of the Day (Agate Village) or Defeating Justy (Phenac City) or by Battle CD (Realgam Tower)
Magnet: Held by Shadow Voltorb (Rock Poké Spoot)
Mental Herb: Obtained in Overworld (Gateon Port) or by Battle CD (Realgam Tower) or 6,000 Poké Coupon (Mt. Battle)
Metal Coat: Held by Shadow Magneton (Cipher Key Lair)
Miracle Seed: Held by Shadow Tangela (Cipher Key Lair)
Mystic Water: Held by Shadow Seel (Phenac City)
Nevermeltice: Held by Shadow Swinub (Phenac City)
Petaya Berry: 15,000 Poké Coupon (Mt. Battle)
Poison Barb: Held by Shadow Beedrill (Cipher Key Lair)
Quick Claw: Obtained in Overworld (Gateon Port) or 8,000 Poké Coupon (Mt. Battle)
Salac Berry: 15,000 Poké Coupon (Mt. Battle)
Scope Lens: 8,000 Poké Coupon (Mt. Battlle)
Sharp Beak: Held by Shadow Spearow (Phenac City)
Shell Bell: 8,000 Poké Coupon (Mt. Battle)
Silk Scarf: Held by Shadow Zangoose (Cipher Key Lair)
Silver Powder: Held by Shadow Venomoth (Cipher Key Lair)
Sitrus Berry: Random Berry of the Day (Agate Village)
Soft Sand: Held by Shadow Dugtrio (Citadark Isle)
Spell Tag: Held by Shadow Banette (Citadark Isle)
Stick: Held by Shadow Farfetch'd (Citadark Isle)
Thick Club: Held by Shadow Marowak (Citadark Isle)
Twistedspoon: Held by Shadow Ralts (Pyrite Town)
White Herb: Obtained in Overworld (Gateon Port or Citadark Isle) or by Battle CD (Realgam Tower) or 6,000 Poké Coupon (Mt. Battle)
EV Training Spots
Macho Brace: obtained after clearing Area 1 of Mt. Battle
Exp Share: obtained from Mayor Trest once Phenac City is freed
HP
Mt. Battle Zones 81 to 85
Cooltrainer Cida
Attack
Mt. Battle Zones 76 to 80
Defense
Mt. Battle Zones 86 to 90
Special Attack
Mt. Battle Zones 66 to 70
Rider Dert
Special Defense
Mt. Battle Zones 71 to 75
Rider Hebon
Speed
Mt. Battle Zones 61 to 65
Rider Willie
Notes and Additional Teambuilding Resources
Calculation of the percentage of the game remaining
This guide uses the approximate number of Pokémon remaining (to be battled) up until Shadow Dragonite is captured. This number includes all mandatory trainers and optional trainers such as those in Pyrite Colosseum, Realgam Colosseum, and Mt. Battle Zones 1 to 6, as well as when overworld Trainers can be challenged again when they have new Pokémon or levels. A breakdown of the Colosseum and Mt. Battle placements are outlined below:
Mt. Battle Zones 1 to 20: After Cipher Admin Lovrina
Pyrite Colosseum: After Cipher Cmdr. Exol
Mt. Battle Zones 21 to 40: After Snagem Head Gonzap
Realgam Tower: After Cipher Admin Snattle and Cipher Peon Kleef at Citadark Isle
Mt. Battle Zones 41 to 60: After Realgam Tower and Before Cipher Admin Ardos
Mt. Battle Zones 61 to 100 are not included because they feature Trainers with Pokémon leveled significantly higher than those of the final bosses, meaning they generally can't be challenged prior to completing the game without extensive grinding. In total, about 940 Pokémon are battled throughout the game in this way, with the average number of Pokémon per trainer increasing steadily toward the game's end.
Calculation of offensive efficiency
The metric of offensive efficiency seeks to create an objective numerical based standard to measure how effective a Pokémon is at speedily running through the game. The scale goes from 0.0000 as a minimum to 1.0000 as a maximum. To achieve a perfect 1.0000 a Pokémon would need:
Effective base 150 offense
Base 120 Speed
Base 100 HP, Defense, and Special Defense
A STAB move with 100 BP, 100% ACC, and zero collateral prior to Cipher Cmdr. Exol
To be obtainable and for its final evolution (if applicable) to be obtainable prior to the first battle
A 1.1x boosting held item available prior to the first battle
These ideal values are compared against a Pokémon's actual attributes. A breakdown of the weighting of the independent variables is:
35% effective base offense
20% base Speed
5% base HP
2.5% base Defense
2.5% base Special Defense
5% STAB move prior to Cipher Cmdr. Exol
7.5% STAB move prior to Cipher Admin Gorigan
7.5% STAB move prior to Cipher Admin Ardos
12.5% When the Pokémon is Obtained
2.5% When the Pokémon's best 1.1x boosting held item is obtained
Additionally, the entire stats terms are multiplied by the percentage of the game when its final evolution is obtained, nerfed by 30% of this value. 30% is selected because this is a reasonable approximation for how much of a Pokémon's stats are buffed upon a given evolution. The position throughout the game for evolution for Pokémon that evolve upon reaching a certain level is determined by the highest leveled Pokémon used by the opposing Trainer, subtracted by three. For example, Gardevoir evolves at LV. 30, meaning the first Trainer battled with Pokémon at levels 27 or higher is assumed as the approximate point Kirlia would evolve into Gardevoir; in this case, this would be Cipher Admin Snattle, who uses Pokémon up to level 28 and appears with 60% of the game remaining. The stats terms are also multiplied by 1.5x for Pokémon that get Exp boosts for having different trainer IDs, such as Tyranitar and Zaprong.
Effective base offense is simply the Pokémon's highest base attacking stat, with a potential increase if they can function as a viable mixed attacker. The calculation considers a Pokémon as a potential mixed attacker if their higher attacking stat divided by their lower attacking stat has a value less than 1.45. For Flareon, this would be 130 Attack / 95 Special Attack, which equals 1.37, a value lower than 1.45, meaning Flareon is considered a mixed attacker. The effective base offense is then calculated as the Pokémon's STAB base attacking stat + 10% of their other attacking stat. For Flareon this is equal to 95 + 0.1(130) = 108. For Pokémon that are not considered mixed attackers such as Jolteon, their effective base offense is simply their STAB base offense, or 110 in Jolteon's case.
The offensive efficiency value can also be normalized around 1 to serve as a direct comparative metric. For example, a Pokémon with a 1.000 would represent the average value of a Pokémon's offensive efficiency in Pokémon XD, therefore a Pokémon with a score of 1.500 would by itself be equivalent to 1.5 Pokémon.
As a result the top ten most offensively efficient Pokémon are:
Espeon
0.8610
1.4830
Electabuzz
0.8533
1.4698
Jolteon
0.8511
1.4660
Houndoom
0.7650
1.3176
Tyranitar
0.7636
1.3152
Flareon
0.7554
1.3010
Ursaring
0.7534
1.2977
Vaporeon
0.7449
1.2830
Electrode
0.7331
1.2628
Zangoose
0.7096
1.2222
Teambuilding Compendium
This section serves as a visual guide for structuring teams. It's useful to have all potential candidates for a particular role laid out so that things aren't overlooked and alternatives can be considered at a glance. Many of the roles featured here are key for snagging all Shadow Pokémon, or for challenging the Orre Colosseum. Pokémon in this section are ordered by when they are obtainable.
 Flareon
 Vaporeon
 Ariados
 Delcatty
 Medicham
 Ninetales
 Dewgong
 Beedrill
 Raticate
 Golduck
 Sableye
 Banette
 Magmar
 Magcargo
 Rapidash
 Hitmonchan
 Lickitung
 Lapras
 Meganium
 Luvdisc (LV. 20)
 Beautifly (LV. 19)
 Loudred (LV. 23)
 Girafarig (LV. 23)
 Raichu (LV. 23)
 Lanturn (LV. 26)
 Castform (LV. 27)
 Metang (LV. 28)
 Nuzleaf (LV. 32)
 Vileplume (LV. 30)
 Whiscash (LV. 31)
 Skarmory (LV. 32)
 Lairon (LV. 36)
 Sealeo (LV. 36)
 Slowking (LV. 36)
 Alakazam (LV. 44)
 Kingdra (LV. 44)
 Heracross (LV. 44)
 Ninjask (LV. 45)
 Lugia (LV. 50+)
 Ludicolo (LV. 57)